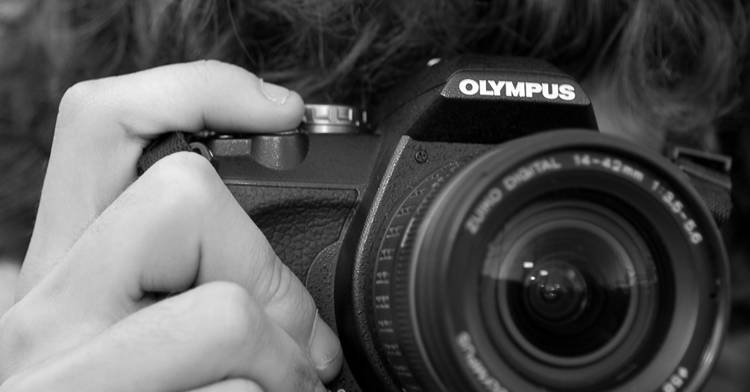
How to photograph textile art
- Category all stories
-
For many artists without a sound knowledge of techniques or access to professional equipment, finding a proper way to take photographs of their works can be tough. And textile art poses its own distinct challenges. Unlike with most paintings, there’s less of a tendency to fit within standard dimensions, and more experimental textile works can encompass a wide range of sizes and shapes. Quilts can also prove to be problematic if they are large, as the wide angle shot necessary requires space that might not be available to the average artist.
We will discuss photography techniques applicable to all art photography, then some methods that will specifically help those in the textile and fiber art fields. This article is merely intended as a starting point and I’d love you to share your tips and hints for photographing textile art in the comments section at the bottom of the page.
1, Make sure your photograph is level
Your body placement can mean the difference between the appearance of a professional photograph and an amateur look. In order to achieve a level photograph, you must situate yourself directly in front of the piece, at eye level. Your camera should be located at the direct centre of your piece, and as far away as needed in order to capture the entirety of the work. If your art is shot from below, the photograph will exhibit signs of “keystoning,” where the vertical lines move toward convergence at the top of the piece (like the introduction to Star Wars).
2. Without the sharpest focus possible, your photo will not turn out well
This absolutely cannot be understated. While some minor adjustments can be made with photo editing software, there is no way to fix the focus of a photograph without a disastrous, grainy look. In order to ensure that your focus is correct, zoom in as much as you can and view whether the image is still sharp. If not, fine tune it until it is. A tripod is very useful in this regard, and will also make sure that subtle arm movements will not nullify the focus. If you do not have a tripod, hold your elbows pressed against your body while you photograph to ensure as much stability as possible.
3. Flash is your enemy
A camera’s flash has some great uses, and photographing art is not among them. A flash will undoubtedly cause a sharp glare, and an uneven distribution of light across the piece. So how should you light your work?
You have a few options in order to get appropriate lighting. Natural light is the most desirable, though direct sunlight can wash out the colors of the piece, so it’s best to find what is known as skylight. Skylight refers to the indirect light produced by the sky itself, rather than the sun. If you opt to shoot indoors, always be sure to use side lighting, because any light behind you (especially from a single source) will cause a shadow to be cast upon your work.
Side lighting can be difficult without extensive (and expensive) equipment. Luckily, if you don’t have the money to buy commercial lightboxes and stands, quilter Holly Knott has wonderful instructions on how to build stands for a fraction of the price, using fluorescent bulbs. Check out her advice at HollyKnott.com.
4. Avoid the wide-angle setting on your camera
When you’re photographing art, moving your zoom all the way to wide-angle will cause what is known as “barrelling.” This will cause the sides of the image to bulge outward, rather than two vertical straight lines. To avoid this, make sure that you have zoomed in a bit on the image. If this is not possible due to distance constraints, you can fix this issue through the Lens Correction command in newer versions of Adobe Photoshop.
Here are some more tips for taking great photos of your artwork from Saatchi online:
Photographing Textiles
1. Find the best way to hang your work
A significant difference between photographing other media and textile art is how you hang your pieces for the shoot. If you are a quilter, you can either use a dedicated stand, such as a background stand, or a design board made of insulation material. Background stands are readily available online, and would be a good investment for those wishing to photograph textiles regularly. The benefit of using this over a design board is that your textiles will hang freely, ensuring that they are perfectly vertical. With design boards, you will need to rest them on another surface, posing the risk of keystoning due to the angle.
2. Adjust your white balance
Depending on the light source you have chosen, different white balance settings are necessary to ensure that a proper representation of your colors appear in your photographs. While most cameras have automatic sensors designed to best approximate the proper white balance, these are often wrong. Luckily many digital cameras have manual capabilities, either as settings (indoor, outdoor, etc.) or as a more in-depth manual process. The best thing to do is to take photos with a variety of white balance settings when you first use your setup, and use that as a guide down the road. Also, a camera’s LCD screens are notoriously inaccurate, so refrain from making decisions until you view the images on a properly calibrated computer screen.
3. Refrain from over-sharpening your images in Photoshop.
A significant issue with the photographs created by artists of their work is that they will use the sharpening tool on their photo editing software. Their reasoning centres around their desire to make sure that the textures of the pieces are appropriately represented. However, very rarely will this work. The issue is most likely due to improper focus, and there is not much that can be done outside of the camera to correct it. That’s why focus is so important to get right when taking the photo rather than adjusting later. If texture is important to the work, take a separate set of close-up shots in order to get these nuances.
More articles that might be of interest:
- Best cameras for photographing artwork
- Finding an audience for your textile art
- Sketchbooks and mind-mapping for textile artists
- Grants and funding for UK textile artists
- Displaying and hanging textile art
- Pinterest for textile artists: The basics
- Best sewing machines for embroidery
- Applying and submitting art to galleries
What are your top tips on how to photograph textile art? Share them with us below.


Great tips! Good, solid photography is essential for a successful online presence and it shocks me sometimes that visual artists don’t see how horrible their photos of their work sometimes are.
One of the props that I have found extremely useful is having a rigid insulation board which can serve as a movable wall. These are easily found at Hardware stores here in the US. The one I have is bright pink, 3 inches thick and about 6 feet high. I covered it with a painter’s drop cloth and pinned it down on the back. I like to photograph outside on overcast days so that there are no sharp shadows. I can take that board out with me and prop it against my house, pin textiles to it and shoot away. For larger quilts and textiles, you would need two of them. When not in use, they can be stored out of the way.
I would like to emphasize the tip about not using flash or the sharpening tools. Both can truly ruin an image. Using a flash flattens a photo and creates uneven shadowing. It’s also important to learn basic cropping and editing skills. I often have to brighten a photo, which will then make the colors too vibrant, so I tone them down again, using the saturation control tools. I use Photoshop Elements 9 and love it. It came with great tutorials and I try to work through them to learn new skills.
A great free site to add frames, special effects and to create collages: http://www.picmonkey.com/
Learning how to use a photo editor will also help open up new doors to plan textile works.
Thanks for posting such important info!
Detail shots can be handled slightly different with “presentation”–folds and draping can create more interest, without sacrificing quality of the shot, or being over dramatic or precious.
I agree with the author’s note to avoid sharpening the entire thing. However, for more clarity and contrast, it can help to sharpen the blacks only. It involves ensuring the image is CMYK, then selecting only the Black channel. Use Unsharp mask and only sharpen a very little bit. It makes a huge difference between a clear image and a blah image.
I come across with focusing problem while shooting a fabric of size say about 4’x4′. if I focus on spot the other spots are unsharp. In other words if I focus in the center, the area away from the center is unsharp. Please guide me to overcome this problem. Please note that I hve taken care of all other things such as lighting camera possition, angle etc. in this shoot. Thank you.