Lisa Solomon is a mixed media artist that moonlights as an art professor, workshop facilitator, and freelance illustrator/graphic designer.
She is best known for her work that questions and deconstructs the meaning of identity through the exploration of mediums traditionally associated with domestic crafts. She received her BA from UC Berkeley and her MFA from Mills College.
As a “hapa” (1/2 Japanese, 1/2 Caucasian), Lisa is profoundly interested in the idea of hybridization. She is drawn to found objects and symbolic imagery altering them conceptually so that their meanings and original uses or intents are re-purposed or highlighted. She uses embroidery and crochet in her work frequently.
Lisa has shown both nationally throughout the US and internationally. Recently she’s had stints as an Artist in Residence at The Palo Alto Art Center, Irving Street Projects in San Francisco, Kala Art Institute in Berkeley, the Oakland Museum, and the Ulrich Museum in Wichita, KS. She’s also exhibited at the San Jose Museum of Art, Nicoletta Rusconi Gallery in Milan, Italy, the Koumi Machi Museum in the Nagano prefecture of Japan, Garson Baker Gallery in NY, and Gallery CA in Baltimore.
She is represented by the Walter Maciel Gallery in Los Angeles, CA. She is also the author of Knot Thread Stitch – Exploring Creativity Through Embroidery and Mixed Media (Quarry 2012), and illustrator of 20 Ways to Draw a Chair (Quarry 2015) and Draw 500 Everyday things (Quarry 2016). In 2013 MIEL press published a monograph of her work: Hand/Made.
Lisa currently lives and works in Oakland, California with her husband, young daughter, a pit bull, a dachshund mutt two 3-legged cats and many, many spools of thread.
In this article, which is part of our From conception to creation series, you’ll share in the process Lisa used to create her 2016 piece Senninbari. From choosing the perfect rope and dye colour to shaping, forming and ultimately installing, Lisa gives a detailed account of the creation and life of this incredible piece of textile art.
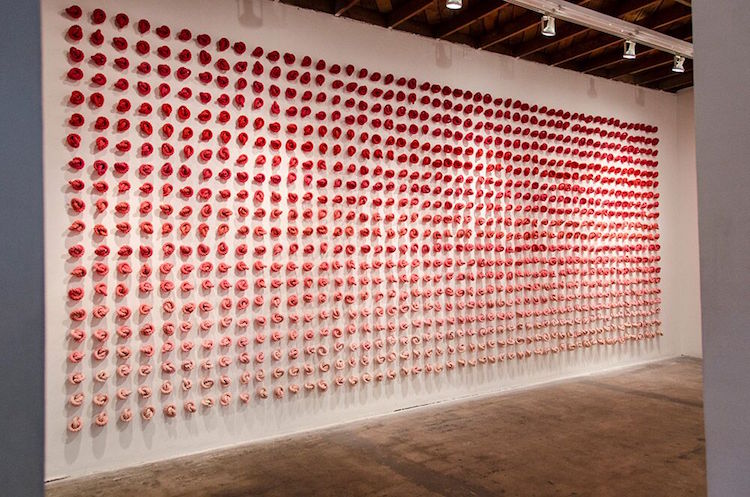
Name of piece: Senninbari
Year of piece: 2016
Size of piece: Approx. 12 h x 24 w feet or 3.6 h x 7.31 w meters, depending on where I’m installing it.
Materials used: Cotton rope and hardware
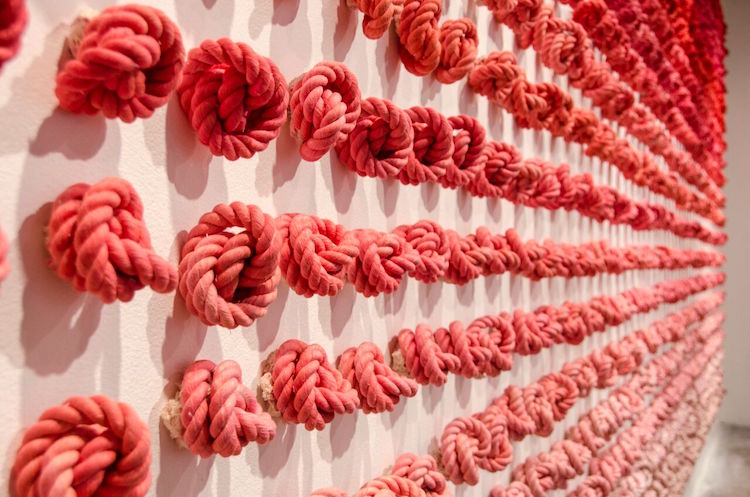
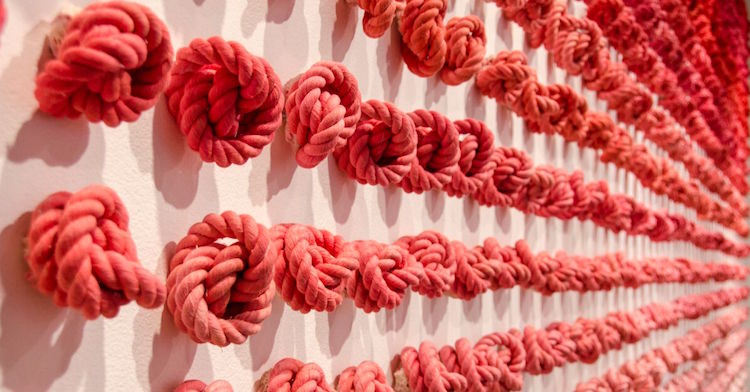
Methods used: I hand dyed the rope to create an ombre effect and hand tied every single knot.
A family connection
TextileArtist.org: How did the idea for the piece come about? What was your inspiration?
Lisa Solomon: Senninbari is a 1000 French knot stitched belt that Japanese women made for their husbands and brothers going off to fight in World War II. The last 3 solo exhibitions I’ve worked on have been based on the number 1000 in Japanese culture. Originally I was really inspired by Sanjusangendo, the 1000 Buddha Temple in Kyoto.
As I researched further there were so many interesting items to explore, senbazuru/cranes, Senju Kannon, the 1000 armed Buddha, Torii Gates, hyotan, etc. I also utilise my own lexicon creating several works that contained 1000 doilies.
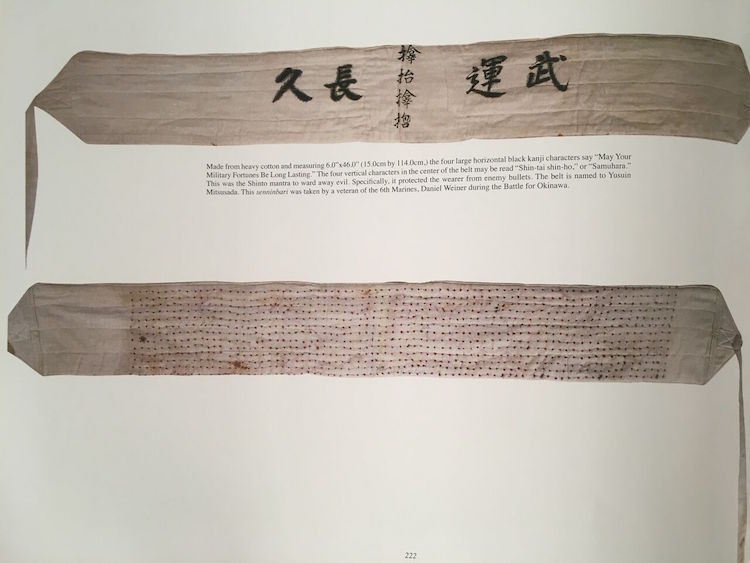
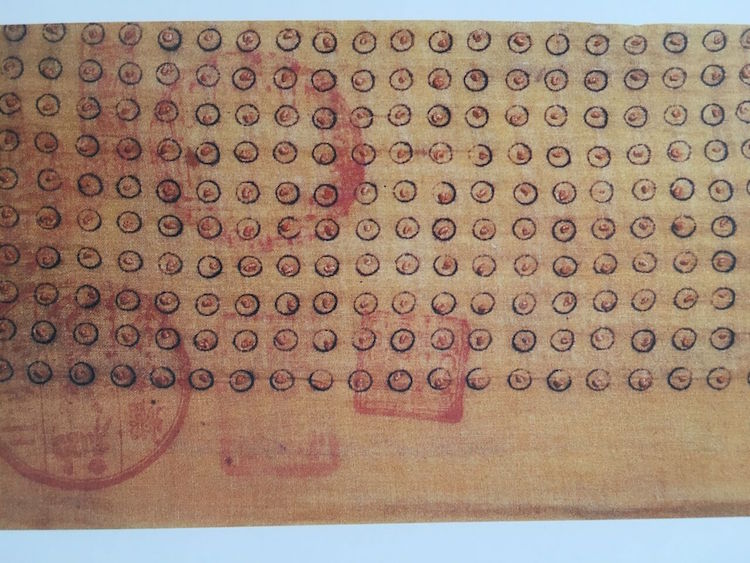
In previous bodies of work I had researched WWII planes and tanks and Fu-go Japanese balloon bombs. My grandfather was in the navy in WWII and I became fascinated with creating beautiful and “harmless” war machines.
When I discovered Senninbari, something that not only was made for WWII, but also utilised the lucky number 1000 AND had embroidery, I was astonished and giddy. They were not only beautiful hand crafted objects, but had a compelling story as well. I knew I wanted to make my own version, a larger than life one.
Collective luck
What research did you do before you started to make?
The Japanese believe that the gut or Hara is significant. The character for Hara can also mean courage. The traditional armour that Samurai wore was meant to especially protect the Hara. Senninbari follow in that tradition. The belts were meant to protect men from harm during war.
Ideally, they were made with many women gathered together, each stitching one knot into a belt and passing it on. Of course many were made by singular women for the men in their lives, but the beauty of the idea of collective luck making really intrigued me.
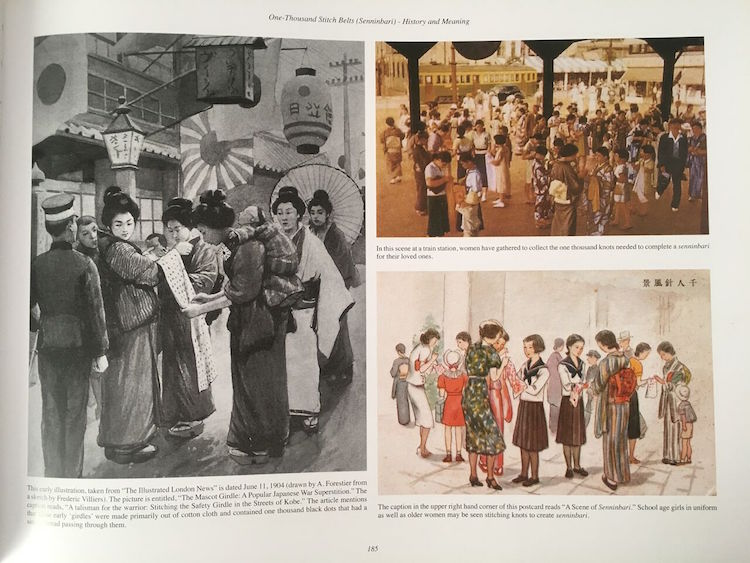
The belts and knots on them were obviously fairly small but I knew that I wanted to make a version that would command some space, perhaps even overpower the viewer. I have been long interested in shifting the scale of items, using small things to generate a sense of intimacy, making small things large for impact or become confrontational. I also inherently have a thing for repetition, so this project seemed perfect.
Was there any other preparatory work?
There was a lot of prep work and trial and error for this project.
First I had to find the right width of rope, I finally decided on ¼” or 7cm diameter. This was big enough to hold it’s own, but not so big that I couldn’t tie it. It had to be natural fibre. I had to discover what kind of scissors to use to cut the rope, Fiskars Amplify.
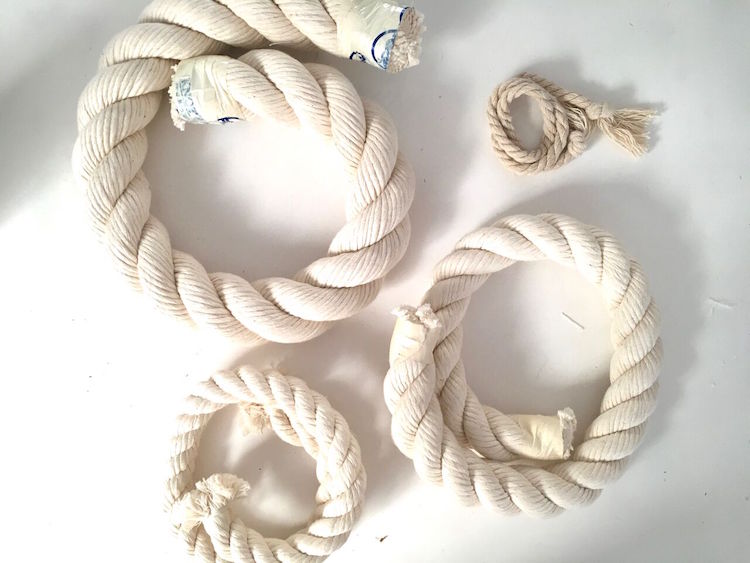
I had to figure out HOW to tie the knot. I actually tried to teach a couple people how to do it so that I could get some help, but in the end, I was the only one who could generate the knot in a way I liked. I had to manage to secure the ends until I could glue them, loom bracelet rubber bands became key.
Eventually, I had to figure out what kind of hardware to use, a 4” / 10cm nail, and how I was going to glue the ends and knot together so they wouldn’t fall apart, hot glue.
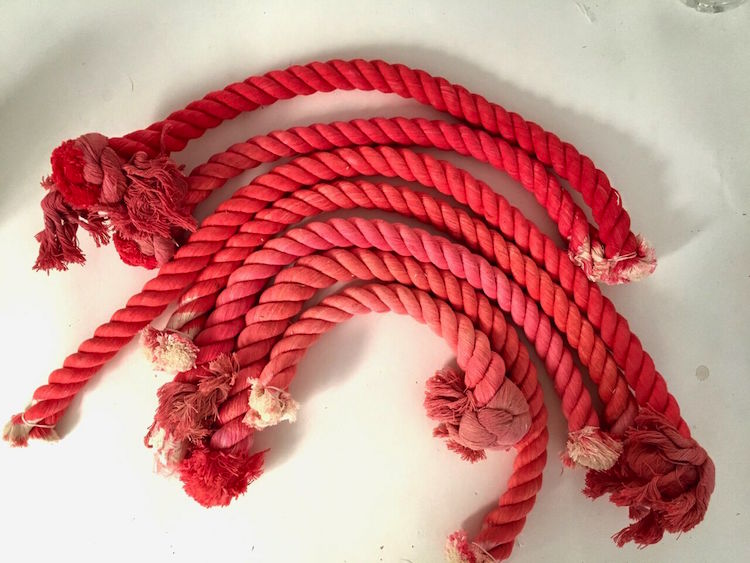
I also had to determine how to dye it. I knew I wanted the colour to shift, ombré, from a light pink to a dark red. The red is supposed to nod to the Japanese flag. I did A LOT of tests and note taking with Dharma Trading’s Fiber Reactive Dyes. I had to learn what colours I could get by leaving the rope in the dye for how long, and when the dye reached it’s max colour potential (1.5 hrs). What reds to mix to get a rich deep shade.
Bidding for business
What materials were used in the creation of the piece? How did you select them? Where did you source them?
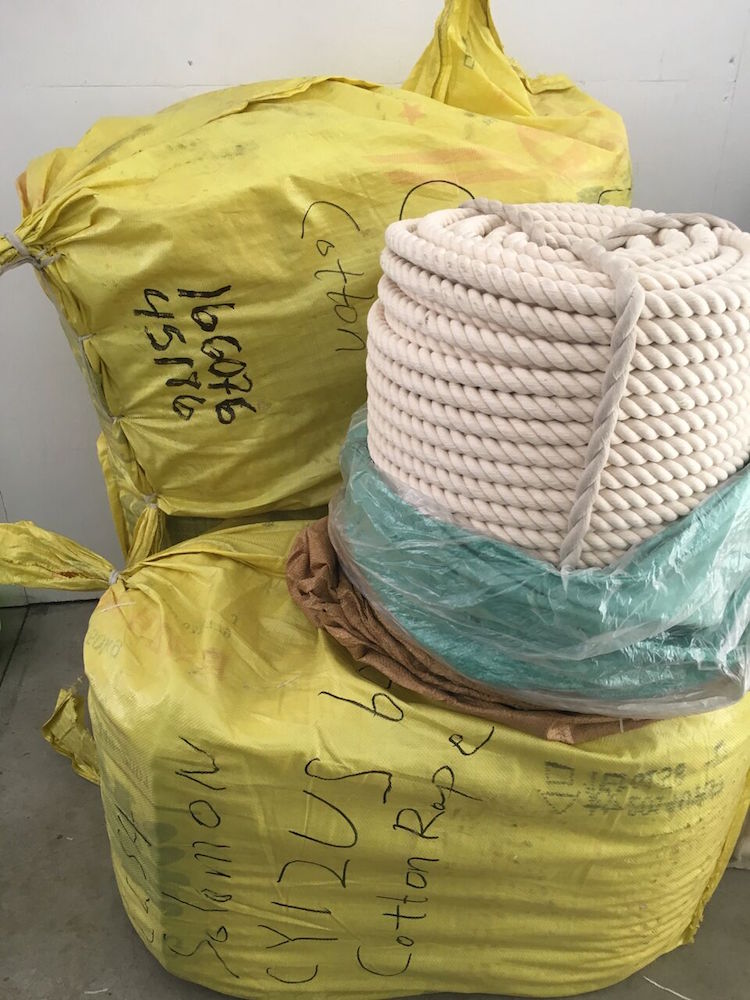
The main ingredient is the cotton rope. I tried to find a US source, and, in fact, the sample ropes I got were all from US companies. In the end, though, I couldn’t afford to buy 2300 feet (700 m) of rope in the States. I winded up searching on Alibaba and had Chinese companies bid for my business.
This whole process was really enlightening. I had to do a lot of math conversion. I had to wait for responses because of the time change. I had to get them to send me photos to confirm, there are different kinds of rope, 3 strand twisted, braided, and a big difference in quality from company to company. I also had to make sure they knew it needed to be cotton. While 2300 feet seemed like a TON of rope to me, for some companies it wasn’t a big enough minimum.
Finally, after a couple weeks of sorting through bids, I found a company I could work with and seemed reputable.
There also was an eye-opening giant learning curve experience in getting the rope shipped. The company I went with offered free boat freight, but that meant I had to get my rope at the dock in Oakland myself. I had no idea that I would have to hire a broker and give them power of attorney to clear it; I’d have to pay a warehouse to store it, even for a very short period, in CASH; I’d have to go to a customs office where I was yelled at because I was importing a “textile” and didn’t I know I had to go to the other’s custom office? No, no one told me, they told me to come here. And I’m an artist with no intention of importing this much rope ever again. And YES technically it will be for sale, but I’m not a typical retailer…it’s going to be an ARTWORK.
Finally, after jumping through lots and lots of hoops, a forklift loaded my rope into my truck and I got it to my studio.
It was bundled in these beautiful coils… I almost didn’t want to take them apart. And if you were wondering… rope is HEAVY. Each of the big bundles must have been close to 60-70 pounds (27-31kg).
What equipment did you use in the creation of the piece and how was it used?
Here’s a list of everything I can think of that I used….cotton rope, scissors and rulers, fiber reactive dye, soda ash, salt, a giant Rubbermaid tub, 5 gallon bucket, gloves, dye recipe + measuring tools, plastic tarp, cinder blocks, small rubber bands, my- and other’s hands, nails, hot glue. It’s not a glamorous list, but there you have it.
Dyeing, stacking and cutting
Take us through the creation of the piece stage by stage.
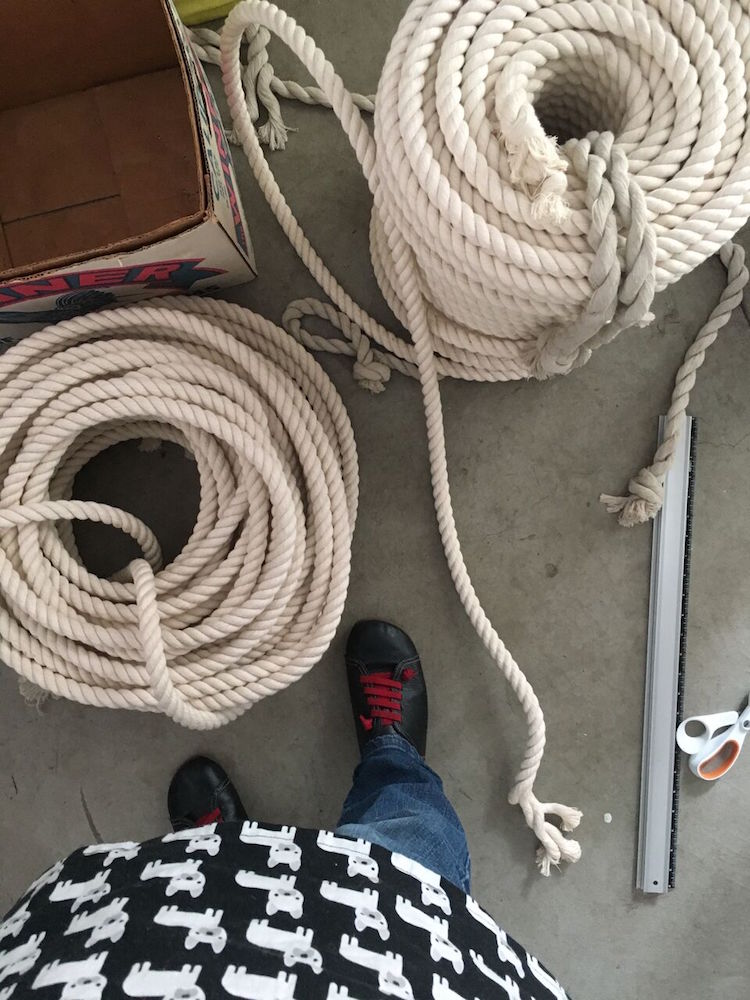
The first step was to determine how many rows of knots and how long the rows would be. I knew the piece was going to be exhibited, so working with the wall dimensions of the space I decided 20 rows of 50 knots would be a do-able configuration. I also thought 20 rows would allow for a nice transition from light to dark.
The next step was cut the giant coils of rope into lengths that would yield a minimum of 50 knots. I ordered enough rope to make extras so I cut the lengths a bit longer hoping for about 54-58 knots per length. This would also allow for some unevenness in dyeing or just some outright mistakes.
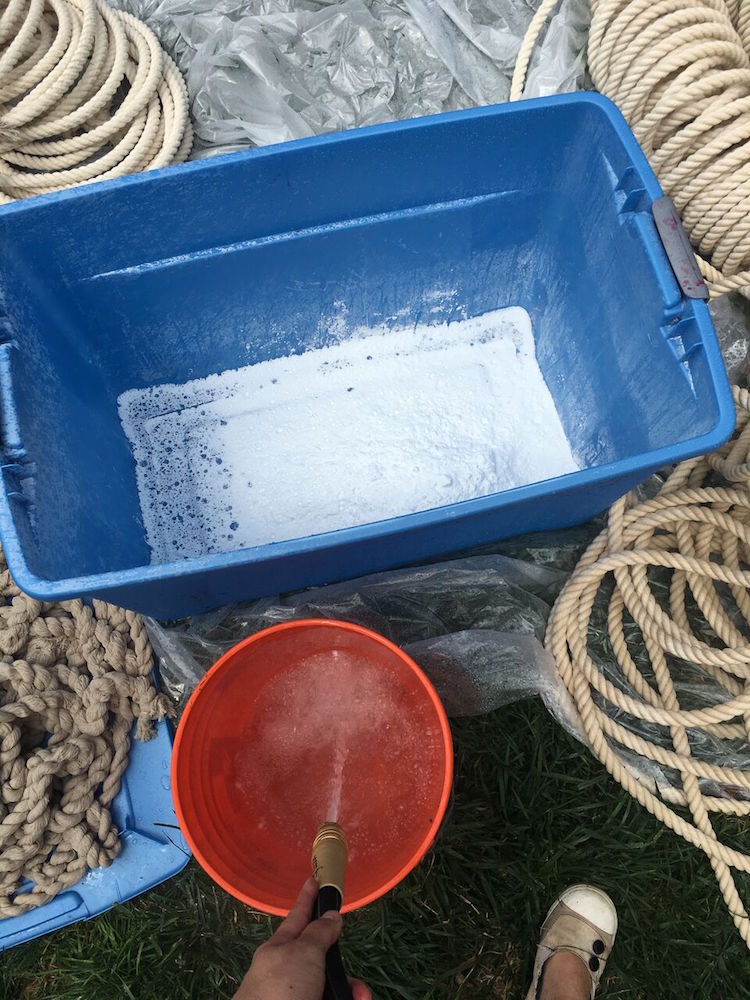
The dyeing took place in my backyard on a patch of grass outside my studio. I put tarps on the grass to try and prevent the dye from killing or discolouring it. We luckily installed a faucet in our yard that generates hot and cold water, so I was able to use a 5-gallon bucket to measure the right amount of hot water to go into a giant Rubbermaid plastic container. Before the water, I added the correct amount of soda ash and salt. I was also able to use a hose to wet down all the rope with hot water really well before going into the dye bath.
Before the water, I added the correct amount of soda ash and salt. I was also able to use a hose to wet down all the rope with hot water really well before going into the dye bath.
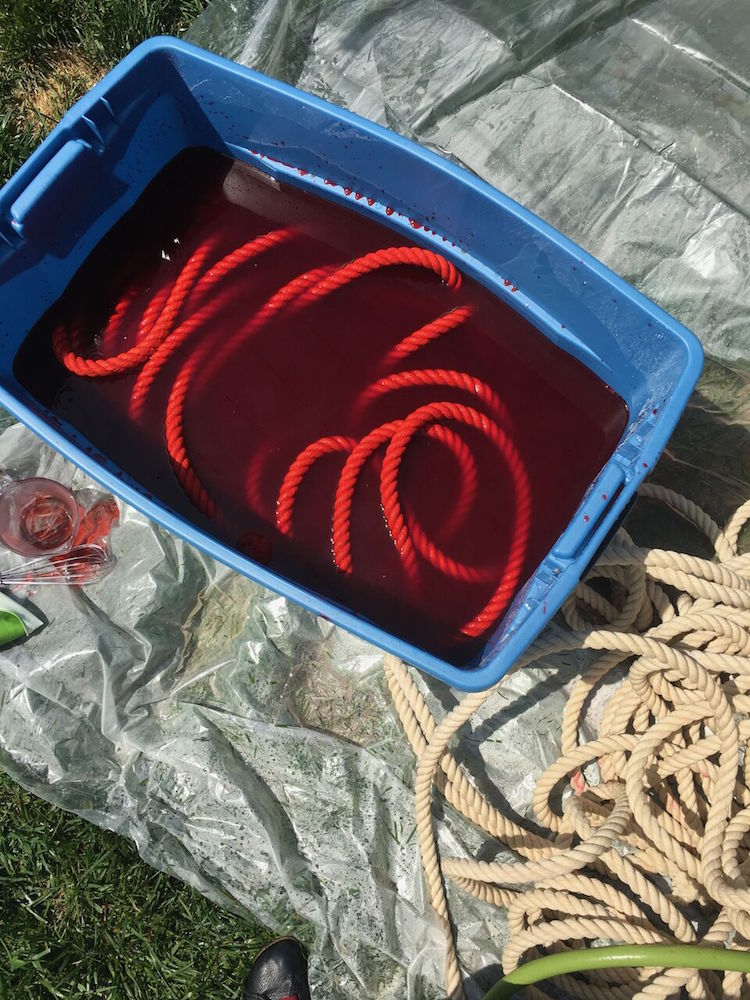
I soaked the rope in the bath, weighing it down with cinder blocks so it got even coverage, timing and removing the rope as needed.
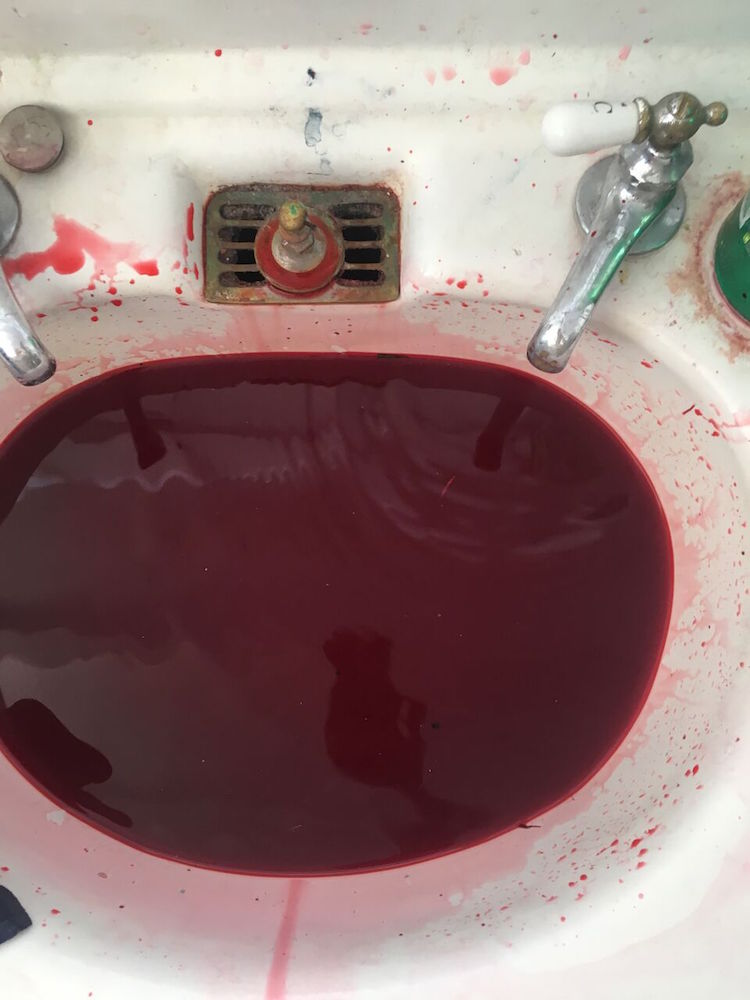
I did the dyeing over 3 long, separate days. At the end of the day, I’d empty the tub by scooping out 5-gallon buckets and pouring them down my small studio sink to drain.
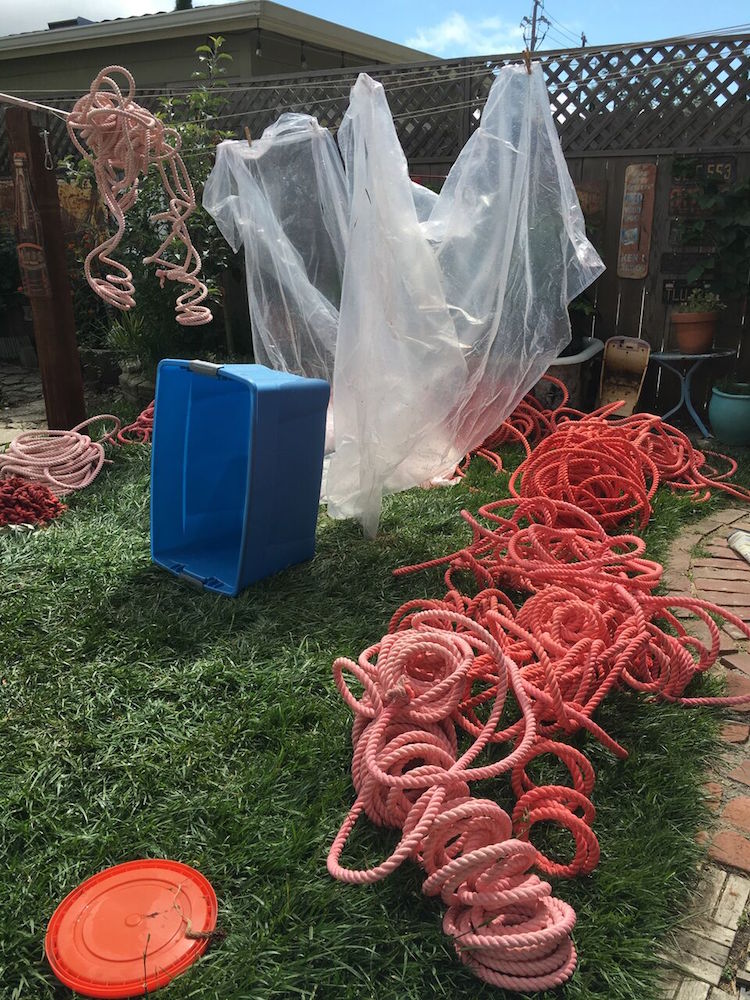
I’d hang up the tarps and leave the rope strewed around my yard and clothesline to dry. It took about 24 hours for the rope to dry.
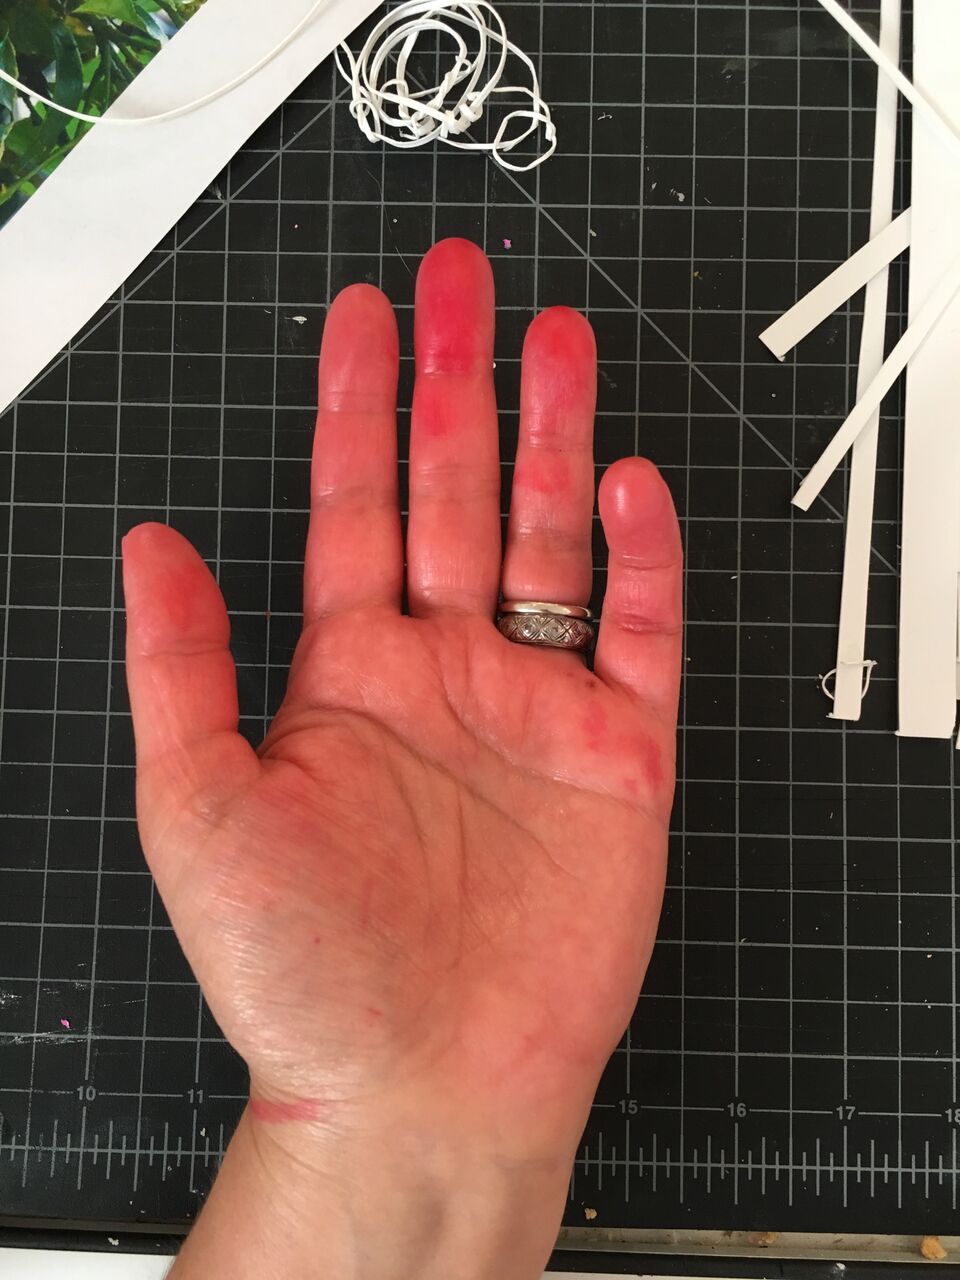
Even though I wore gloves my hands would be red at the end of the day.
After the rope dried I brought it back into the studio. It no longer stacked as neatly as before it was dyed!
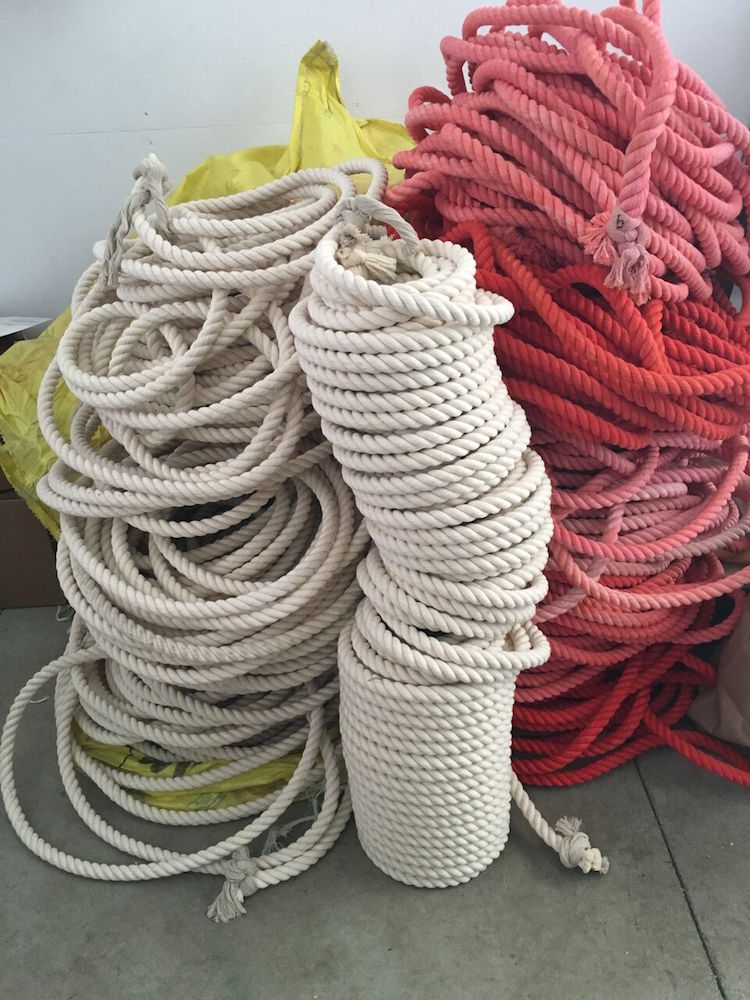
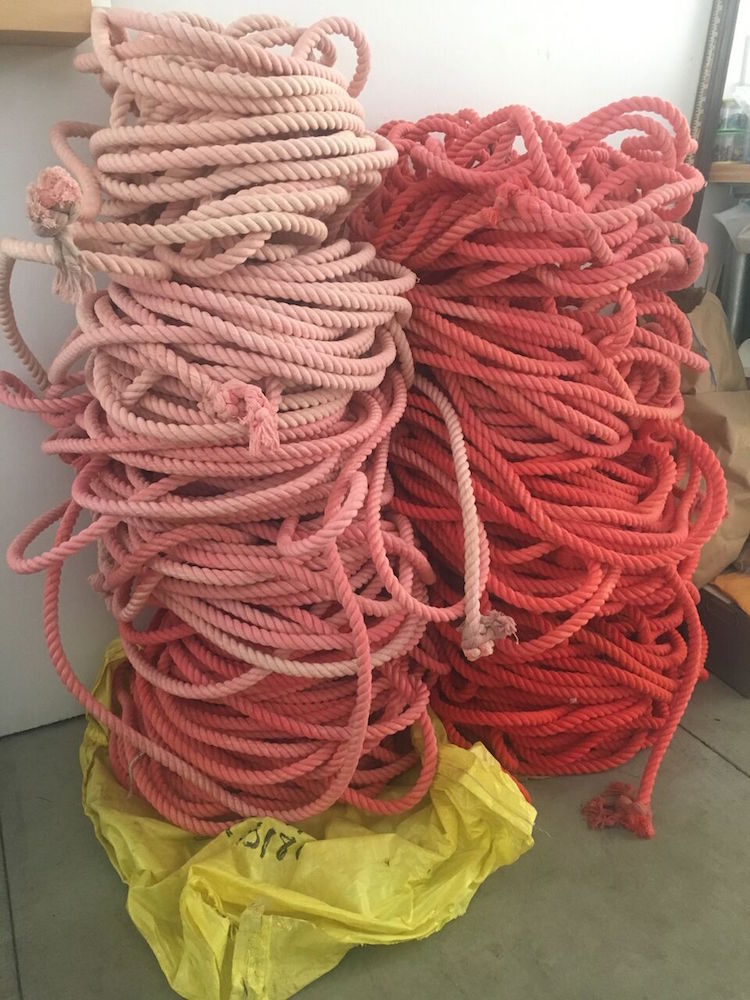
After the 2nd day of dyeing, I realised I had to stack them in colour order to find the gaps and figure out what I needed to do for my last batch of rope. The last batch was the hardest. I had figured out that running the rope through the wastewater was the surest way to get the light pink, but finding the right combo for the darks and the in-betweens was a bit trickier.
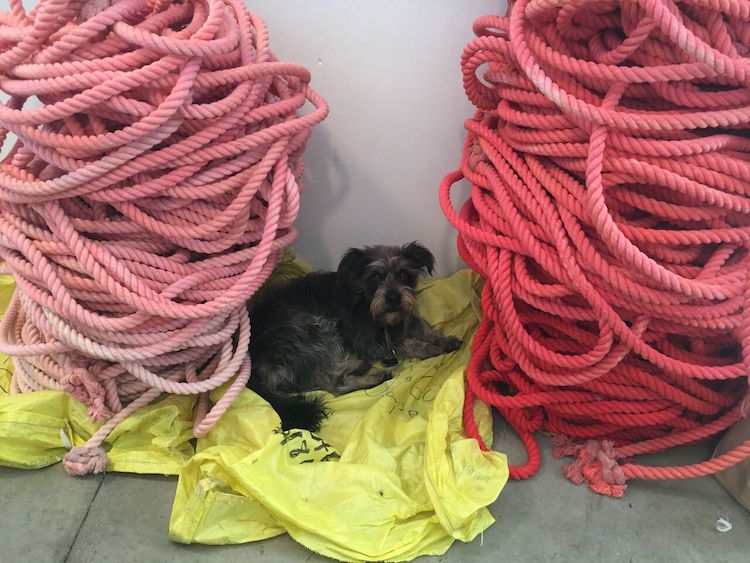
My dog, Diego, was of no help.
After all the dyeing came cutting stage 2. I figured out my order of colour and labelled each long length ONE through TWENTY, one being the lightest pink. All the long lengths then had to be cut into 2-foot lengths. While cutting rubber bands were placed on each end to keep the ends from unravelling. As the lengths were cut I kept each row together in a garbage bag. When I was lucky I’d have a helper cutting so meanwhile, I could make the knots.
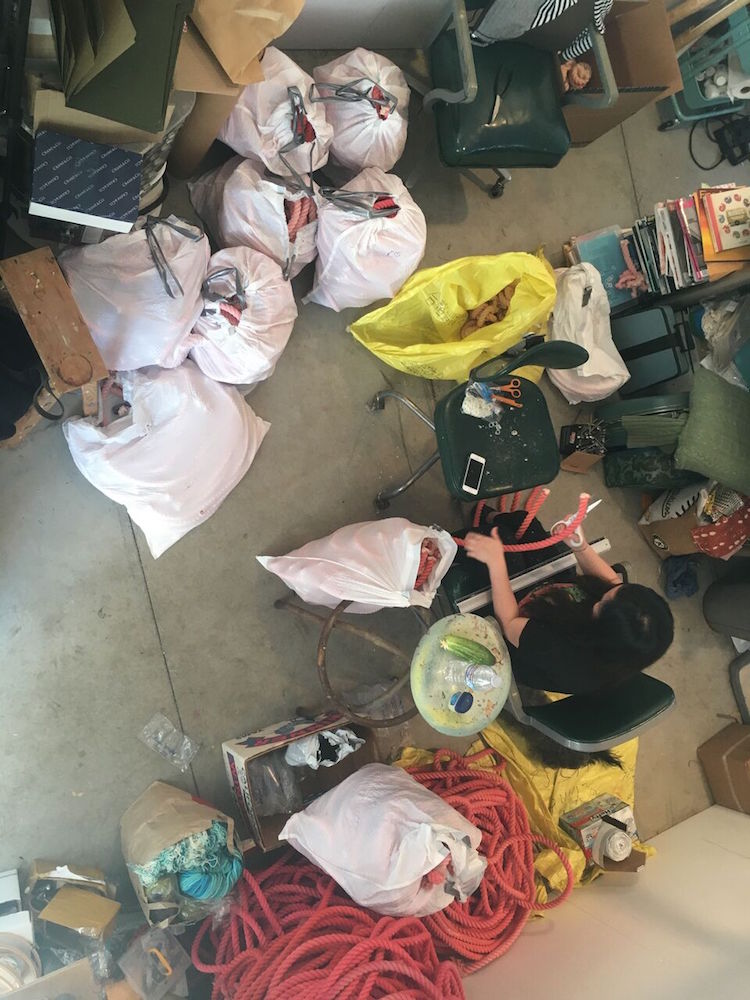
After all the knots were made, hot glue was applied to really keep all the ends from fraying. A nail was also inserted and glued in at this point to use as a hanging device. My mom and dad were big helpers through this step as well.
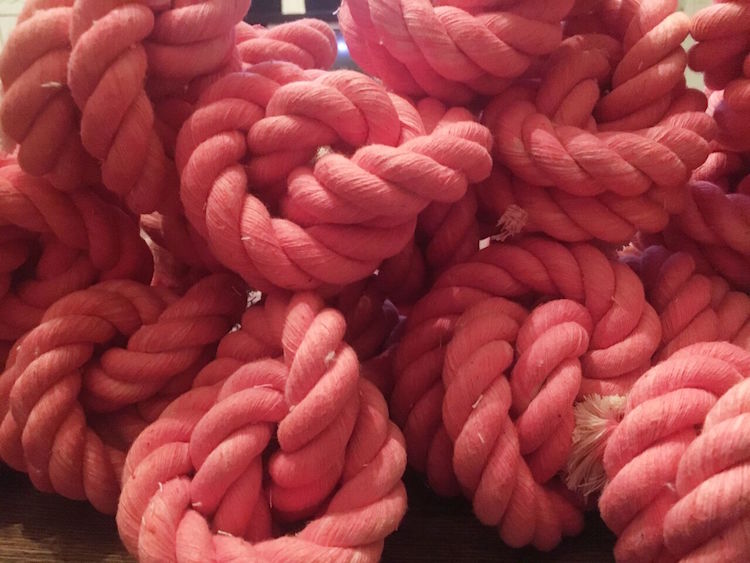
All the knots were then quality controlled and transferred into boxes. Each row with it’s own labelled box. At this point I counted to be sure I had 50+ in each box.
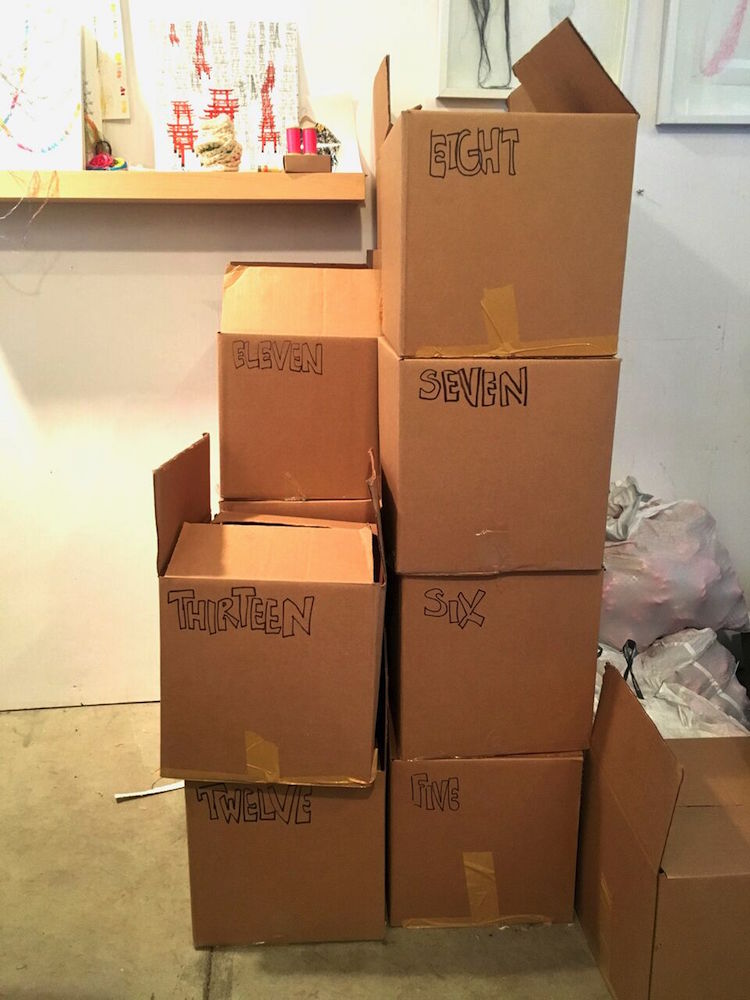
Being hit by a wall of knots
What journey has the piece been on since its creation? (Galleries, exhibitions, prizes, sale, reviews etc.)
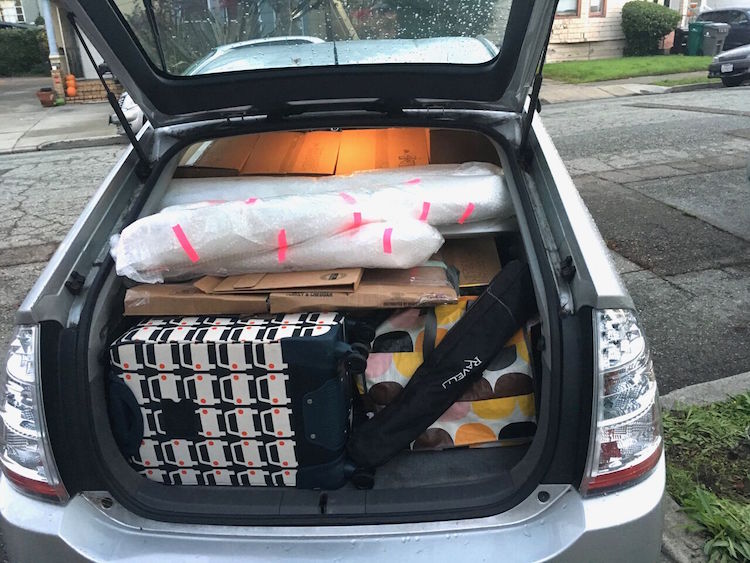
The first stop for this piece was my solo exhibition at Walter Maciel Gallery in November 2016, Mata Sen. I loaded up my Prius w/ 15 boxes, Walter had collected 5 boxes prior and all the work for the show. I couldn’t see out the windows, but it was kind of funny how much I squeezed into that little car
Originally Walter and I had discussed placing the pieces in the main large gallery. I knew there was going to be a duct at the top of the wall, but when I got there I realised how distracting that duct was going to be. So we moved the installation to the smaller room where it would be impossible to walk super far away from it.
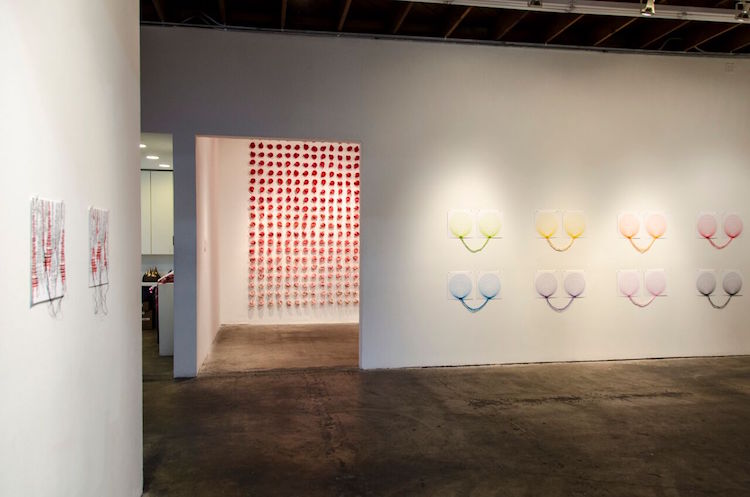
At first, I was a little fearful of this. In the end, though, the intimacy of being “hit” with the wall of knots was super impactful and I’m glad we made that change.

The whole room pretty much ended up glowing with the colour of the knots. This was really a nice surprise. I love bonuses like that. I feel like shadows are always my surprise bonus feature.
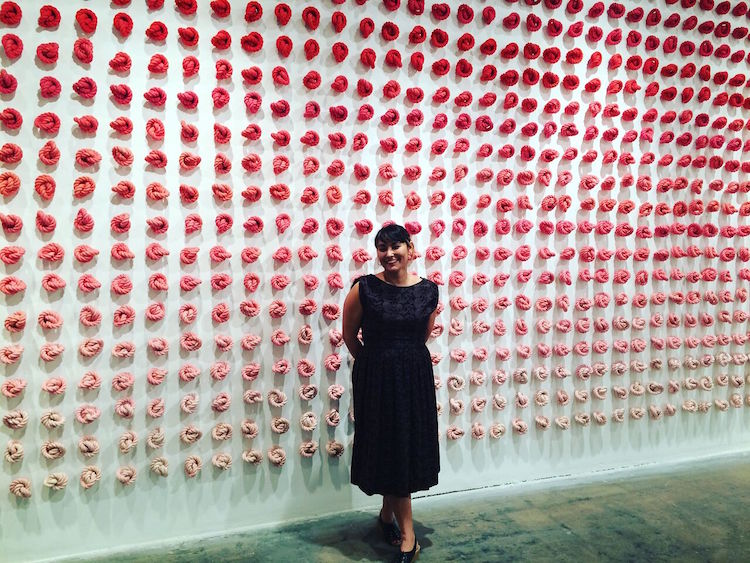
Me at opening night of my show.
I was also asked to put up the knots for Art Market in San Francisco April 27-30, 2017 as a special project. To my surprise, they had me right at the entrance to the fair!
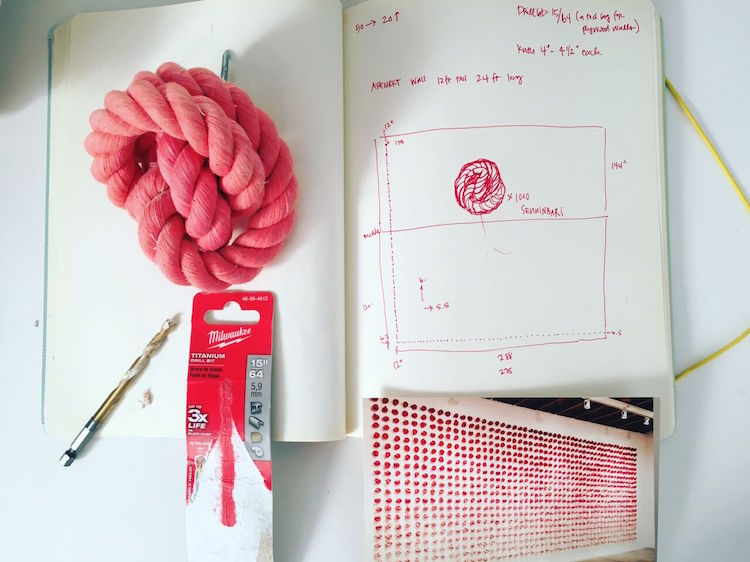
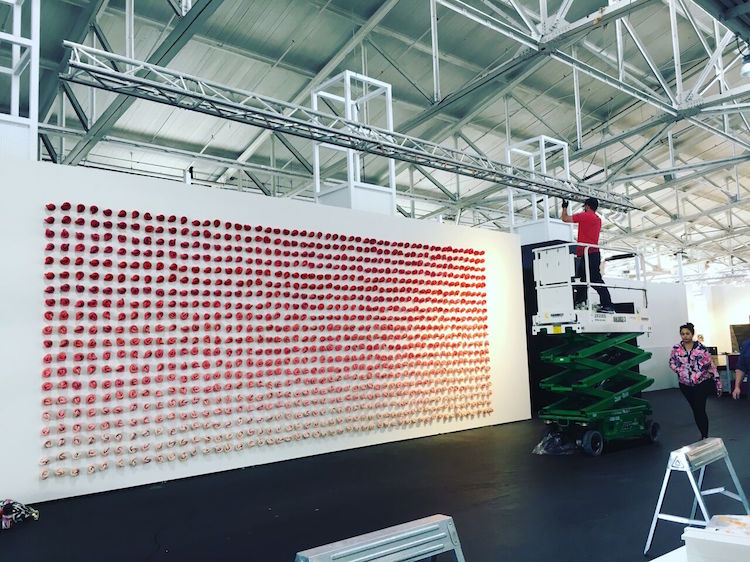
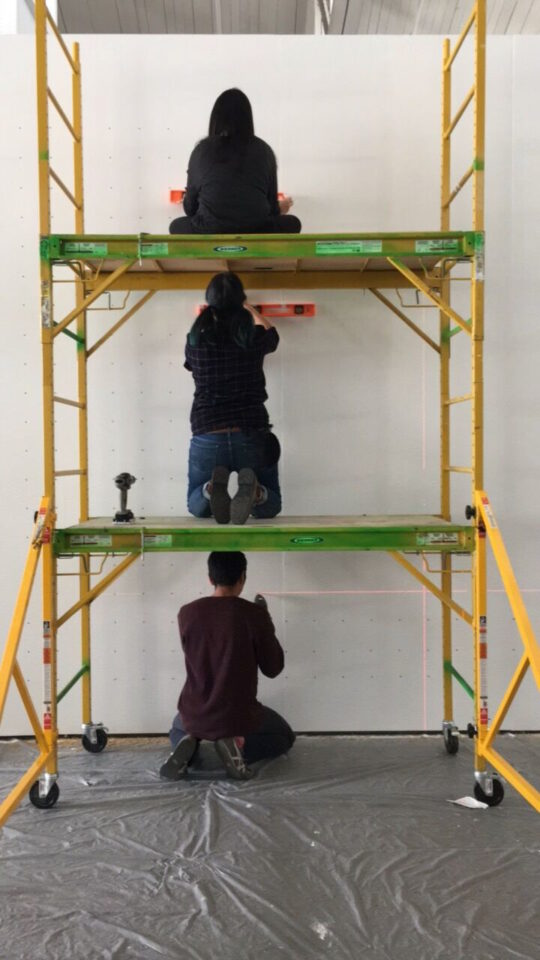
I had 2 days to put it up, but luckily I had some stellar helpers and 2 scaffolds at my disposal. I can’t describe how much I love scaffolding. It makes things SO much easier.
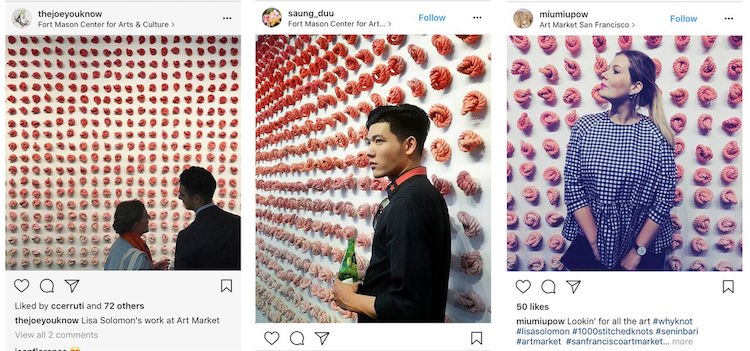
I wasn’t able to hang out at the fair much due to a prior commitment out of town, but I heard that the piece was a popular photo backdrop. It was really fun actually to see all the different takes from strangers and friends on Instagram, you can see a small sampling if you go to #lisasolomon.
I’m not sure what the future holds for the piece. I’m hoping a permanent home somewhere. It’d be great if it were somewhere public where people could see it. Even better if it was in a related field…. Like a Prada or Commes de Garcon showroom or office???? A girl can dream.
For more information visit: www.lisasolomon.com
Got something to say about the techniques, materials and processes used by this artist – let us know by leaving a comment below.
Comments