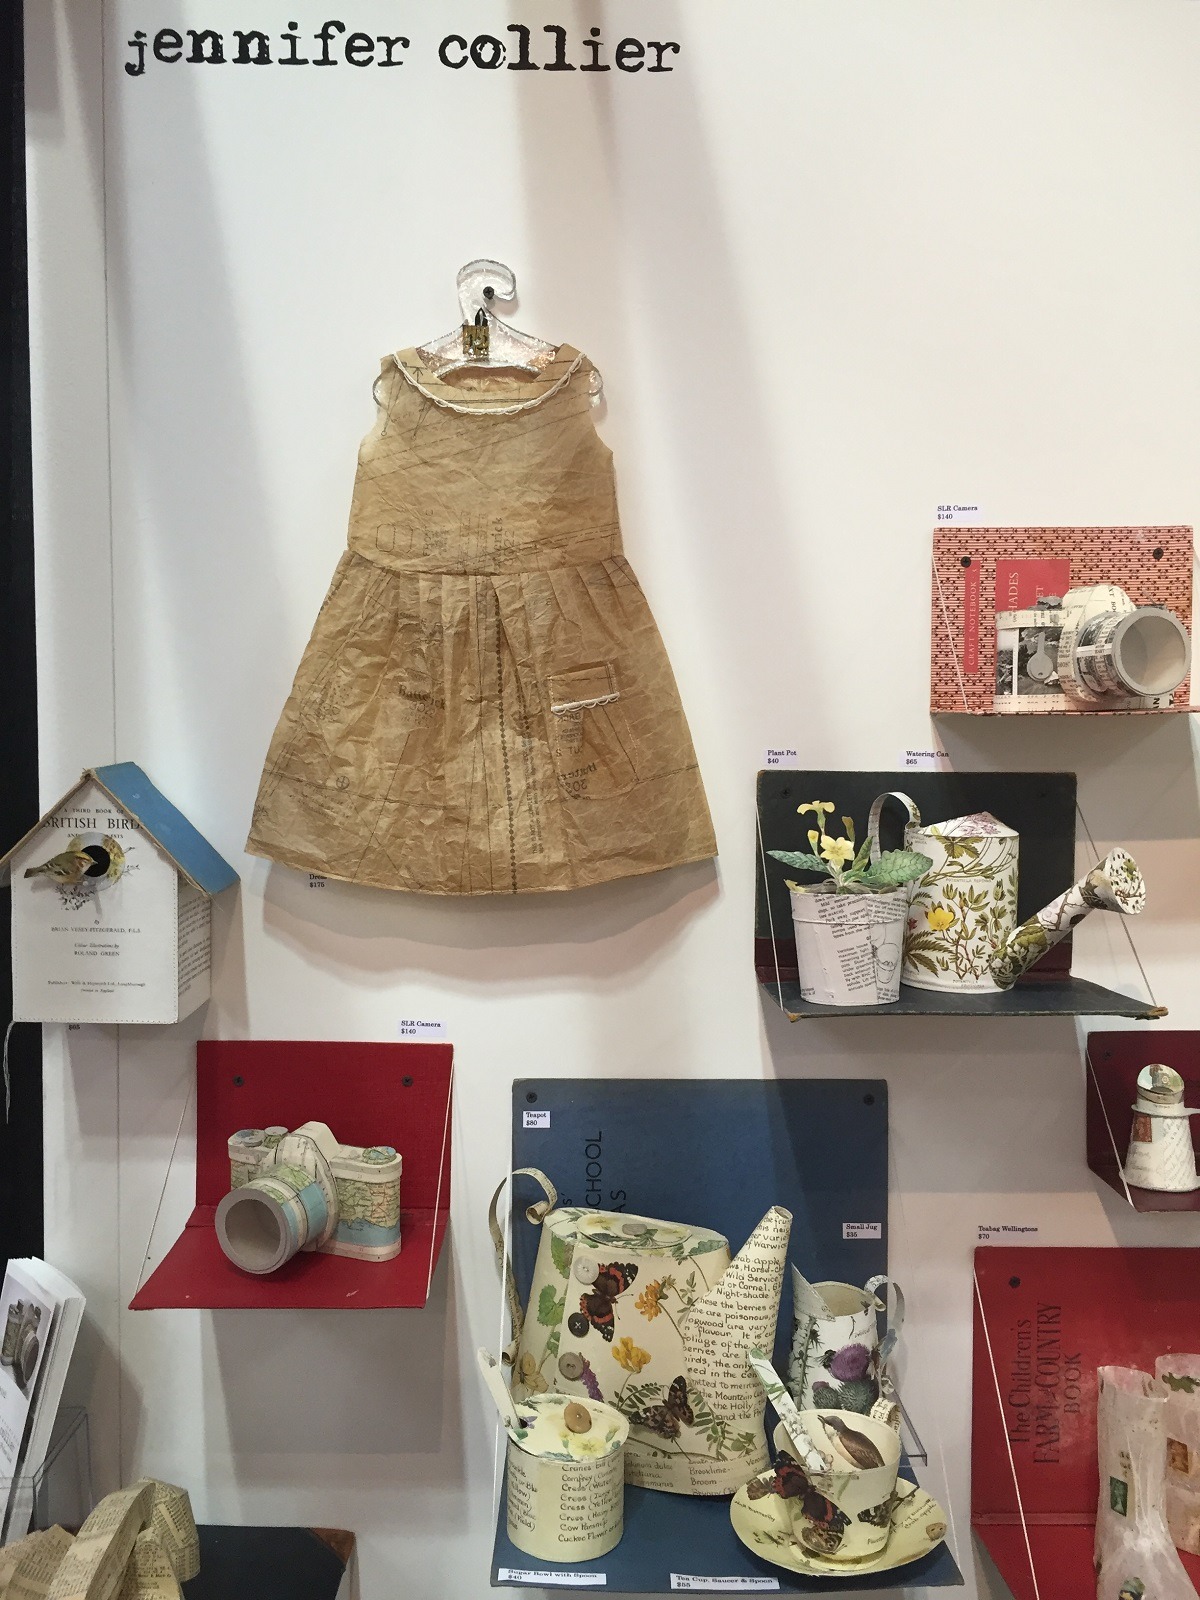
Pioneer of paper-based textiles, Jennifer Collier, creates exquisite sculptures from vintage recycled materials in conjunction with stitch; a contemporary twist on traditional textiles. For Jennifer, the papers act as both the inspiration and the media for the work, with the narrative suggesting the forms. Her process sees old papers such as maps and books become cameras, shoes, lampshades and dresses – each one transforming into something truly unique, delicate and complex.
Most recently Jennifer has been collecting rarely used, heritage stitches and her work favours the crochet picot stitch in particular.
Jennifer completed a BA (Hons) in Textiles (Print, Knit and Weave) in 1999 at Manchester Metropolitan University. She began running her own workshops in 2002 and is internationally exhibited, works to commission and has had her work featured in over 60 magazines, including Vogue, Grand Designs and Selvedge, and in over 15 books to date. She runs her own gallery and workshop, Unit Twelve, in Stafford, England which houses 6 artists including Jennifer herself.
Jennifer has a particular interest in supporting mental wellbeing, including work with children with behavioural difficulties and adults with learning difficulties.
In this article, Jennifer shares her process for creating a paper dress made of vintage dress-making patterns. She tells of the simplicity of her tools, details of her cheats and the stage that makes her fellow gallery artists hold their breath in horror.
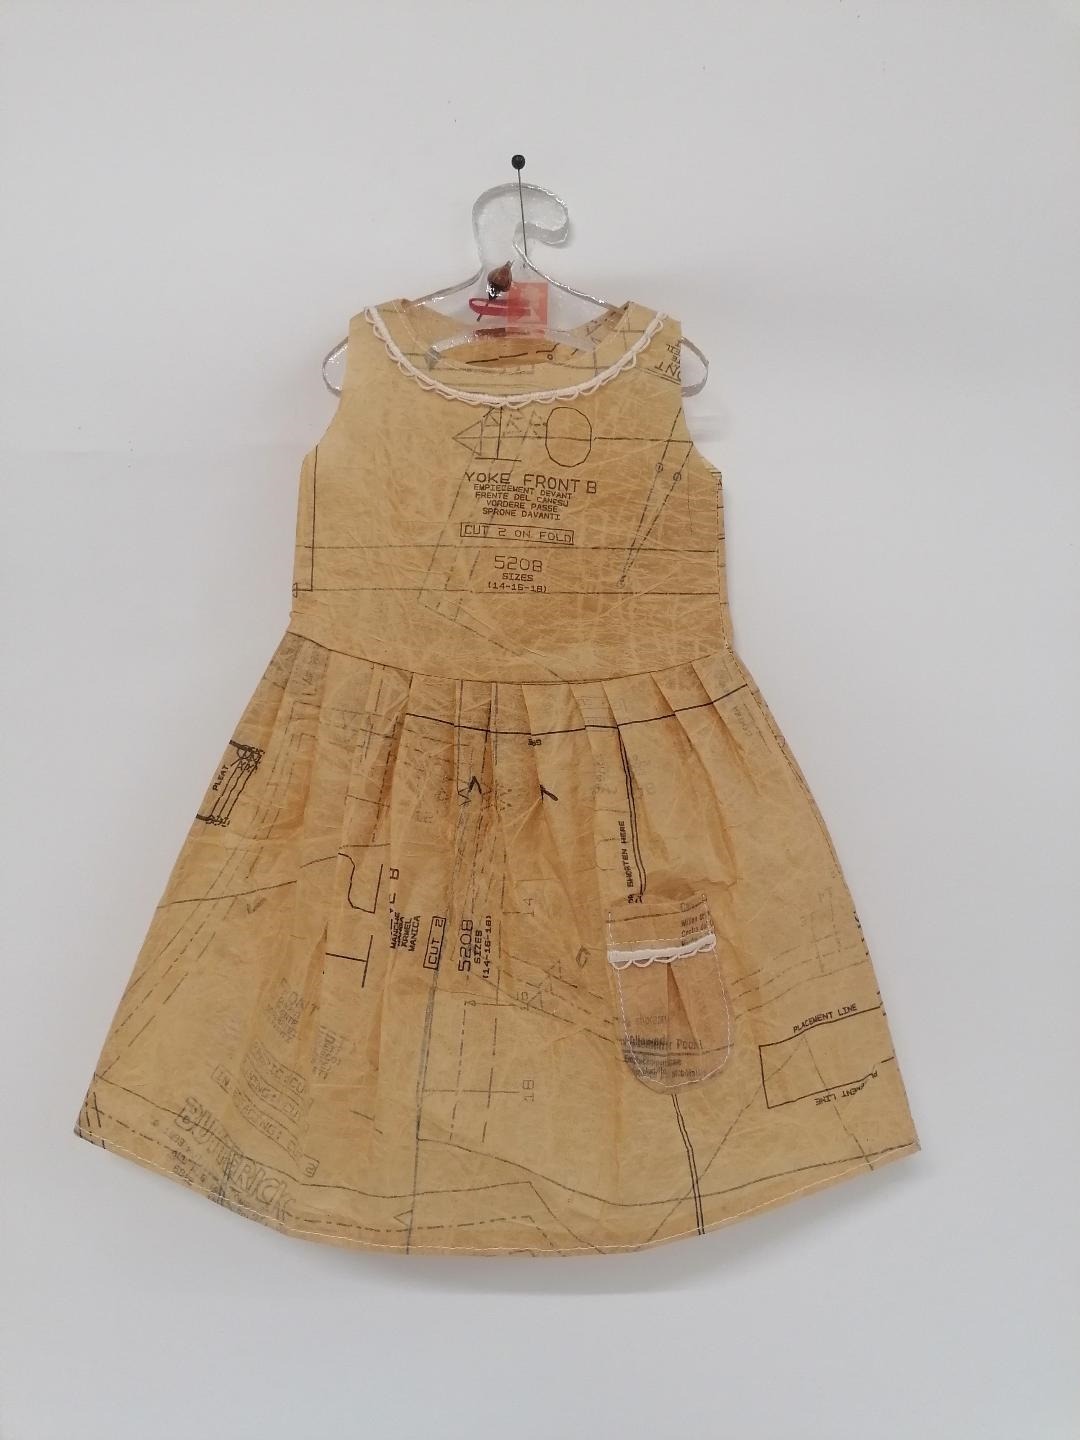
Name of piece: Pattern Paper Dress
Year of piece: 2018
Techniques and materials used: 30 x 40x 2cm approx, Techniques: Hand and Machine stitch. Materials: Vintage dress making patterns, hand sewing thread and Crochet thread
Functional, decorative or both?
TextileArtist.org: How did the idea for the piece come about? What was your inspiration?
Jennifer Collier: When I was at school you had to take childcare as an option in order to do sewing (and learn how to cook for, sew for and look after a child) so I took GCSE Art instead. It was later, when I did a foundation course that my tutor was the legendary textile artist Amanda Clayton; I honestly believe that if it were not for her I would never have developed a love for stitch (or be brave enough to ‘drive’ a sewing machine). Until that point I had assumed I would be a fine artist, as all my A-level course had offered was drawing and painting, but luckily I met Mandy and she showed me the many facets of what textiles could be and she was always very patient, no matter how many needles I snapped!
I started making garments back in 1999 for my degree show – which was a collection of six 8 foot dresses based on Jeanette Winterson’s novel ‘Oranges are not the only fruit’. Five were created from things to do with oranges (slices trapped in latex, orange peel woven on a loom, orange stickers and the tissue paper wrappers stitched together etc) and one was made from apple slices ‘baked’ between layers of fabric, because ‘Oranges are not the only fruit’…
I have only ever made one successful, and wearable, dress – my wedding dress 12 years ago. I used a traditional pattern, but used a Dorma furnishing fabric to make it from, so it was very unconventional (and some said resembled their nan’s bedroom curtains…)
I have always been very experimental in my work – stitching leaves, weaving with fruit peel, embedding seeds in my knitting (to go outside and be rained on so it starts to grow) and even making hats out of toast! Working with paper was a really gradual thing – I was always trying to emulate the qualities of paper in my work (using things like heat transfer printing onto fabric) and suddenly it just made sense for the paper to be the media for my work as well as the inspiration for it. The transition from fabric to paper was really slow, but as soon as I made the leap I felt so much happier with my work, and that I had carved out a niche for myself, as back then there weren’t many makers working with paper in this way.
I (shockingly) don’t use sketch books, make drawings or plans before I start – as a maker it is very much trial and error and I always work in a 3D way, using scraps of papers to mock up and play with the patterns and shapes I want to achieve. When I am happy with the shape I keep the ‘template’ I have devised so I have it if I ever have to make something the same or similar again. These patterns are just made from tatty bits of scrap paper, like newspaper or lining paper, and have scribbled notes all over, some relevant and some not, so they really would only ever make sense to me.
What research did you do before you started to make?
I spent time looking at the construction of garments, deciding when a seam, join or stitch is functional, or when decorative, or when some cleverly do both.
As this garment was always going to be non-functional and look good off the body, rather than on, I didn’t need to add shape by including darts or functional fastenings. Instead, I had to consider how to capture the essence of a dress – so what to include, and what to miss out.
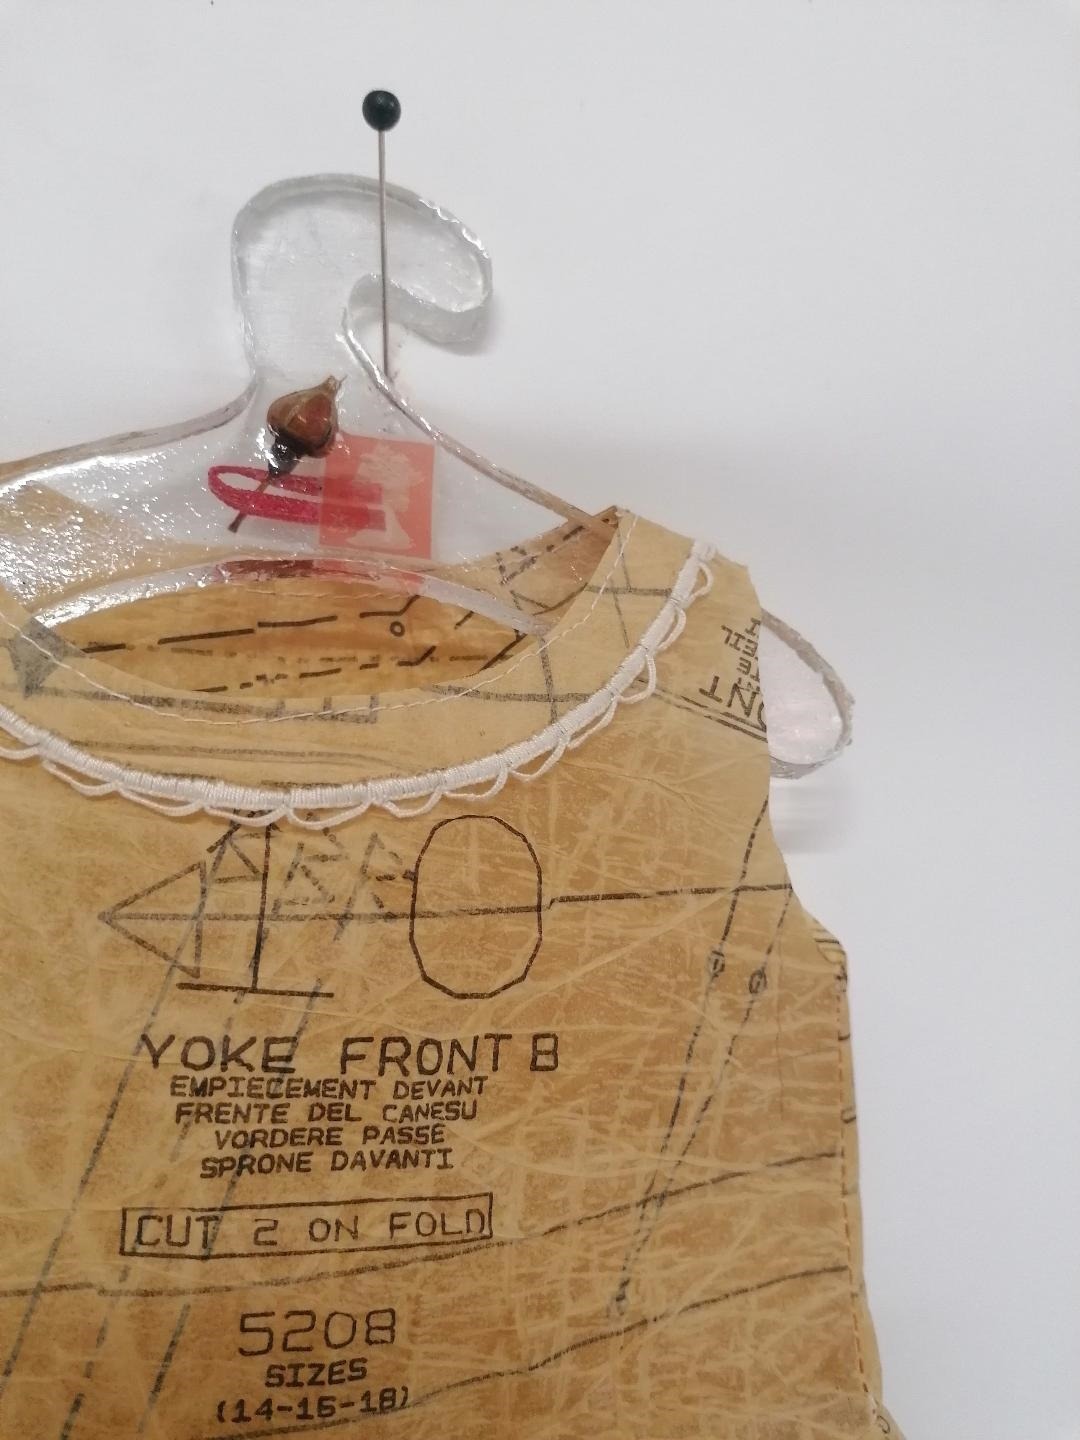
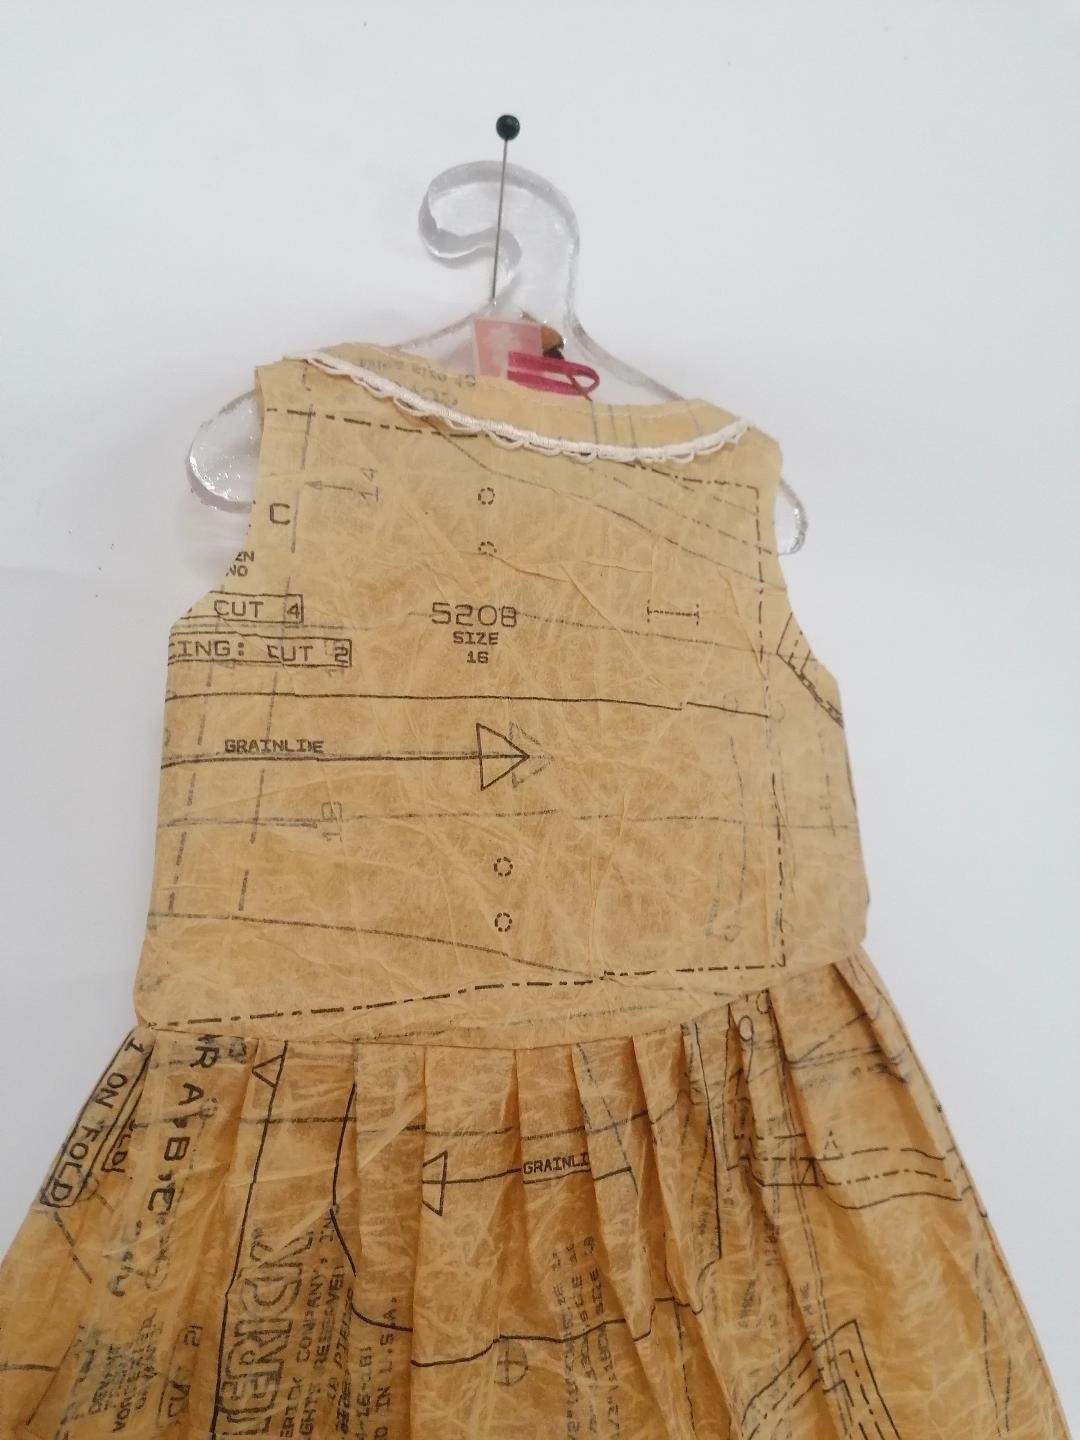
I do love my work to be viewed 360, so I try to make the back as exquisite as the front, which is why the stitched collar goes all the way round the neckline. I decided to pleat the skirt, as this is reminiscent of any childhood garment.
With my work I try not to spell out the narrative too much, but love the viewer to attach their own meaning to the work, by recognising a paper, a shape, a stitch and it evoking memories for them. I almost always add a pocket, as there is nothing in life that cannot be improved by adding a pocket – I even put them in my paper suitcases!

Recycled and vintage paper
Was there any other preparatory work?
For all of the pieces I make I devise my own patterns, moulds and templates, so all of my work is completely unique to me. This dress has a very simple three-piece pattern; a top front, a top back and a skirt (that I use twice for the front and the back).
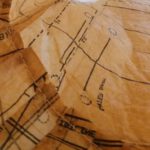
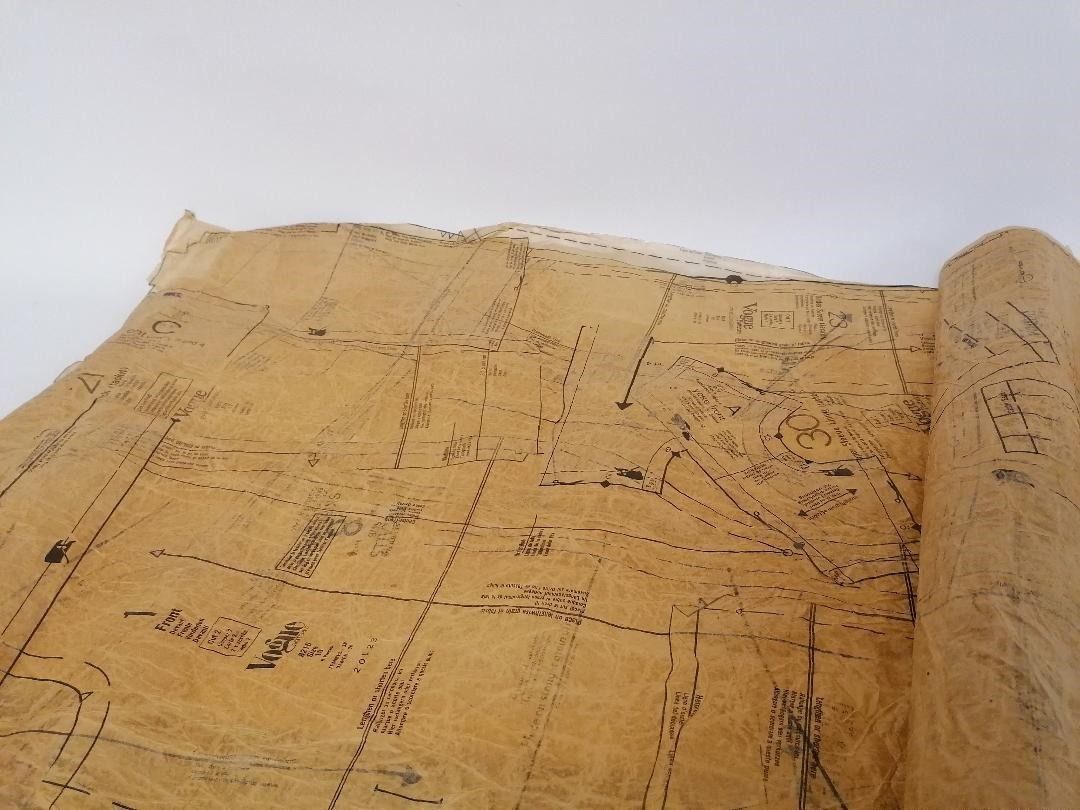
My patterns are literally made from tatty bits of recycled card or paper that I have been using for years and years, and have been terribly mistreated with scrappy snippets of notes to myself.
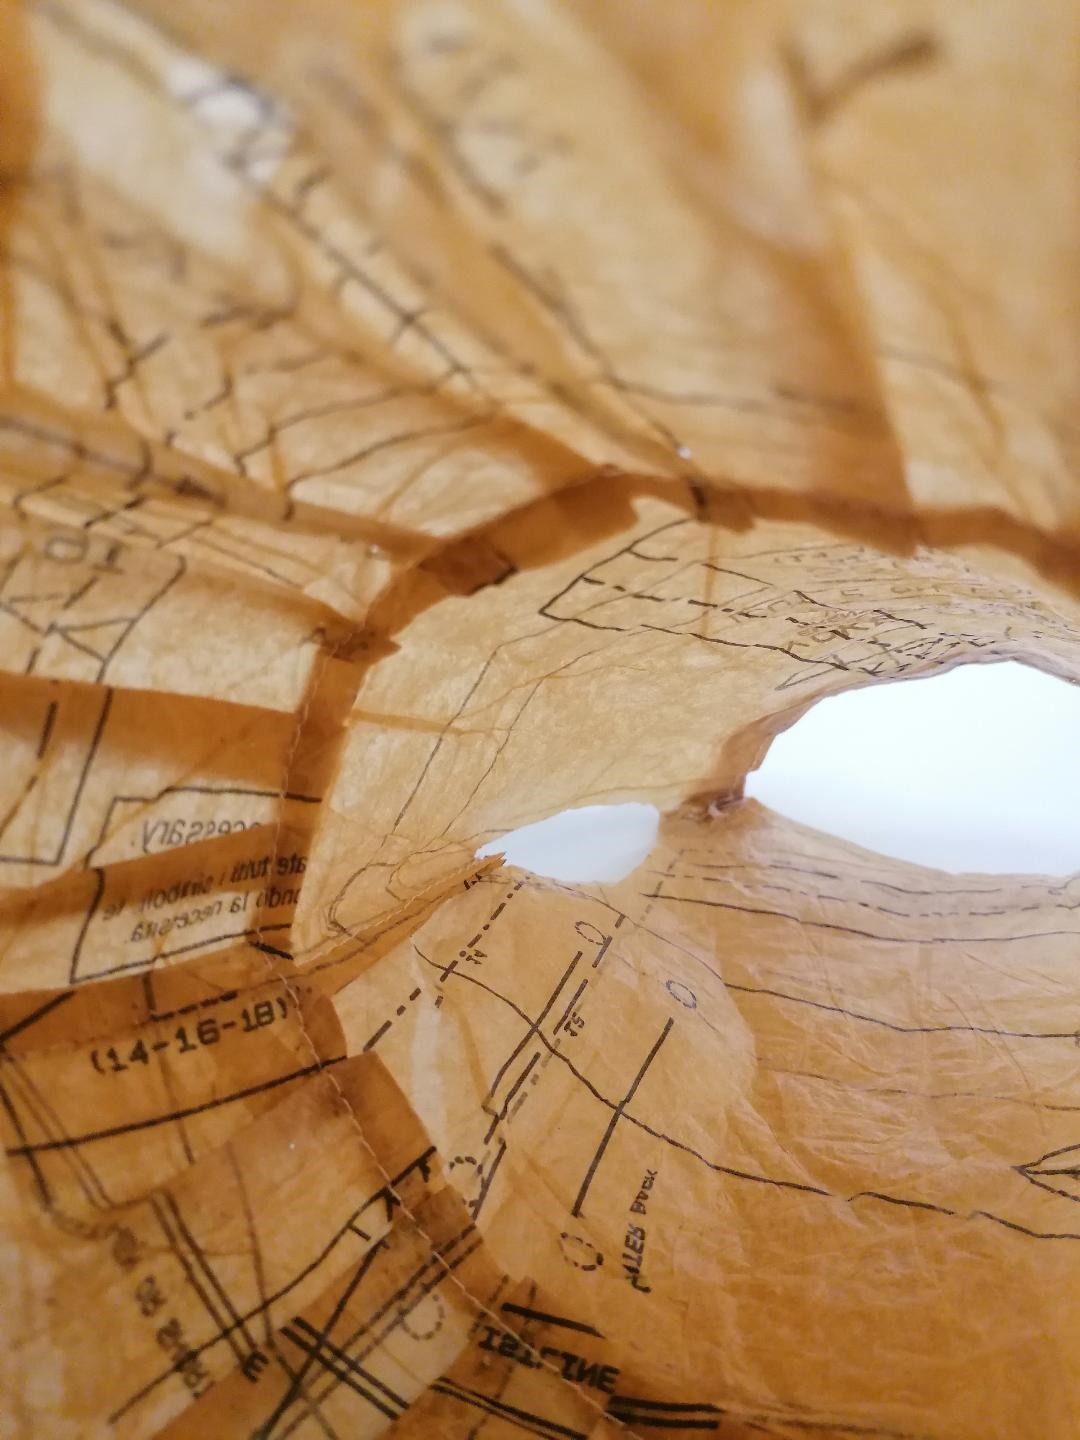
I also went on to devise a pattern for a ‘sweetheart’ dress with pleated pockets, a pocket top, and a dress collar so I could add hand picot stitched embellishment. I also had to take time to experiment with layering up this beautiful, but delicate tissue paper, so that it was the right thickness for me to be able to sew and manipulate without tearing. I discovered that four layers were perfect to manipulate and not tear, (although three are better to show lighting) and that the side touching the plastic is slightly shiny, so I prefer to use the top side.

What materials were used in the creation of the piece? How did you select them? Where did you source them?
In all of my work the materials are the most important part for me; they provide the inspiration as well as the media. Sometimes it takes me years to decide on a paper’s function, or be ‘brave’ enough to use them, as some are just too precious to waste. So the beautiful vintage dress-making patterns were just the perfect and obvious choice to make a paper dress from. They completely sum up the narrative and were just crying out to become the dress they were destined to be, just in a very different way.
I used to trawl charity shops and flea markets for vintage patterns, but now people know my work I am often donated reams of this beautiful tissue paper. I have so many I have even wallpapered one wall of my gallery with them!
What equipment did you use in the creation of the piece and how was it used?
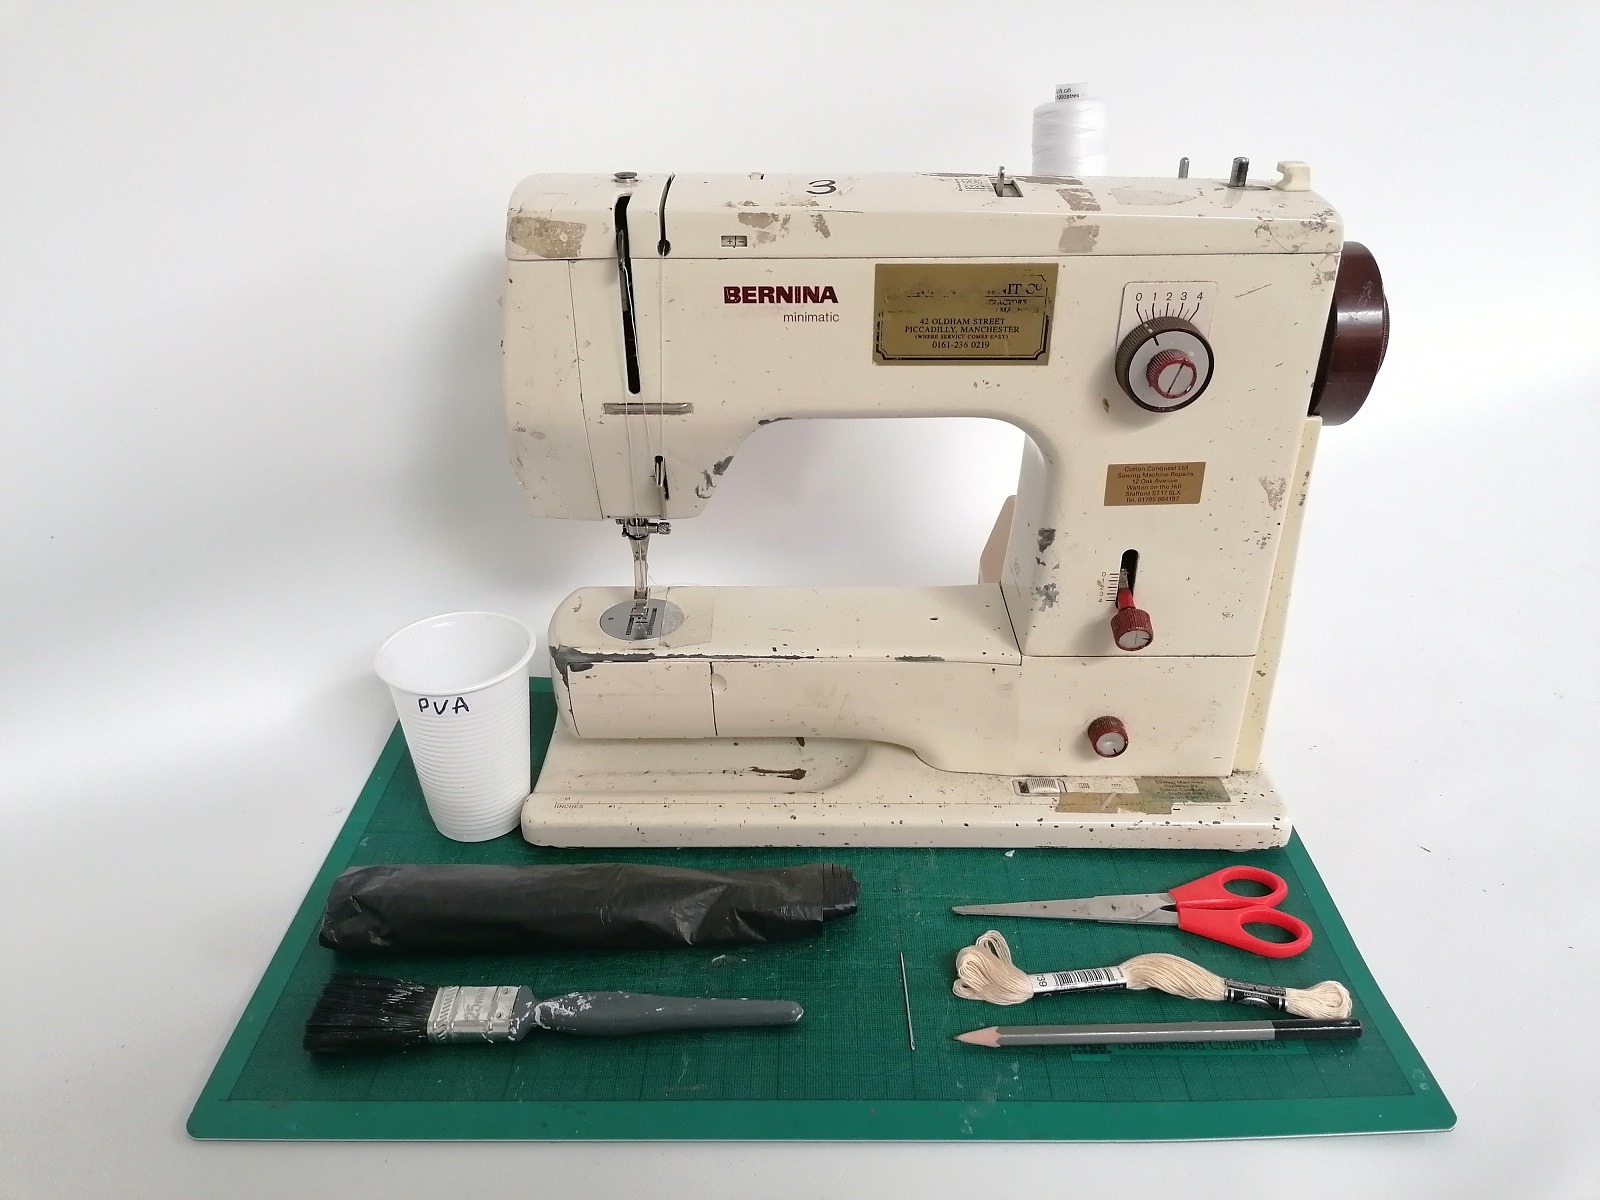
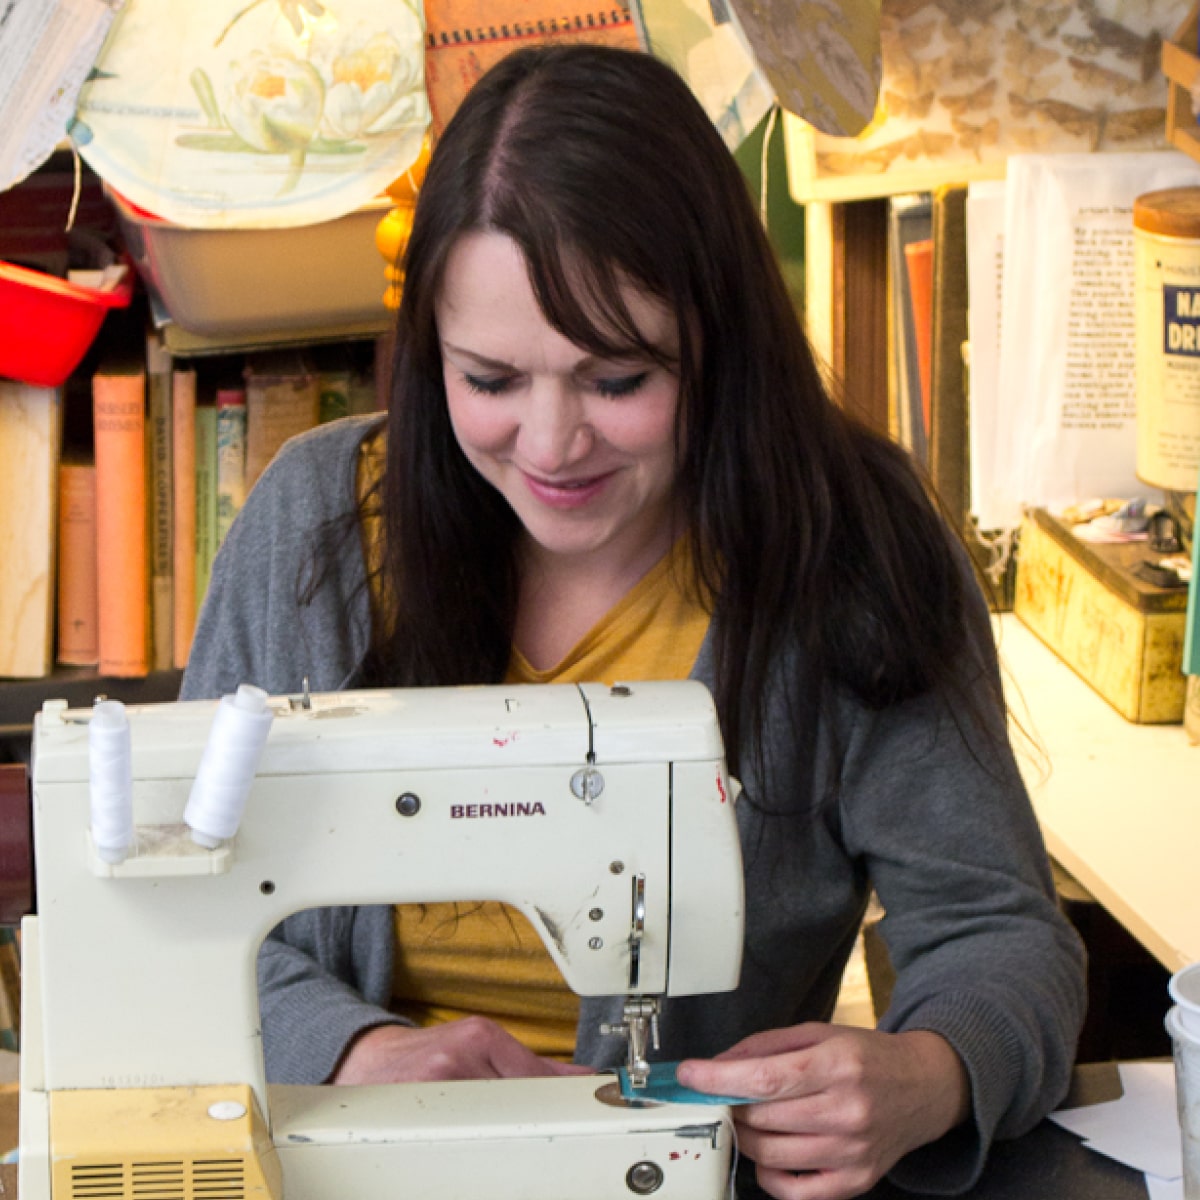
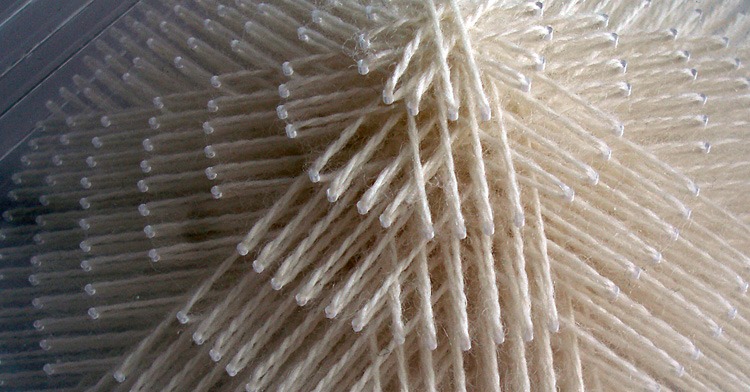
I always work with very basic equipment; my trusty Bernina sewing machine, white cotton, scissors, (watered down) PVA glue and a brush, a needle, crochet thread and a bin bag! I always just cut out with scissors, rather than a knife, and use a standard sewing machine rather than an industrial (as most people assume) for all of the construction of my pieces.
I jointly bought my Bernina with a flat mate in my first year at university in 1996 for just £80, but I got custody when we left, as I continued to make and she didn’t. There is absolutely nothing special about it, other than that Berninas are a true workhorse, hold their value and are an utter pleasure to use.
The final process is always the hand stitch to add exquisite details. The only ‘cheats’ I have when sewing with the machine on paper are that you need to set the machine on its longest stitch length and guide the work through the machine much more than you would normally, as the feed dogs are unable to grip the paper from underneath as they do with fabric. Apparently it blunts the needle too, but as I always only sew paper I don’t notice it!
Screw, scrunch and soften
Take us through the creation of the piece stage by stage
Firstly I need to prepare the dress making patterns, to make them thick enough to work with so I open out a bin bag, lay it on a large flat surface and lay out a layer of the pattern paper. Then, with a brush, I apply a thin layer of watered down PVA glue, and then another layer of patterns and glue. I repeat this so I have roughly four layers. These can be made up of big bits, or a patchwork of small bits, as, together, they will all laminate to form one layer when dry anyway.
By applying the glue with a brush it pushes out any air bubbles and smoothes out any wrinkles in the paper. I find four layers is thick enough to work with without it tearing, because – as you will discover later – this needs to be quite a robust ‘fabric’ to survive the construction. However, in my paper lampshades I only use three layers, as this allows more light through.
I leave this overnight to dry on the plastic, and the next day I have the very satisfying job of peeling it off the plastic. I find the side that has touched the plastic is slightly shiny so I always use the top, matt side as the front in my work. Now I simply draw around my pattern and cut out.
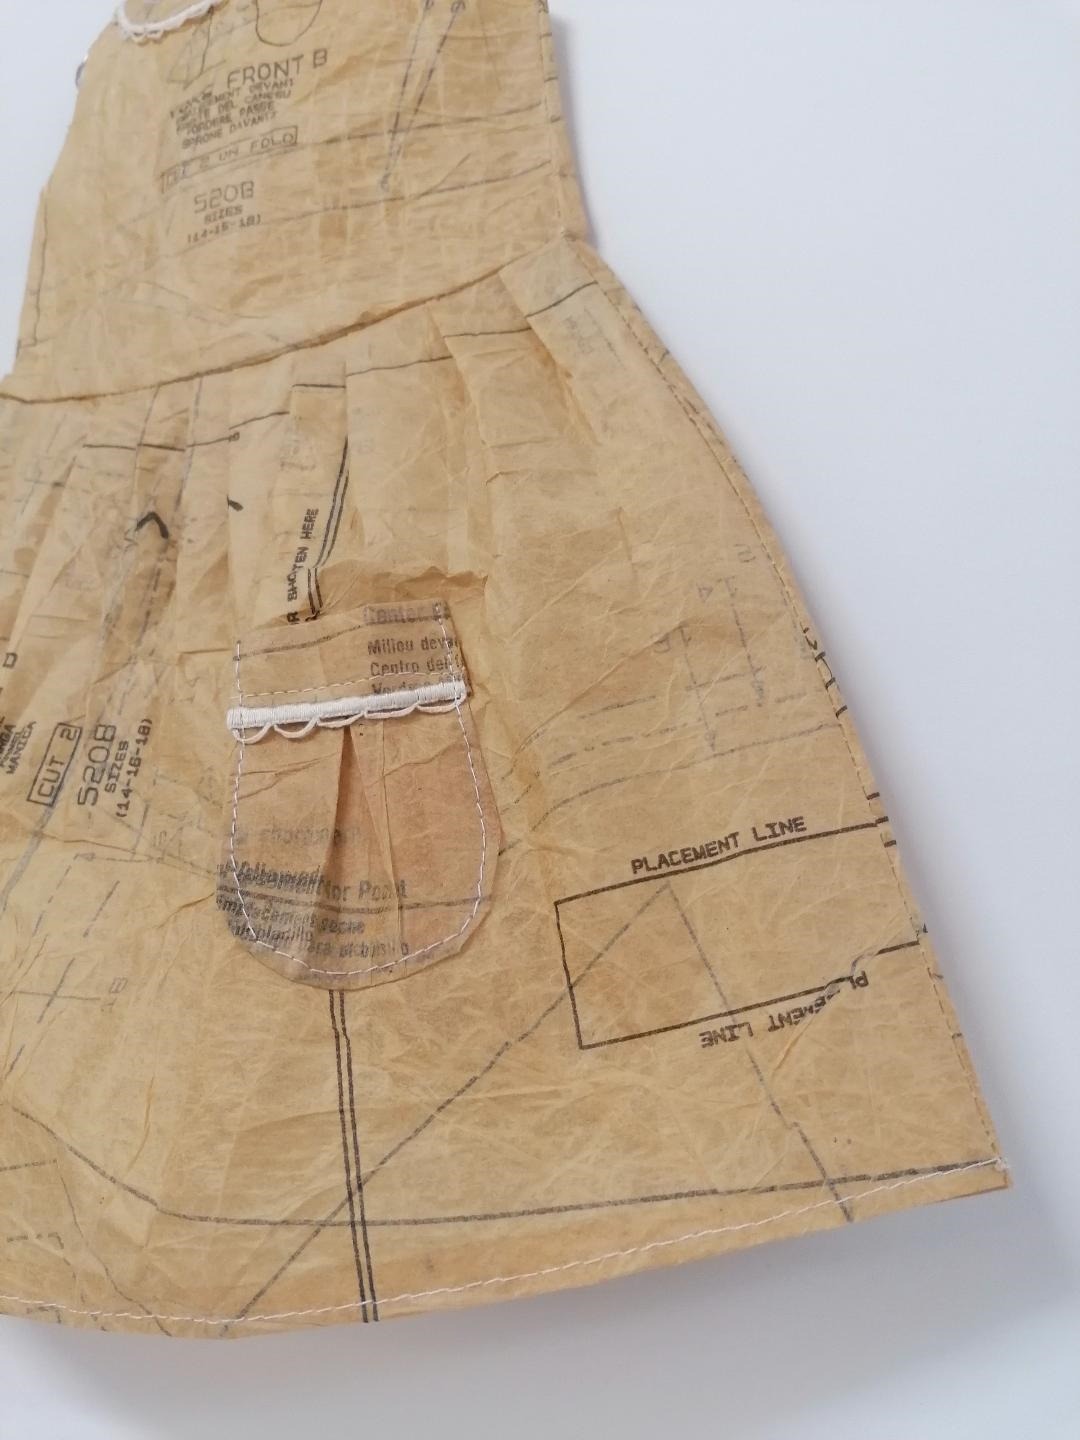
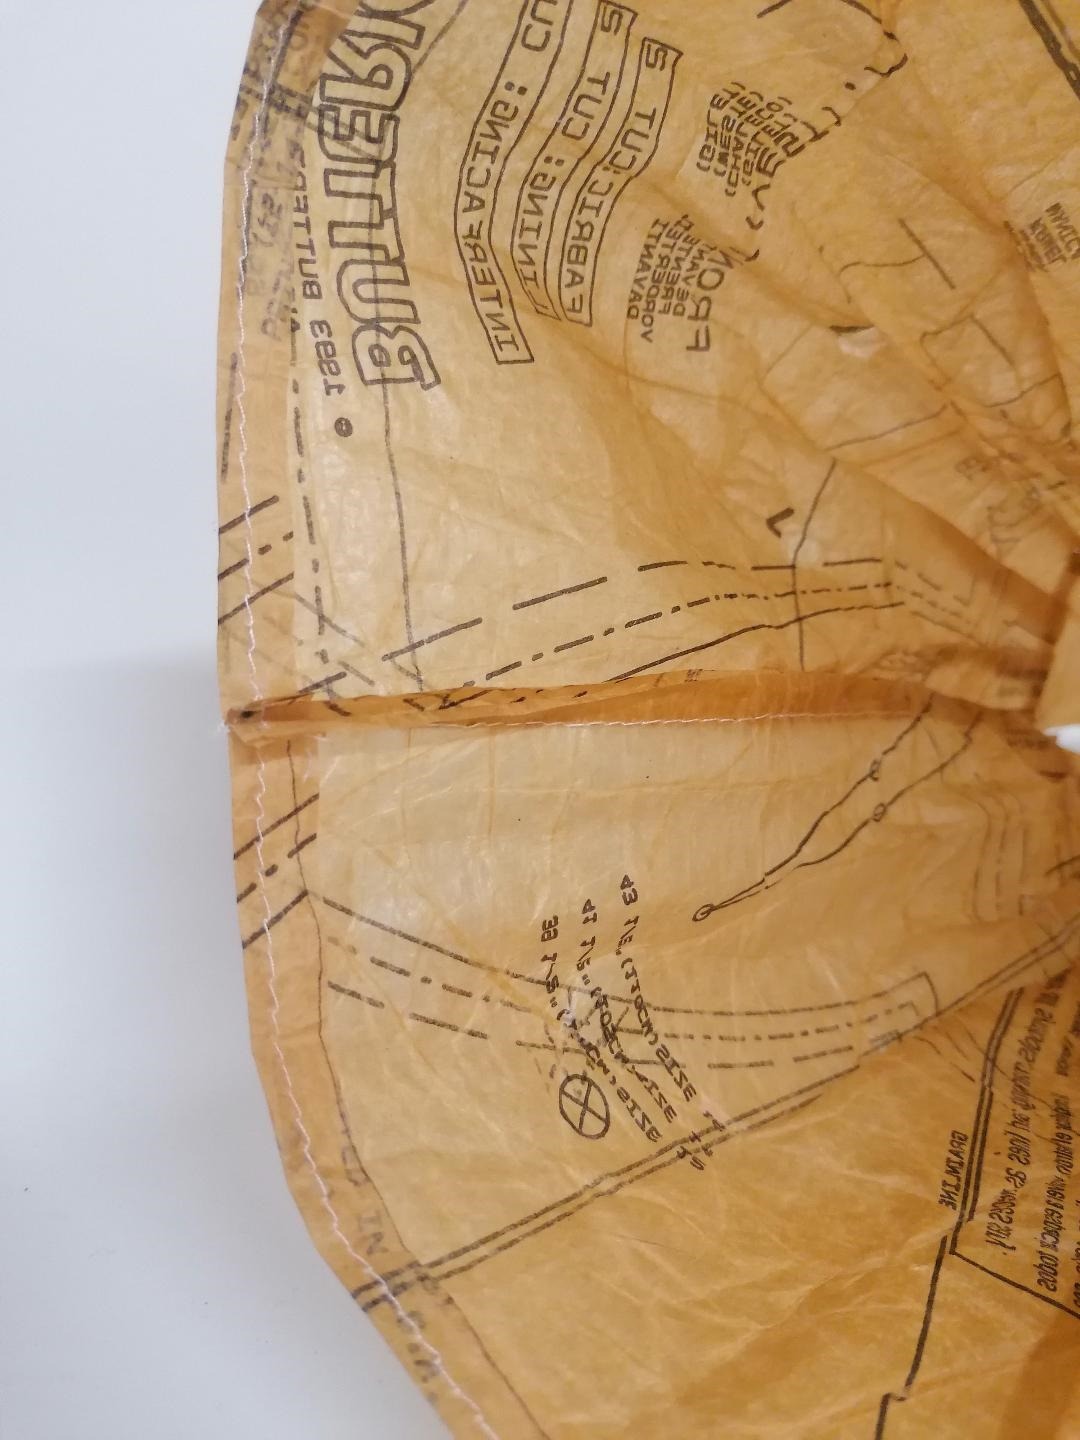
In this piece, I have added a hand picot stitched edge onto the pocket top and the collar front and back, as I love my work to be as gorgeous on the back as on the front, and to be viewed 360. Picot stitch is a detached buttonhole stitch, and adds an exquisite lace edge to the work, and further adds to the narrative of the piece. It takes me about 5 minutes per picot loop to hand stitch, so it took me approximately 25 minutes to hand stitch the pocket top and 2 ½ hours for the collar!
The collar and pocket were machine stitched onto the cut pieces before the dress was assembled for ease of stitching. The dress top front and back are placed face to face, and the two side seams and two shoulder seams machine stitched together.
People are always surprised that my garments are made inside out – as you would a real garment – and everyone in my shared studio space holds a collective breath as I do the next stage … because I then screw and scrunch up the piece to soften the paper so it doesn’t tear, and then I turn the dress top right side out.
For the skirt I, again, place the right sides together and machine stitch the two side seams. The (right side out) dress top is then placed inside the (right side in) skirt, ensuring the pocket on the skirt is the correct way up, so that the waist of the dress top matches to the waist of the skirt. I pin the side seams, to hold this in place.
I then find the middle point on the top front and also on the skirt front, adding in a small pleat here, and I pin these two points together. I repeat this at the middle back of the dress. I then repeat this all around the waist, easing the middle to the middle, adding a small pleat between the previous ones until all of the skirt is eased into the waist of the skirt top. I then run a line of machine stitch around the waistband to hold the pleats in place and attach the dress top to the skirt. I can then safely remove the pins and pull the dress top up through the skirt, so the whole dress is now right side out.
Again I do give the skirt a slight scrunch up before pulling through to ensure it doesn’t tear, and again everyone holds their breath in horror as they watch me screw up something I have spent so long working on!
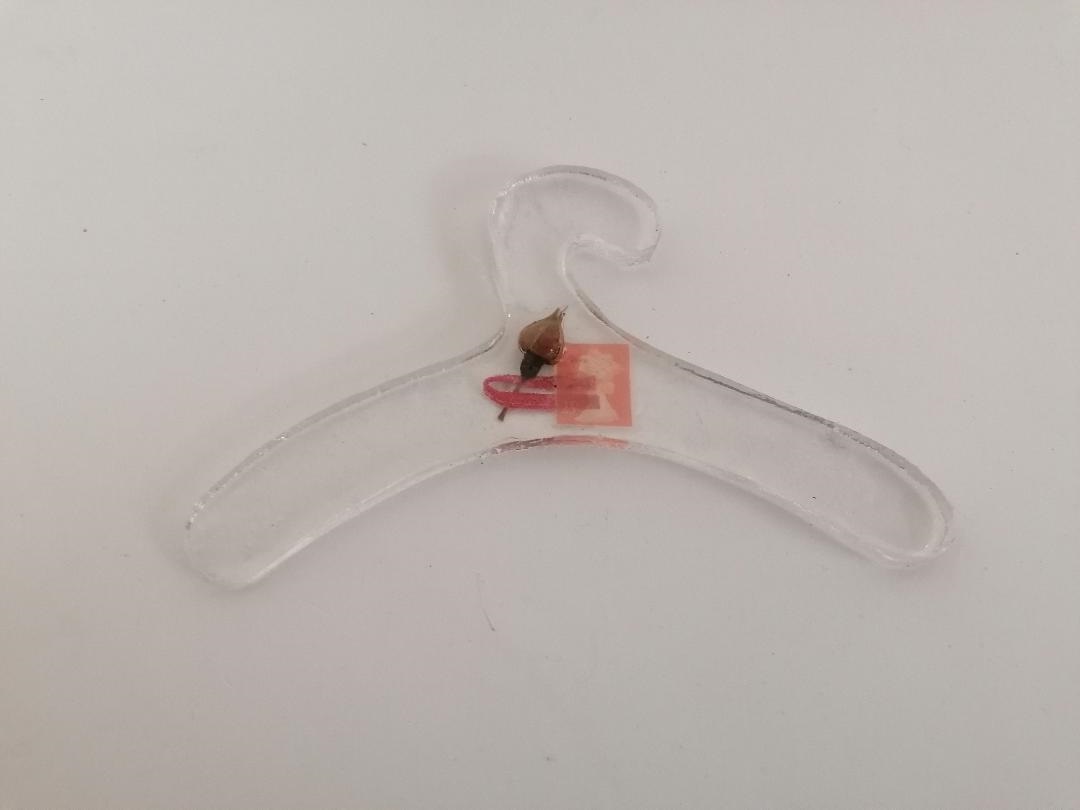
Lastly, I hem the bottom of the dress skirt, and the dress is complete. All of my dresses come with their own specially made resin coat hanger, encapsulating found objects that are either relevant to the narrative of the dress or picked by a commissioner.
What journey has the piece been on since its creation?
My dresses started off very simply, and an early version of this, without the picot stitched detail, used to be stocked by the V&A shop. I have also shown and sold copies of this dress all over the USA at exhibitions and at the trade show NY NOW in New York.
It proceeded to go out to boutiques and galleries all over the world and I have received commissions for many versions of it as a result and still get requests for new ones now. By making and keeping my own templates I can remake items to order, so what people get is very similar, but never identical, and therefore always unique….
For more information visit www.jennifercollier.co.uk
Do you feel inspired to stitch with paper? Let us know your thoughts in the comments below.
5 comments
Jilly
A brilliant tutorial beautifully presented. Thank you Jennifer for so generously sharing your techniques and enthusiasm. I feel an afternoon with paper treasures needles and threads beckoning.
Lois Igden
Looking forward learning something new!
Olga
This was very Interesting as I love stitching papers too. Till now I have avoided using glue, afraid it will brake all my needles. But often my papers tear. Will try thinned PVA. Thank you very much for sharing.
Christine
What a wonderful technique. I loved the narrative too on Jennifer’s journey to paper stitching. I feel inspired to take out my vintage patterns and give it a go.
I’m not a ‘practicing’ artist in any sense but will enjoy the challenge aps I like to ‘make things happen’!
Thanks
Mary McBride
I have seen similar dresses but without the glue base so they’d fall apart as people touched them. This technique is wonderful and I’m wondering what I will make as I have saved many of my patterns from when I made my own clothes (including wedding dress with a balloon skirt). Thank you for the inspiration!