Emily Jo Gibbs layers delicate sheer fabrics to achieve a delicate graphic quality in her artworks, with remarkable results. She makes sure to include the little details, whether it is the gnarled bark on a knobbly twig or the worn handle of a well-used paintbrush, as these give life to her work.
Emily builds simple yet intricate collages combining silk organza pieces with a minimalist hand stitching style. Read on for an inside look into her creative process, and how she made her artwork Beaker with Brushes.
Still life variations
How did this work come about?
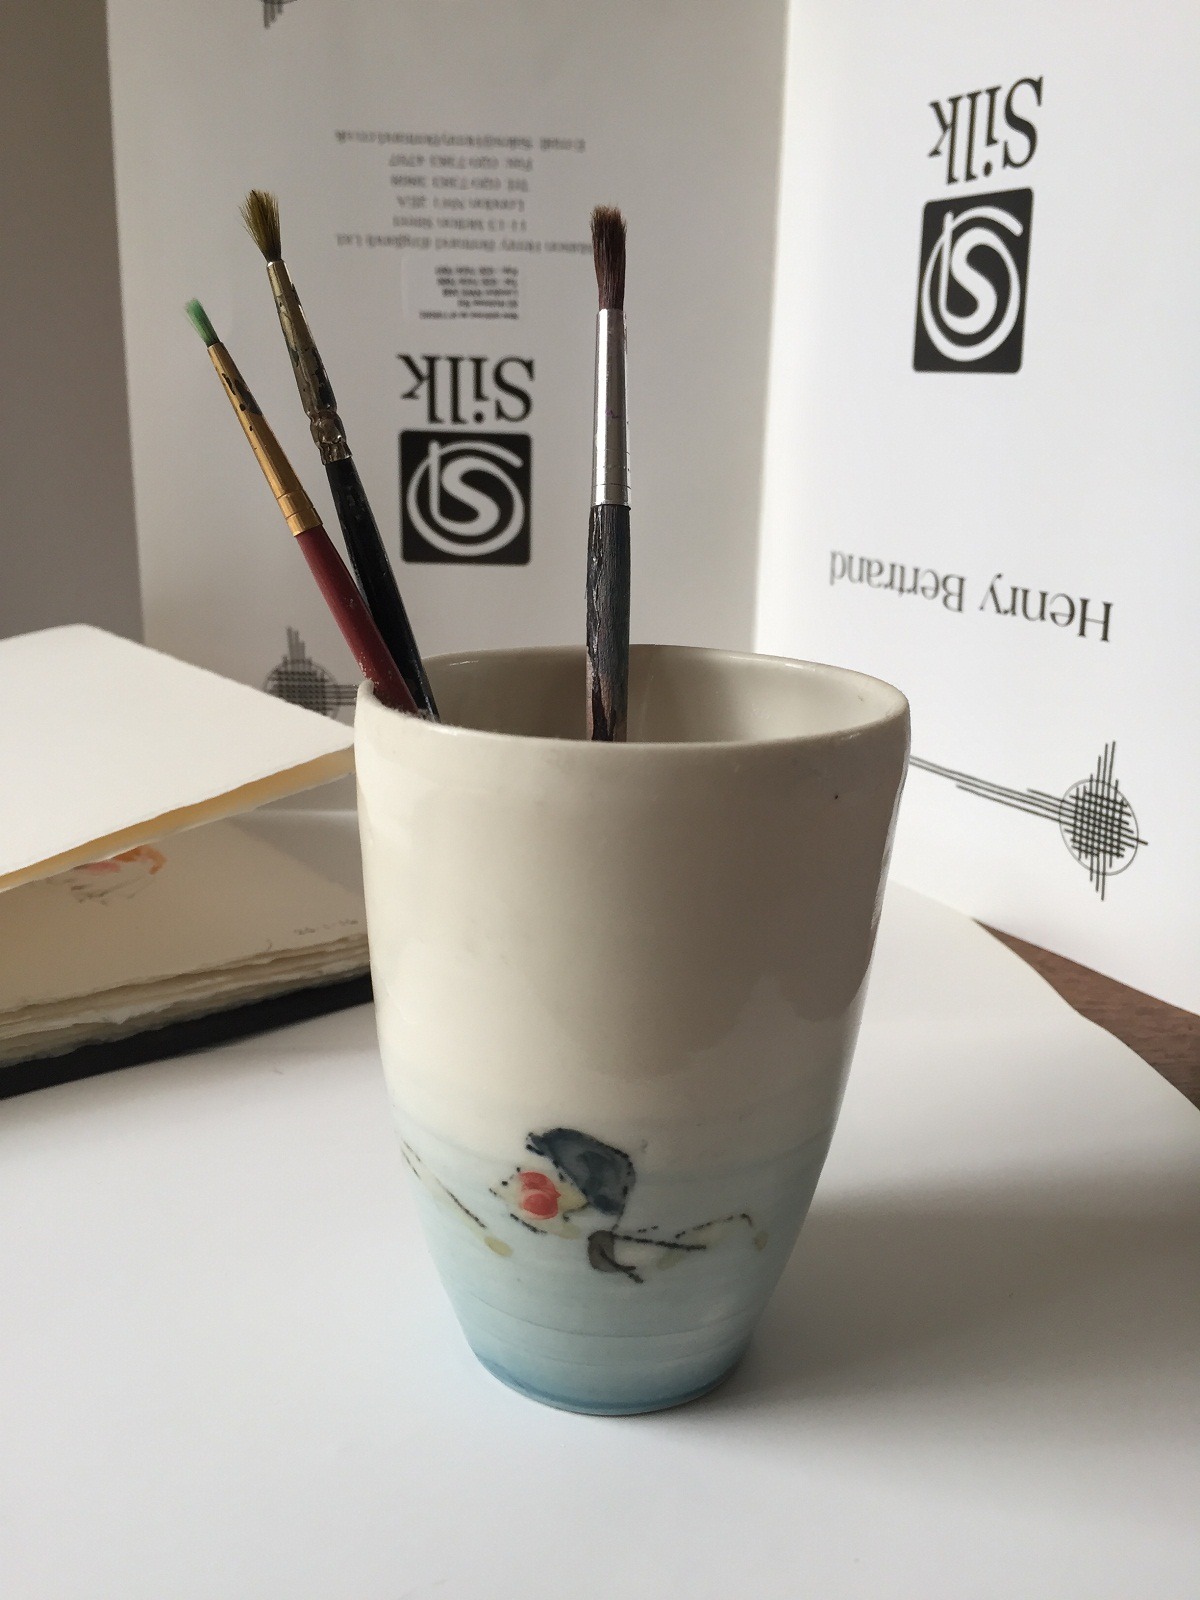
Emily Jo Gibbs: The creation of Beaker with Paint Brushes was the culmination of several things. I’d finished a collaborative project with Bridget Bailey that resulted in my Pincishion portraits project, which depicted people through their workspace and tools. And for several years, I’d also been making still life artworks of sticks placed in jam jars.
I was looking for my next subject and thought it might be interesting to depict another makers’ work. I am very fond of a particular ceramic beaker by Helen Beard, featuring swimmers. Sadly, it had been dropped and is no longer functional, but I felt that it would be rather nice to celebrate it in a stitched work.
The beaker is decorated with two swimmers, one on each side. One has a yellow hat, and the other has a blue hat. This gave me the opportunity to make a pair of similar still life works to depict both swimmers.
What research and planning did you do?
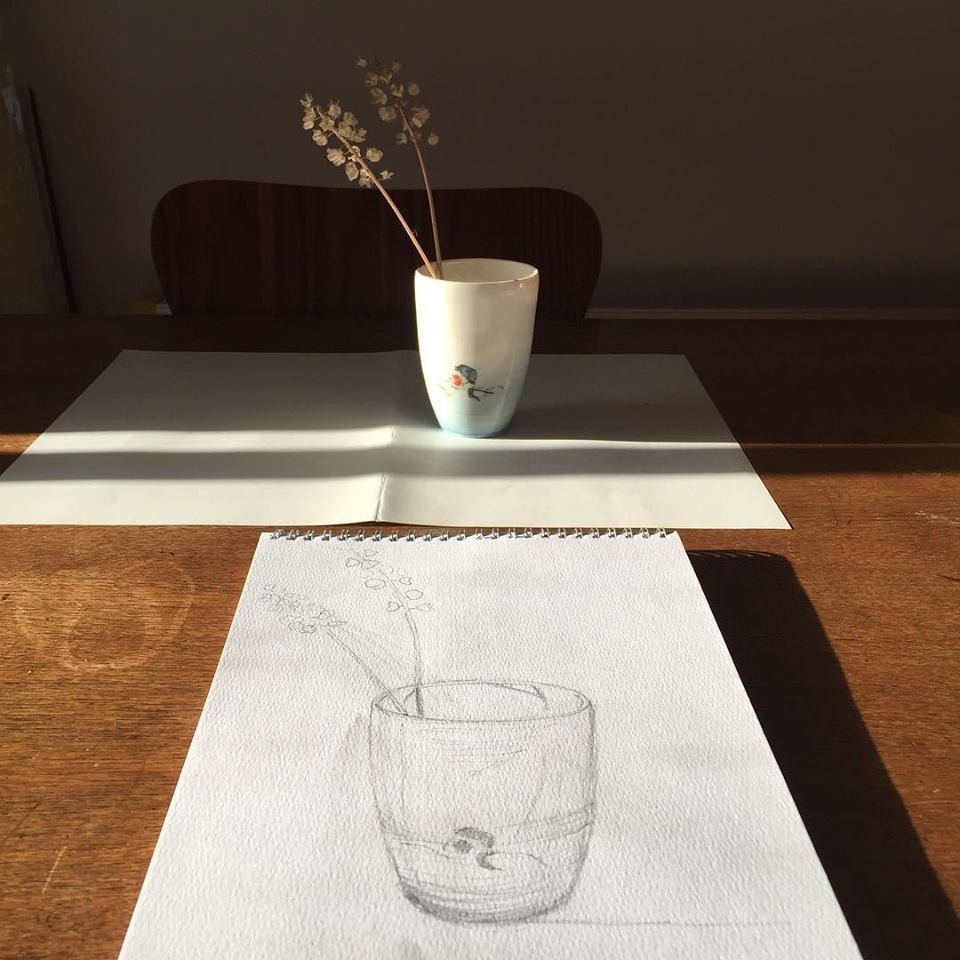
I made drawings and took photographs to help me develop the composition. I tried out various still life set-ups and liked my design ideas featuring paint brushes the best.
When considering my compositions, I pay most attention to the shape and tone of the different elements. Quite often, my still life works have a plain white background. But I wanted to bring more colour into this piece, so I arranged pieces of card and sketchbooks around the subject to create areas of light and shade that could be translated into coloured panels.
My intention was always to ignore the lettering on the card, but I really liked the tonal changes the pieces of card gave the background.
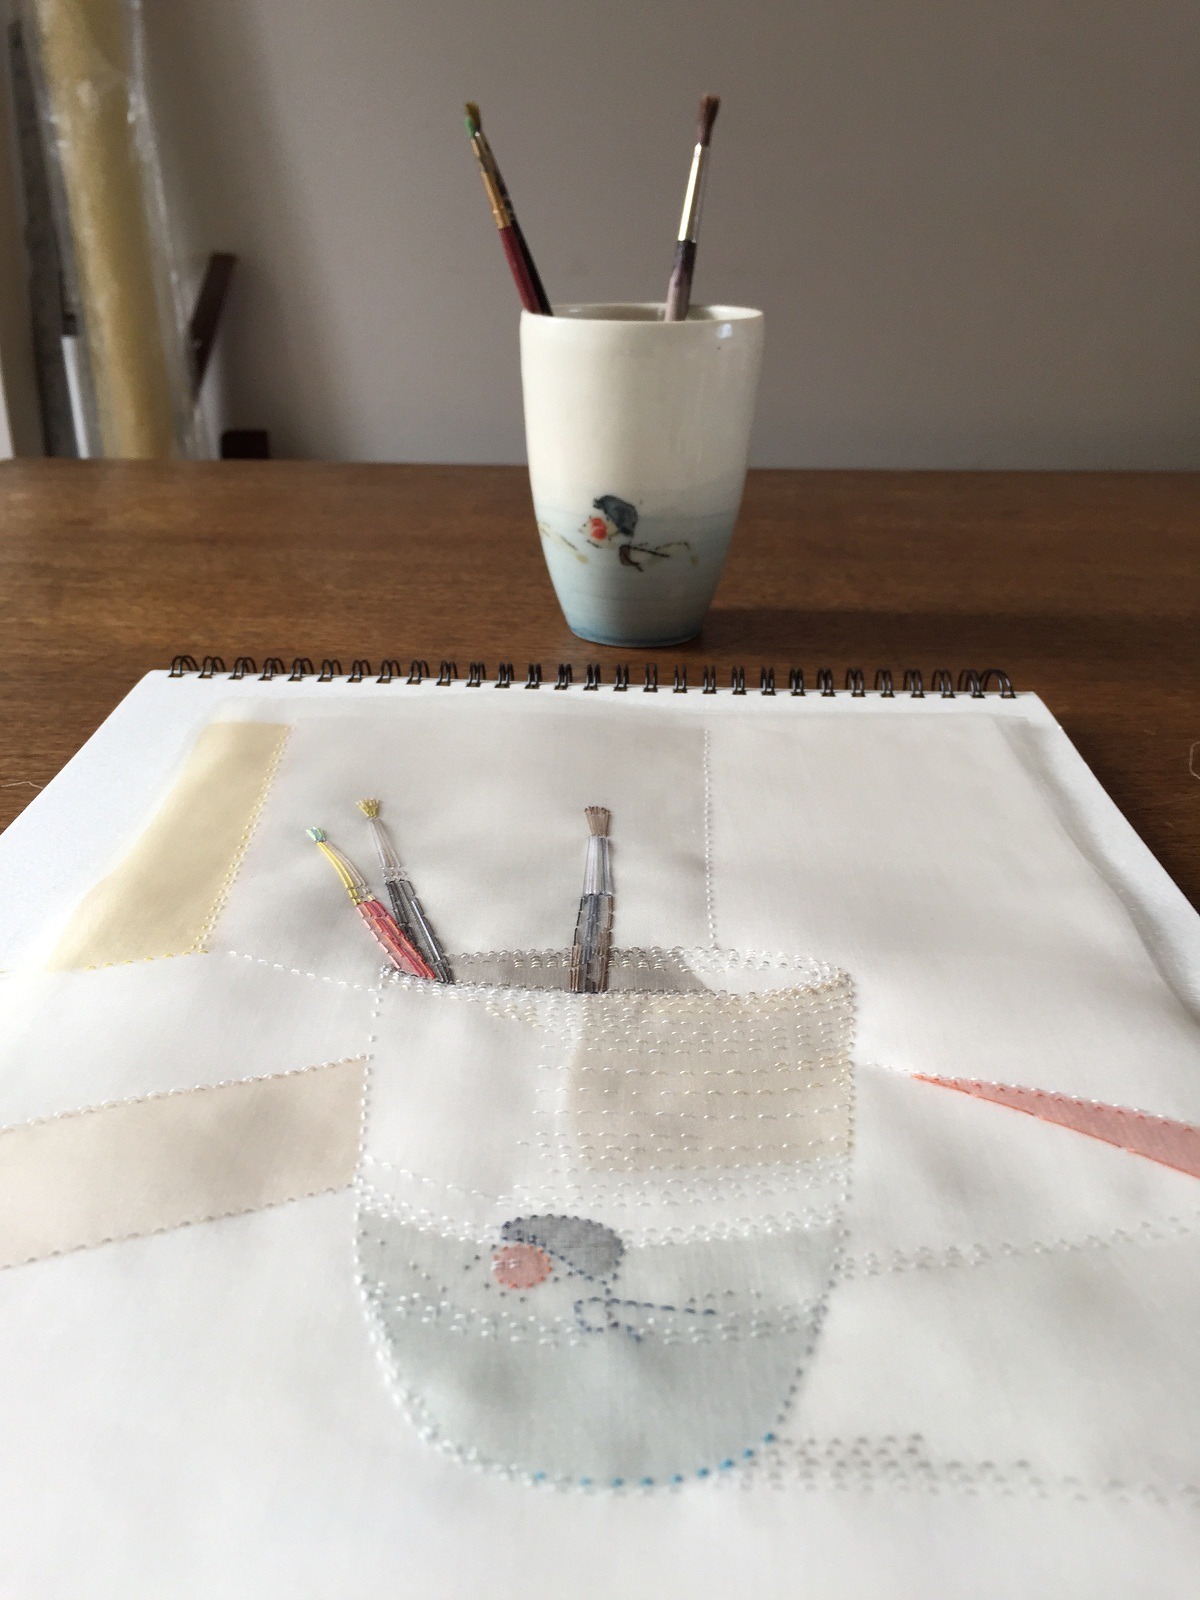
My desk has a big window to the left, which threw great shadows, not only on the desk surface but also inside the cup.

Balancing the design
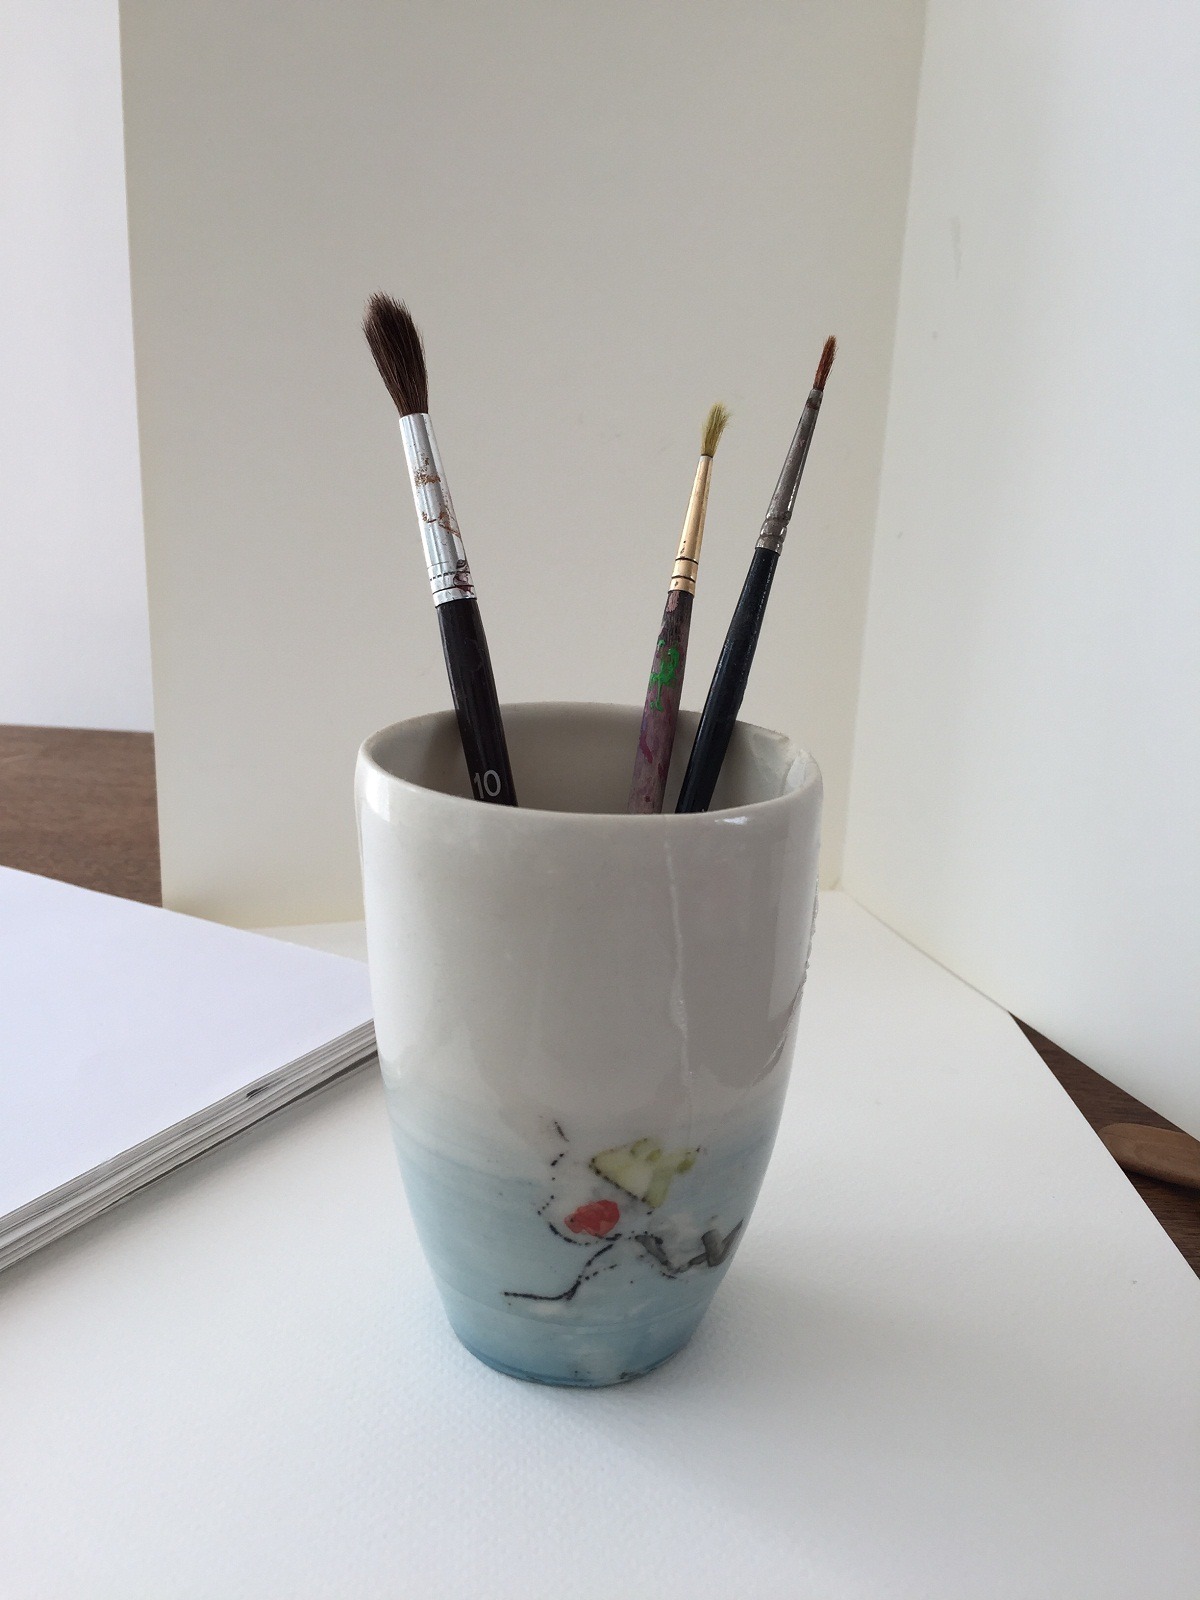
In the above image, the paint brushes on the right sit inside a light area and make a more confusing image. The green brush is also really close to the fold in the background card, and the page of the sketchbook lies in line with the rim of the beaker.
I preferred the two images below where I could see clear panels of colour – areas of light and shade that could be easily translated into a collage.
Artistic license
I had made a successful artwork showing the side of the beaker with a swimmer wearing a blue hat. I wanted to make a similar work showing the other side of the beaker, so I recreated the composition with different pieces of card and paper.
I used a bit of artistic license when planning the work: in one of my composition ideas there was a roll of yellow organza in the background. I decided to use that yellow organza for the swimming hat and echoed it in the left-hand panel, even though that area is bright white in the photograph.
I decided to include well-worn old paint brushes because of the shapes of the brushes and the interesting details of the chipped and peeled-off paint on the handles. The different coloured metallic sections and the stained bristles all add to their liveliness and hint towards their previous use.
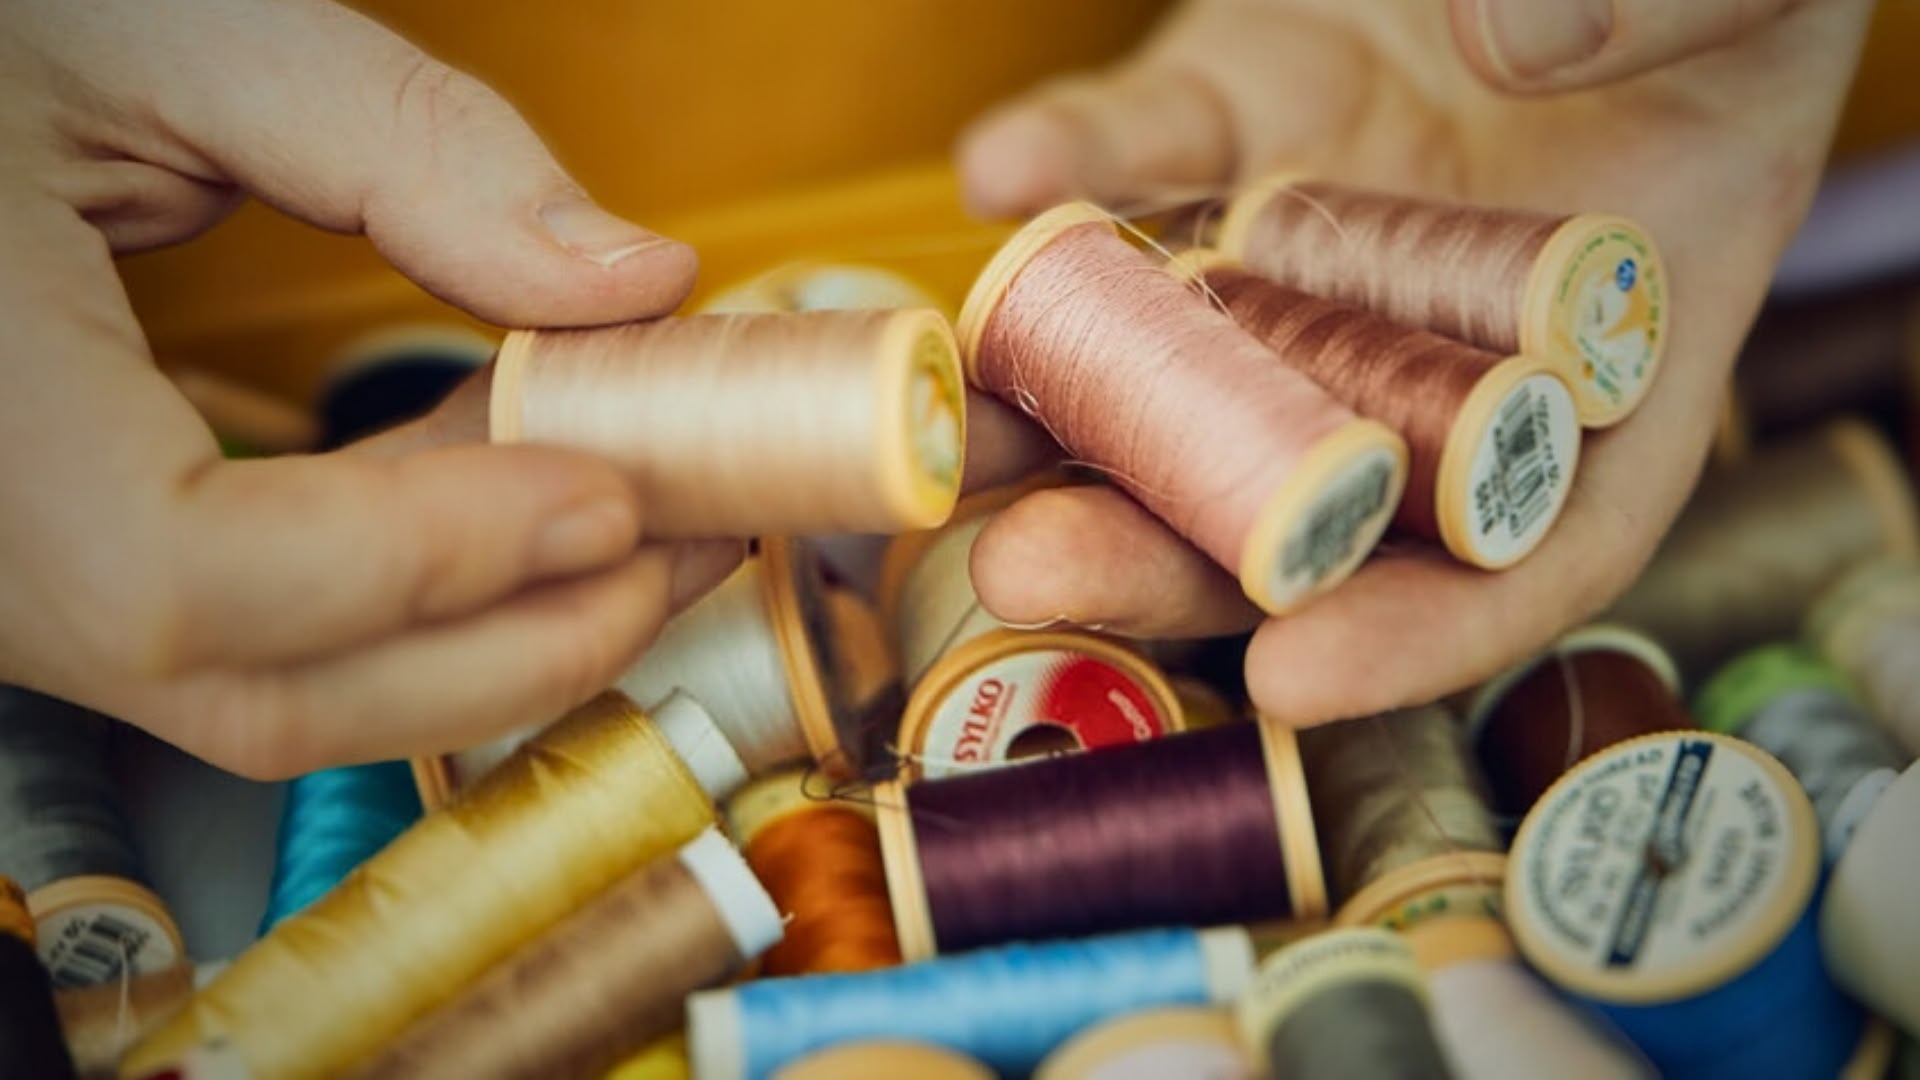
Fabric & thread supplies
What materials did you use in the work?
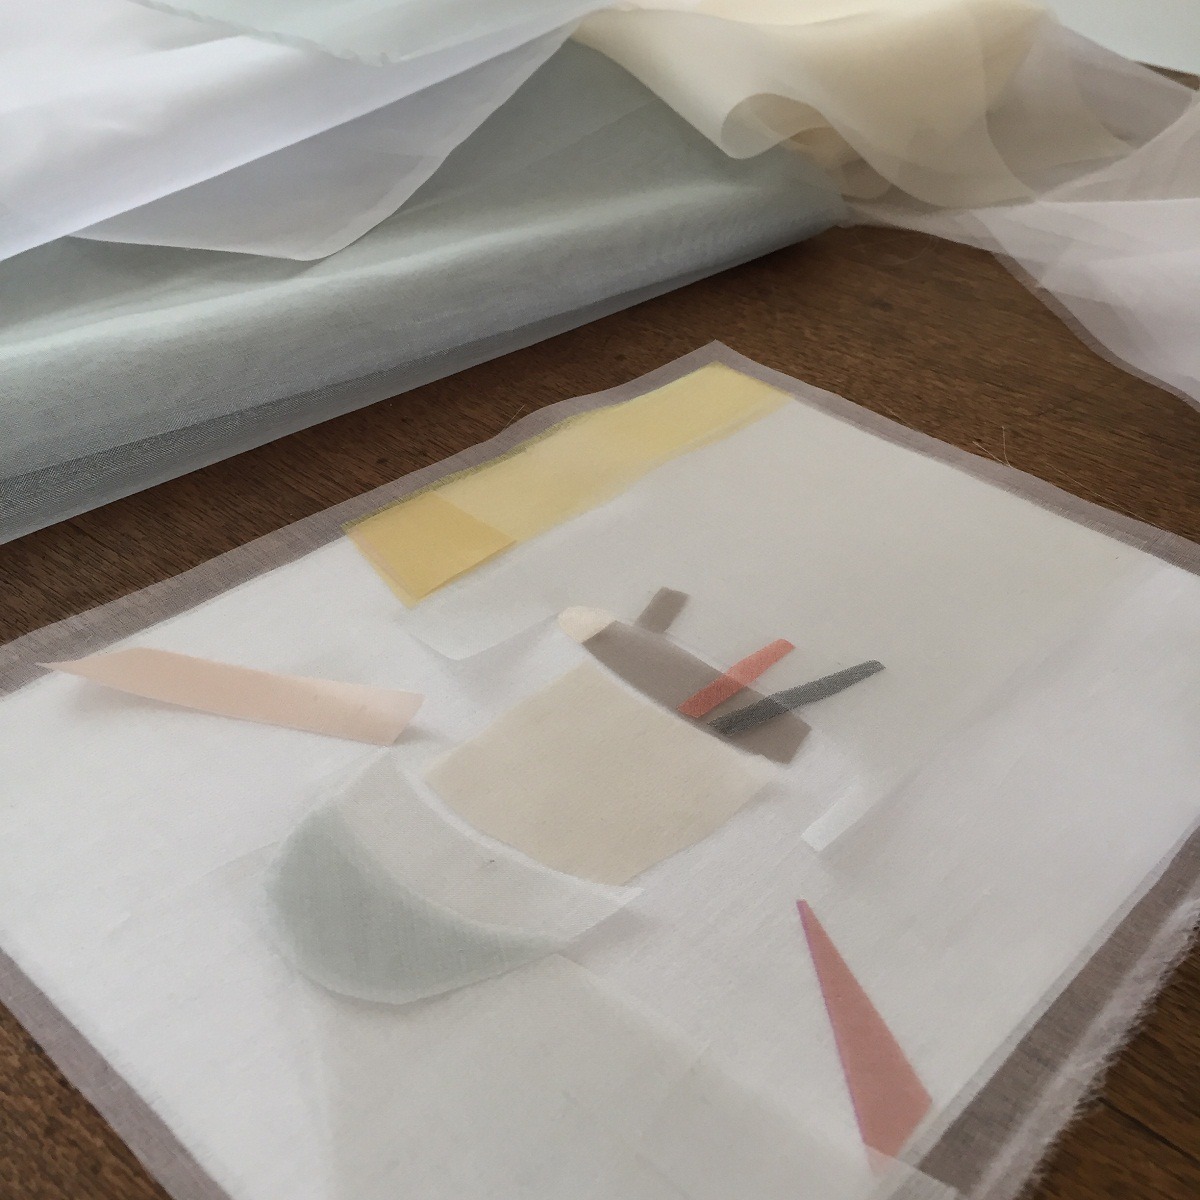
In all of my work, I collage layers of silk organza pieces onto a background of white linen. My previous career making couture evening bags left me with a lot of silk organza. I cut out the organza shapes and then worked out the composition by laying them out on some heavy white cotton that I had to hand.
I prefer to use linen as the base fabric for my works. The edges fray in a really satisfying way and linen gives the work a nice weight. I buy two types of linen from Whaleys in the UK; drill satin linen in optic white, a dense, heavy-weight, bright white fabric, and Novelle linen in white, which is a lighter, slightly off-white fabric.
You can buy silk organza online from places like Top Fabrics, who sell small lengths from 10cm. I stitch with cotton or poly-cotton sewing threads made by Coats, Gütermann and Sylko. Sewing threads are fine and delicate, readily available and offer great colour ranges.
What equipment do you use to create your work?
I actually use only a simple set of tools to make my work. I have large and small pairs of Fiskars scissors. As I am cutting through both paper templates and fabric, I maintain my scissor blades using scissor sharpeners from Fiskars. I use pins to attach my organza to the paper templates and an HB pencil to draw stitch marks on the fabric.
As my work is detailed, I use a magnifying visor like those used in the jewellery trade, which I received as a hand-me-down. And I use sharps or embroidery needles, size 8 or 9.
I don’t use a frame or embroidery hoop. Instead, I work with the fabric placed slightly off the edge of my dining room table.
Coordinating colour blocks
Take us through each step of the process…
I take a lot of care designing the composition using drawings, photography and then photocopying to make a to-scale template for the finished piece. I make several photocopies of the finished design, which become my templates for cutting the organza.
I cut a piece of linen and a piece of white organza to the size of the template, which in this case was about A4 (8″ x 11″). I frayed the edges of both pieces of fabric.
I laid the piece of white organza over the template and pin them together. I used a sharp HB pencil to make small dots. Every dot represents a stitch. I need enough dots to help me position my pieces, but I try not to add too many pencil marks. As I want my work to remain light and airy, I include more dots where necessary and fewer dots in the other areas.
Then, I looked carefully at the design to identify the areas that would be made of simple blocks of colour, areas that would be fabric and stitch, and areas that would be just stitch. Some of the colour block areas were be made from two or three layers of the same colour of fabric.
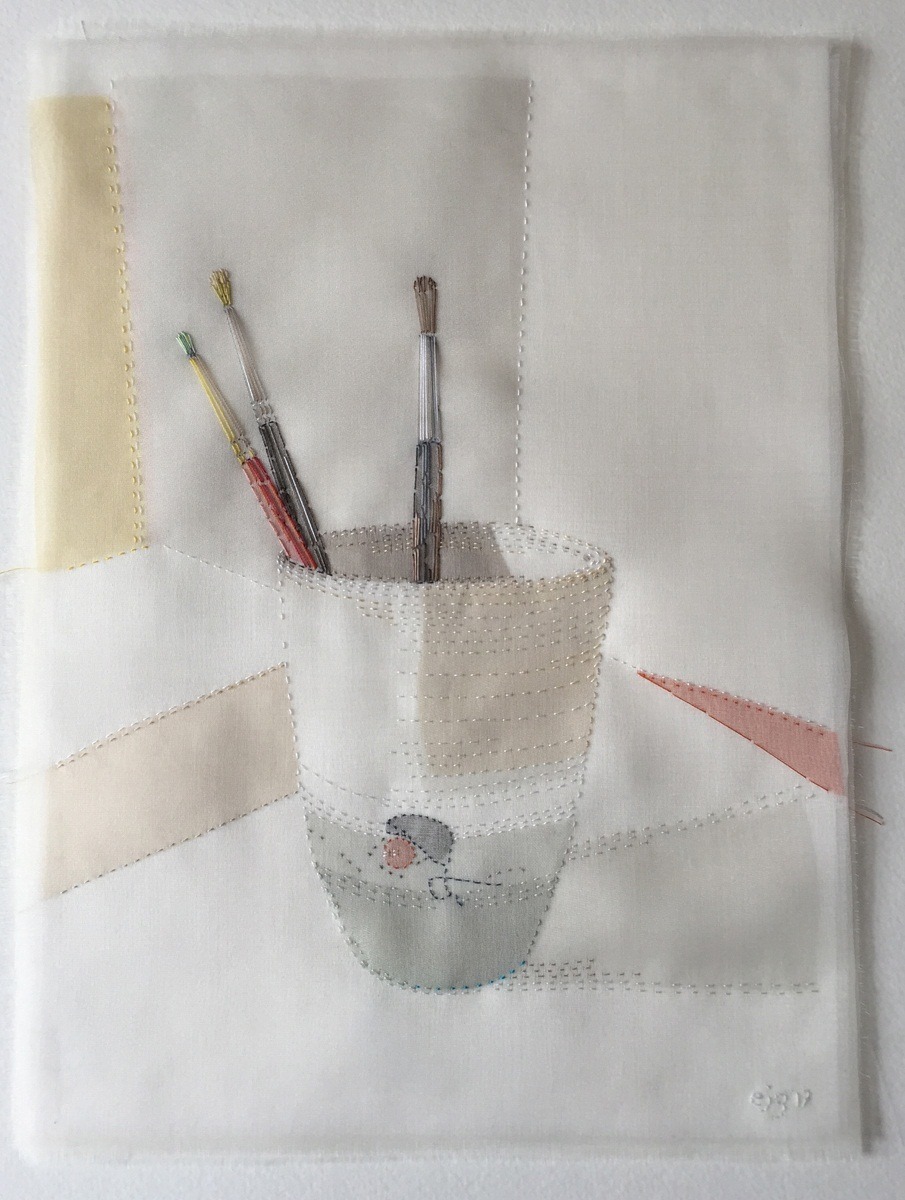
In the image of this artwork, the bottom of the beaker and the shadow are one piece of pale grey with two smaller pieces of pale blue laid on top. This created the gradient effect of the ceramic glaze.
The inside of the beaker and the brush handle on the left are the same shade, and I used double-layers of colour to create more punch or depth when needed.
Dealing with delicate fabrics
To accurately cut out the fabric shapes, I laid the coloured organza over my photocopy template, pinned it, and then cut out the shape through both the paper and organza. Having multiple photocopies was necessary, because some shapes overlapped.
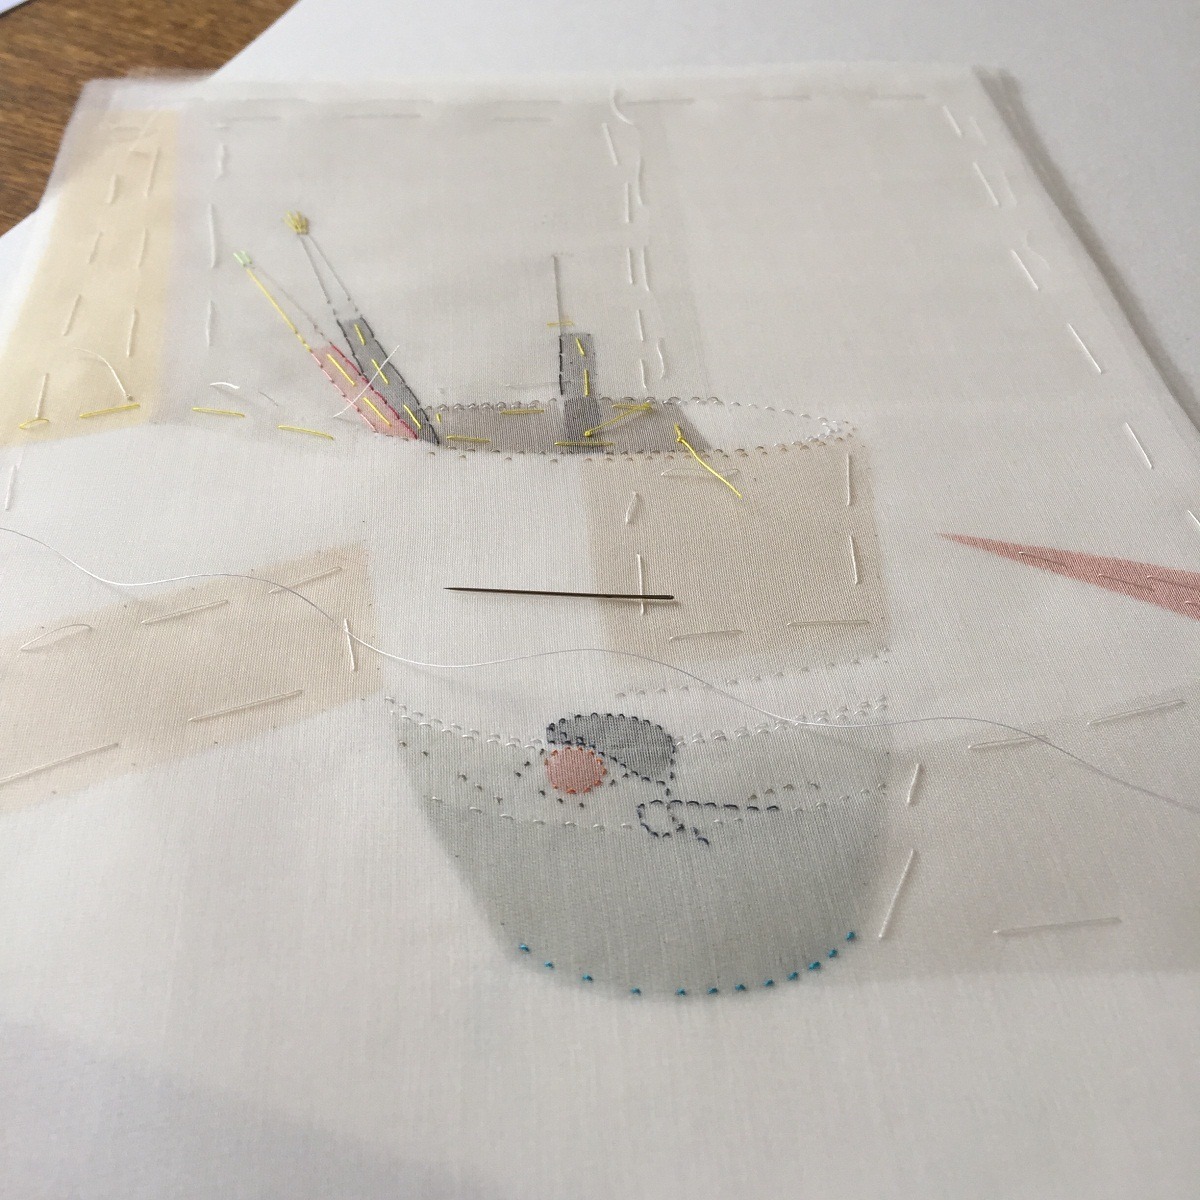
Once all the pieces were cut, they needed to be positioned under the white organza layer I had prepared earlier. I used the pencil dots to help me position each piece and then pin and tack everything in place.
When all the pieces were tacked onto the white organza, I laid the whole lot onto the linen background and tacked around the edge and across the piece to hold everything in place.
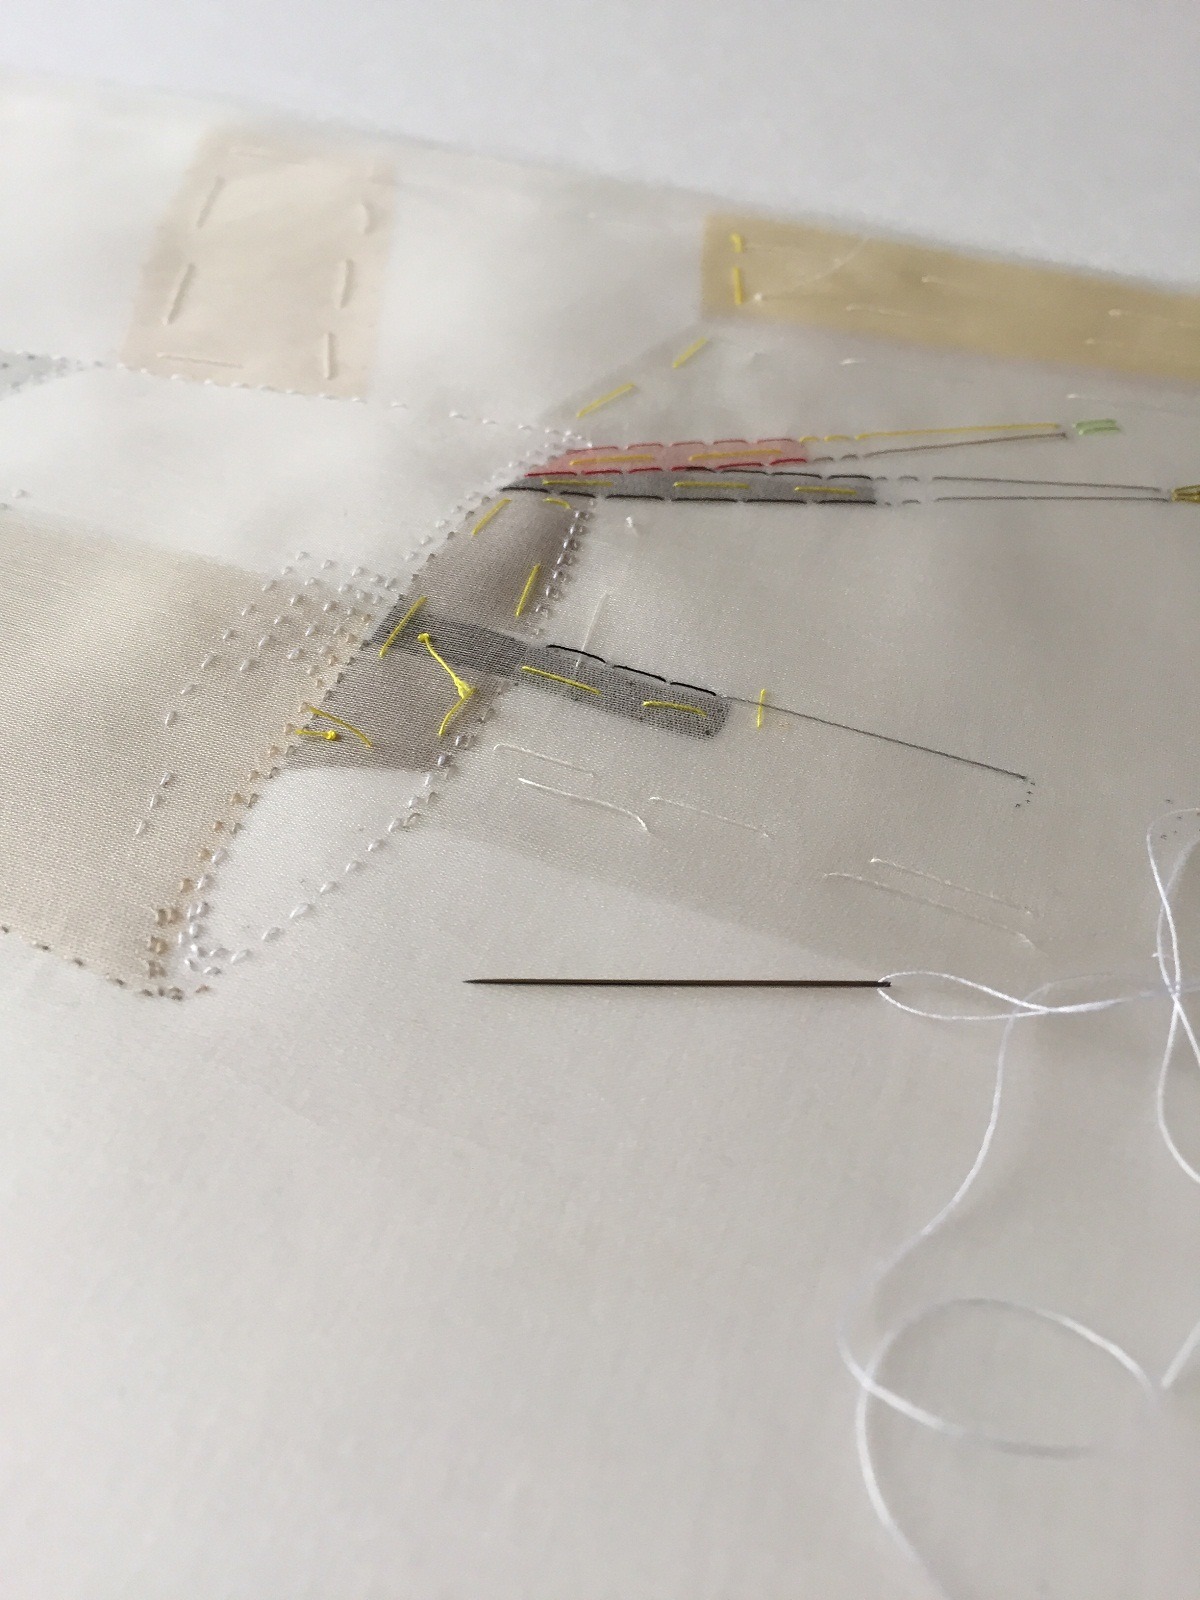
Stitching the details
There are two distinct disciplines in action when I make my still life works: creating the collage of organza pieces and then hand-stitching the details.
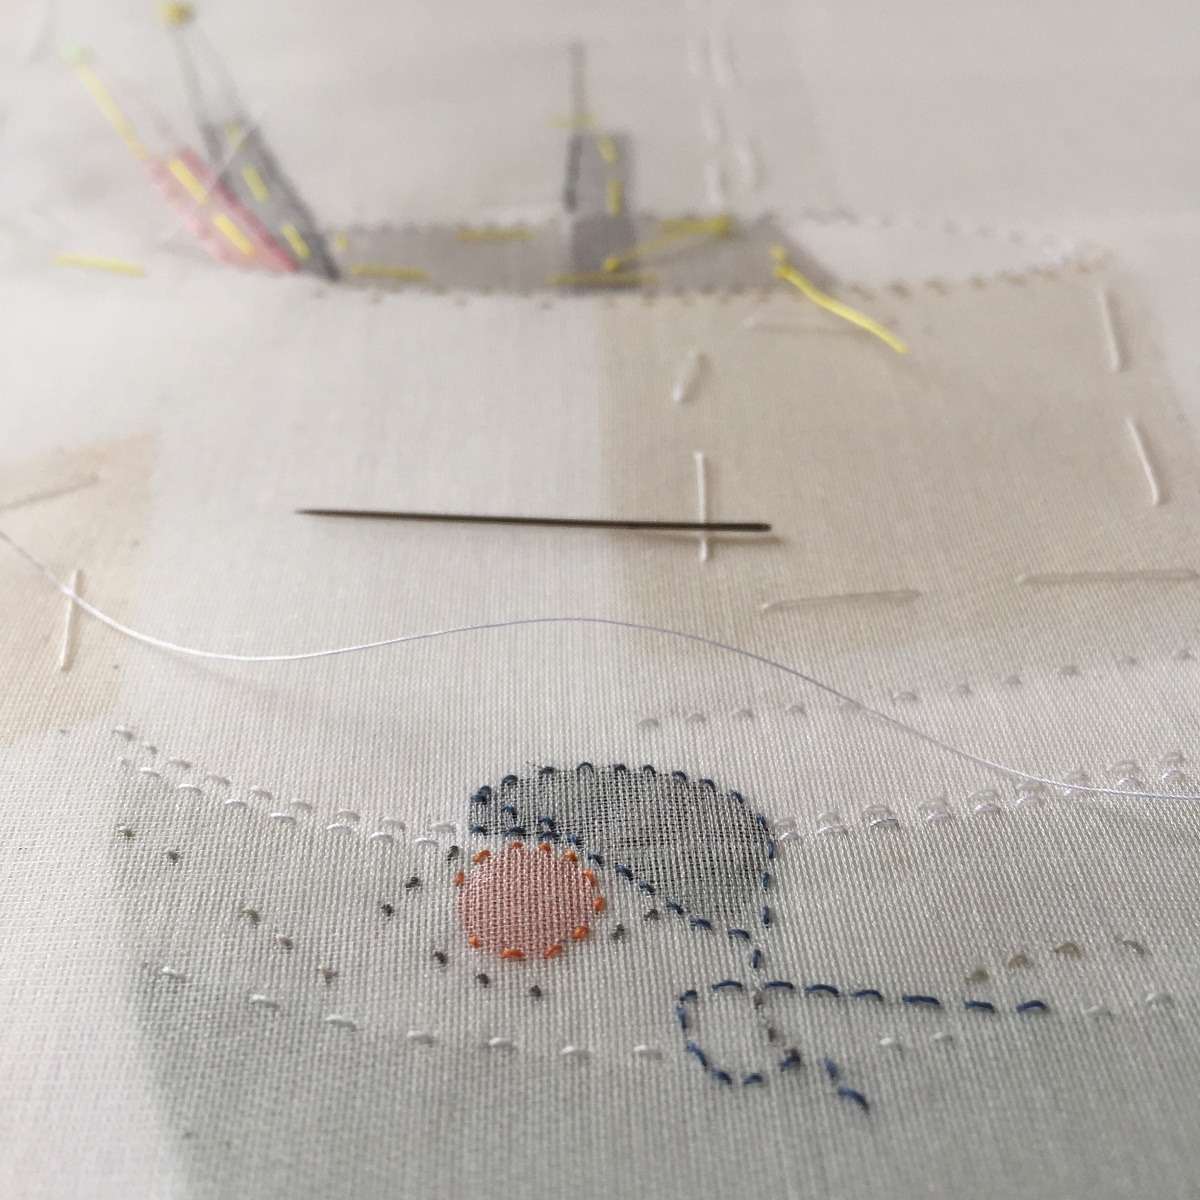
Observing my template and the actual still life set-up, I used short and long stab-stitches to describe what I could see. I moved across the whole piece stitching over the dots and alongside the coloured fabric pieces to trap them in place. I changed my thread colour often, even if meant I was only making one or two stitches in a particular colour.
I stitched the metal parts of the paint brushes using long stitches. I made simple pencil marks at the top of the wooden part of the brush and the top of the metal part. And, to describe the highlights, I used several long stitches of white thread next to one another.
After adding the stitching details around each piece of organza, I checked that everything was anchored and then removed the tacking in that area. This allowed the picture to gradually build up and develop until it was completed.
What journey has the work been on since its creation?
I originally made this work for a spring show at Mint Gallery, London in 2017. I have made many more still life works since, which can be seen on my website.


2 comments
Susan Bowhay-Pringle
Deceptive simplicity! I love the working of the paint brushes in this piece and the geometry of the background shapes. I work in silk and muslin, layering fabrics and the comment from Jackie T about pinning is true – all those pins just get in the way. A little loose tacking and patience serve better but the essential element is understanding the fabric.
Jackie T
I love the evanescence of layered sheer fabrics. Because of their tendency to misbehave I think I’ve been too heavy handed in pinning them down before they make a run for it, leading to more stitching than I need. Looking at Emily Jo Gibbs ‘Beaker with paint brushes’ I was charmed by the delicacy and restrained use of stitches. They say just enough, and let the qualities of the fabrics sing their own song. I resolve to have a different relationship with the materials I use in future.