Choosing the right display method can turn your textile art into a statement piece. But it can also be a huge challenge. The weight, drape, and delicate nature of fabric and thread demands techniques that protect your work while also showcasing its beauty.
Good news! We’ve lined up nine textile artists who are sharing their go-to display methods. You’ll be surprised by each technique’s simplicity, as well as the fact they don’t require expensive equipment or professional support. Each artist generously provides step-by-step instructions and tips that will help ensure your success.
No matter what type of textile art you create, we’re confident at least one of these strategies will help you display your work in all its glory.
Shadow box & floating mount
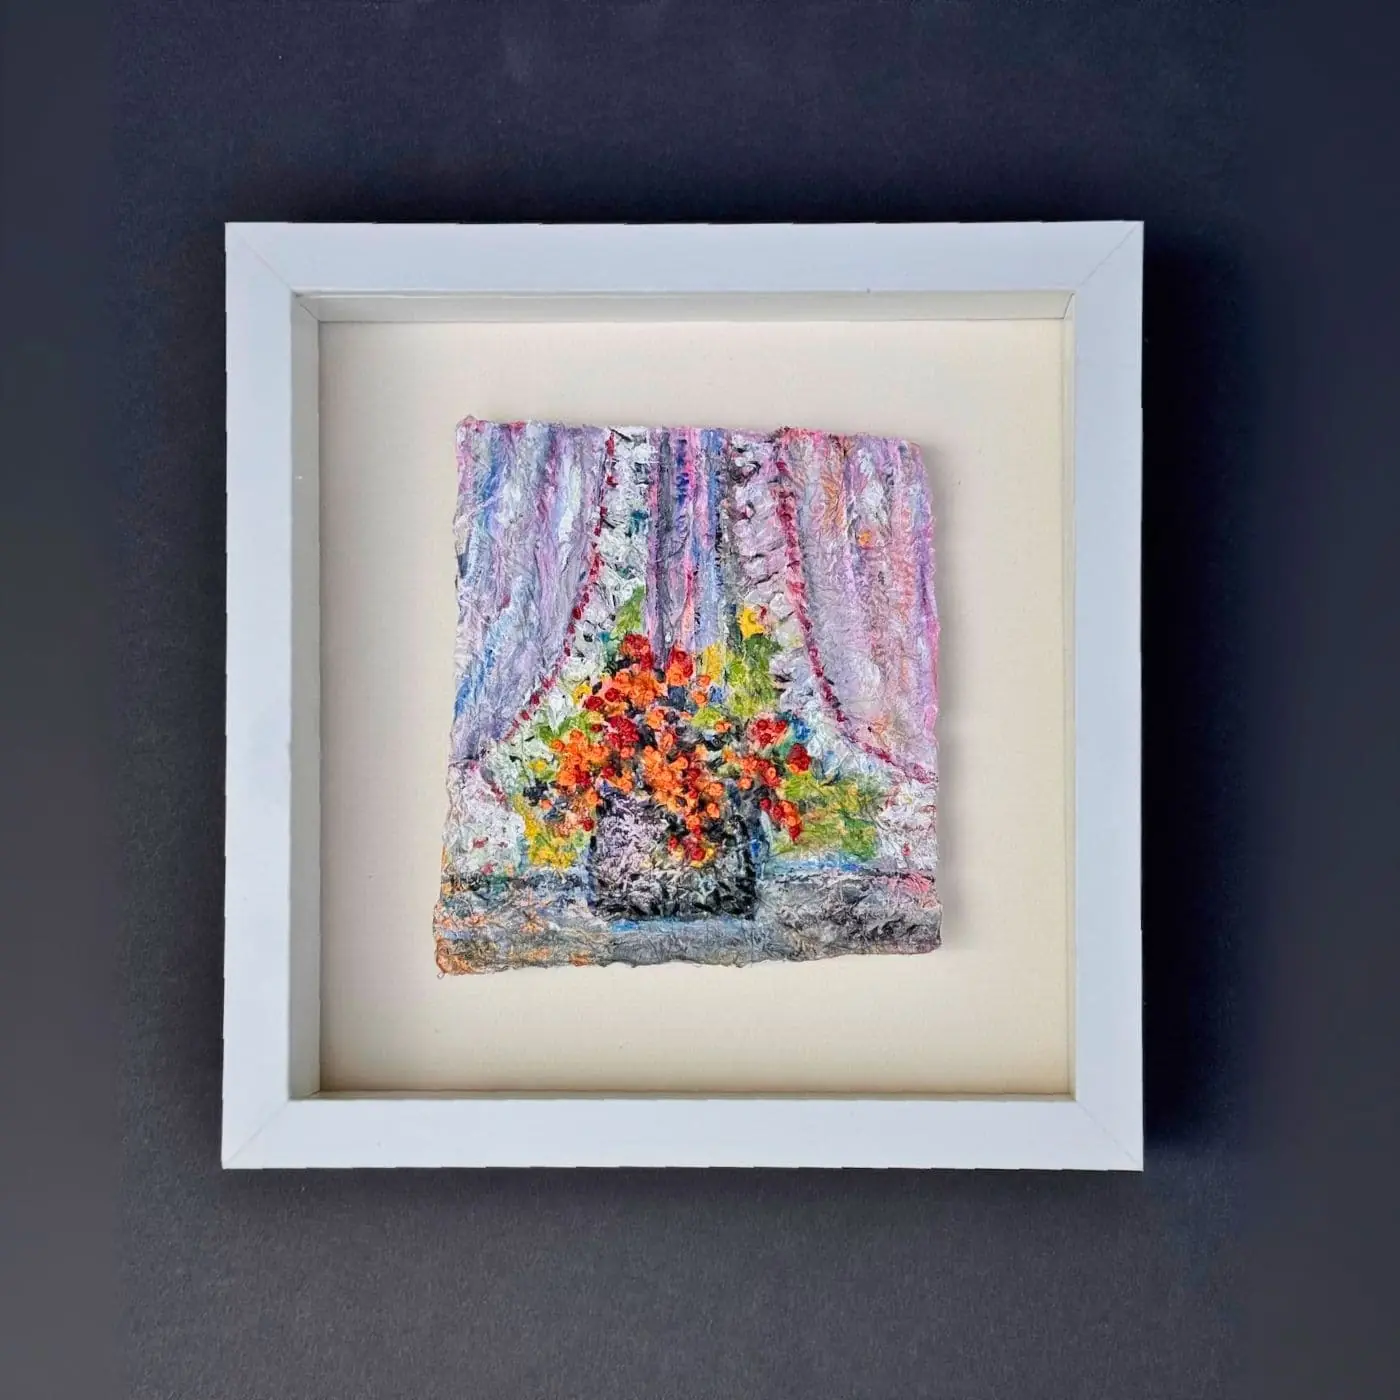
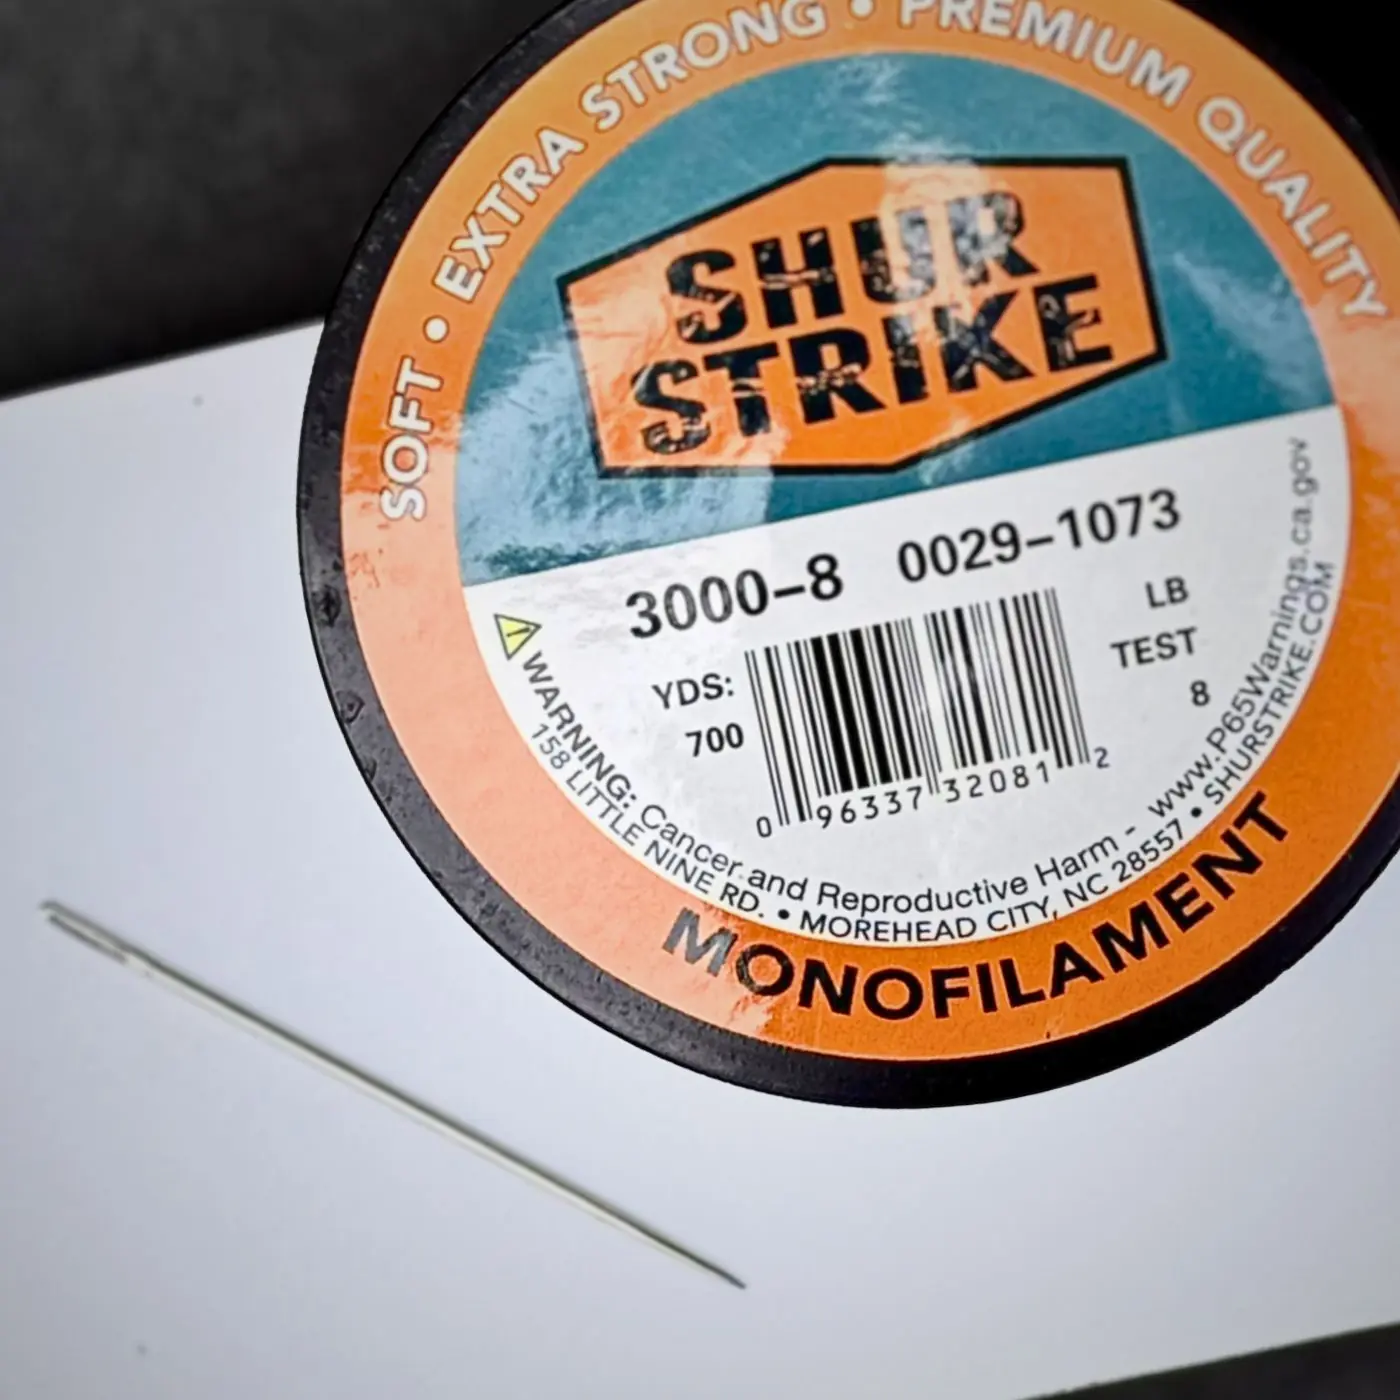
Mary Beth Schwartzenberger: Because my art is a combination of paper and fibre, I find an enclosed shadow box frame to be the most archival and effective way to display my work. I never glue my art to any surface. Instead, I float my work using foam core and fishing line which allows the paper’s uneven edges to become a design element.
First, choose a shadow box frame with an appropriate depth to allow your art to float without touching the frame’s back, sides or the glazing. The box’s sides can be made of mat board, foam core or plastic strips.
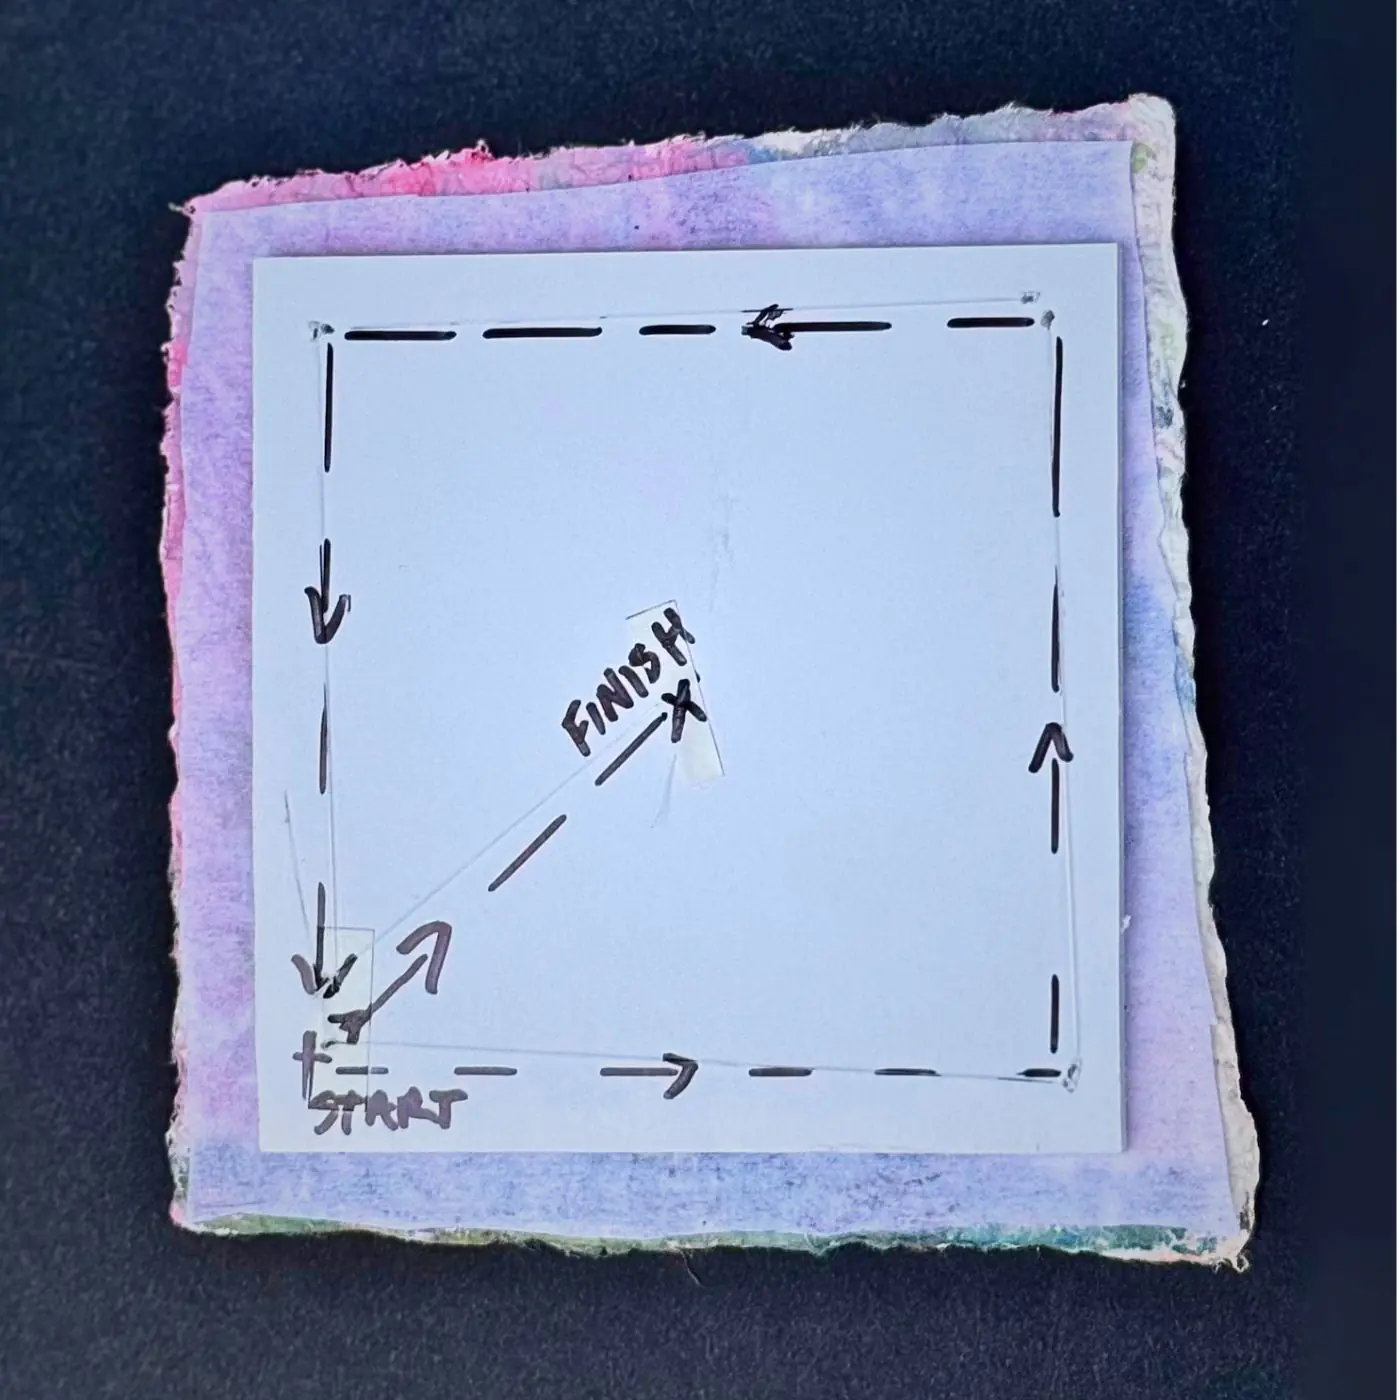
Next, cut a piece of foam core that’s at least 3cm (1″) smaller than the artwork’s perimeter. Then stitch the artwork to the foam core using fishing line. Because the art is stitched rather than glued, you can safely remove it by simply cutting the fishing line stitches.
The foam core is then glued to the float board that fits inside the frame. The proper fitting sequence is glazing, shadow box sides, float board with media and then close.
I always encourage artists to work with a professional framer. While it may cost more, it will pay dividends in quality and longevity. I also suggest letting a framer know you’re a willing partner in the process. Most will respect your interest and offer suggestions for various techniques.
For smaller works, many frames with built-in shadow box sides or matting are sold online. But again, if your project is particularly important, I think using a framer is your best route. You’ll have a high-quality frame and a wider choice of matting and glazing. A beautiful work of art deserves a beautiful presentation.
Mary Beth Schwartzenberger is based in Los Angeles, California (US). Her work has been featured in galleries and museums throughout the US. She has also been featured in a variety of publications, including Fiber Arts Design Books 6 and 7 and Cloth Paper Scissors magazine.
Bobbin & scroll
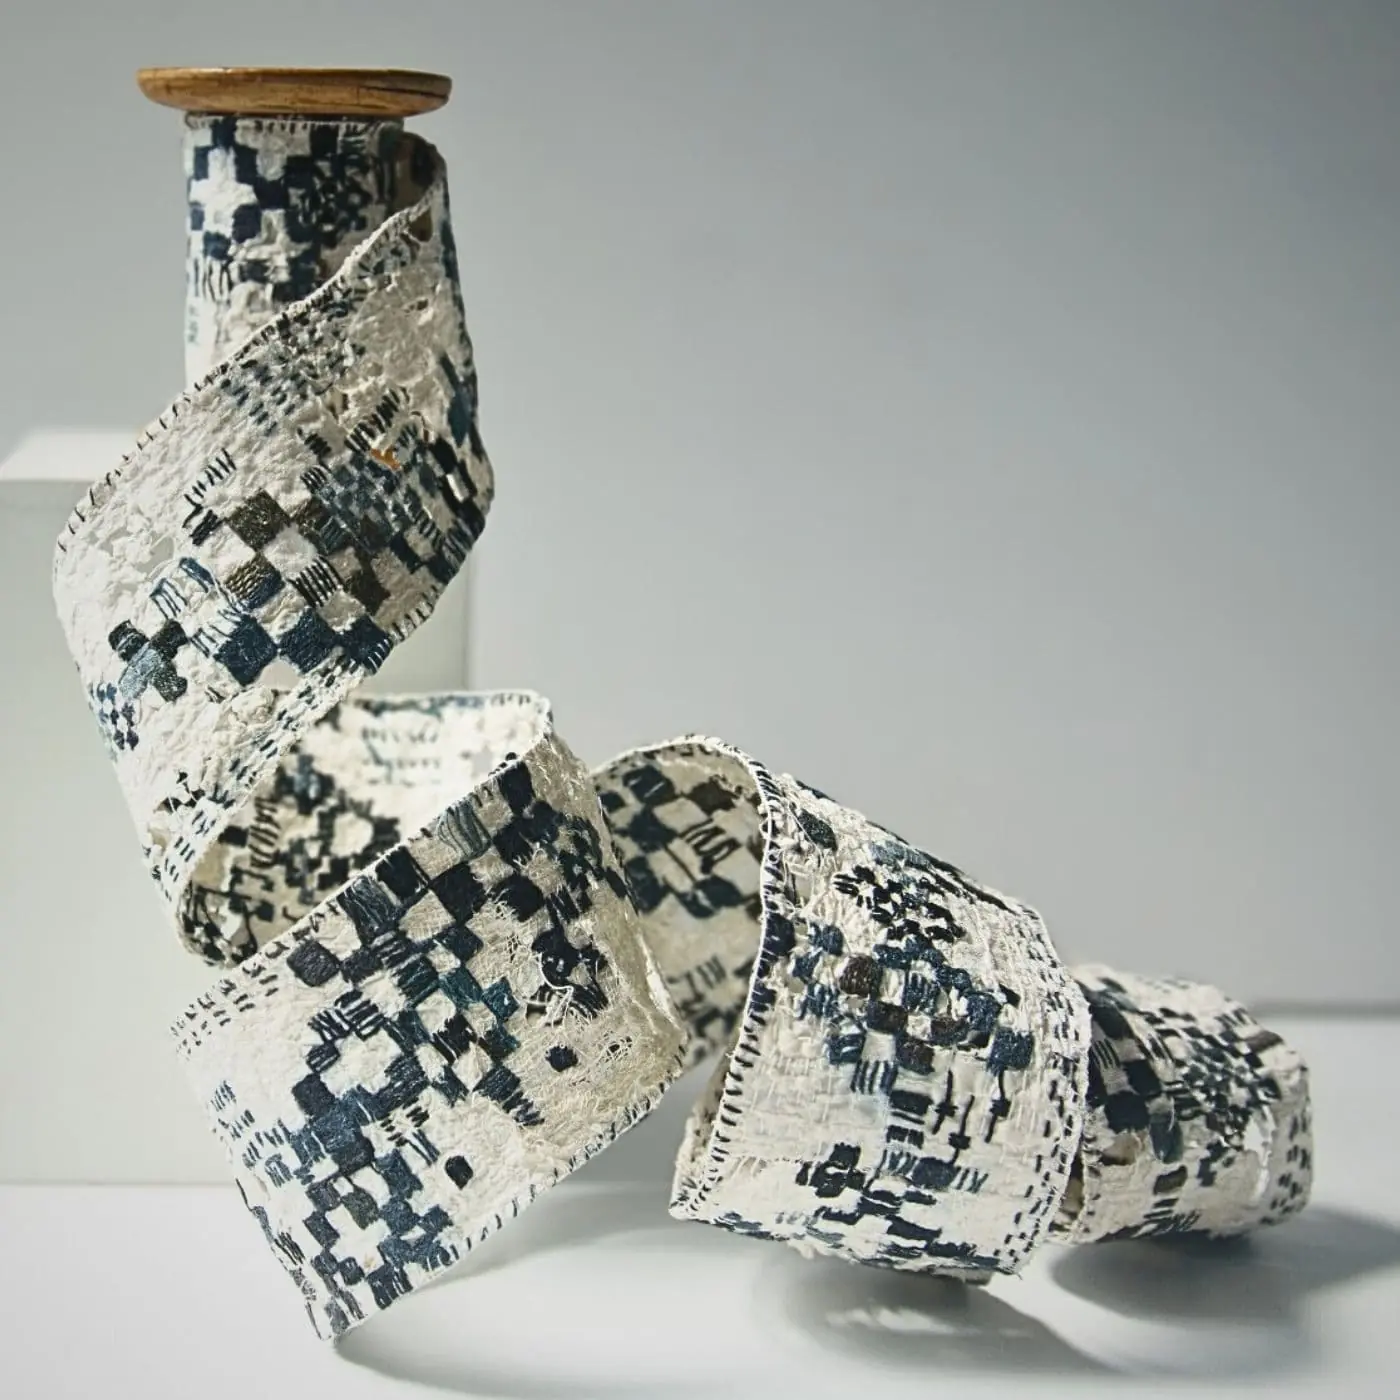
Gwen Hedley: I enjoy the flexibility of scrolls, which can be used with a spool, bobbin or other tubular item. They can be displayed as a freeform relief work or hung on the wall by passing a small rod through the spool holes, protruding just enough to carry a short hanging thread.
The height of your spool determines the width of your scroll. Your spool should be a bit longer than your stitched scroll. This makes it easy to wrap the scroll around the spool. In my example, my spool is 9cm tall, and my scroll is 6cm tall.
You’ll also need a short length of 2cm (1″) Velcro to attach the scroll to the spool. Cut the Velcro to fit across the end of your stitched scroll and then sew the hooked side at the very end of your scroll on the right side. If you don’t want to stitch it onto your scroll, sew a small fabric extension at the end of the scroll (as shown in the first image below) and stitch the Velcro onto this instead.
Place the fuzzy piece of Velcro onto your sewn-on Velcro strip. Next, wrap the scroll just once around the spool and mark a line on the reverse side where the Velcro now sits invisibly on the back of your work (marked by a pin in the image below).
Peel off the fuzzy half of the Velcro and stitch it firmly into place on the reverse of the scroll, just inside your marked line. Stitch around all sides of the Velcro.
You’re now ready to wrap the end of the work tightly around the spool, pressing the Velcro strips firmly together to hold the end securely in place. Then you can wind the rest of your scroll onto the bobbin.

To display your scroll on the wall, fix the spool to the wall at a jaunty angle using a picture hook and thread. Then arrange your unwinding scroll in any way you wish, remembering to keep the dimensional quality. Sticky fixers or the like can be added to the back parts that touch the wall.
Alternatively, you could sew a thin wire at each side of the scroll and manipulate it into interesting undulations.
My favourite method is to stand the spool on a small plinth, allowing it to unwind and tumble across the table. The longer the scroll, the better. I have a small box to contain each spool for storage and transportation, and this, in turn, can become a plinth for the piece.
Gwen Hedley is based on the Kent coast in the UK. She teaches and exhibits across the globe and is a long-standing member of the Textile Study Group. She has also written Drawn to Stitch (2010) and Surfaces for Stitch (2000). Photo of Restoring by Melanie Chalk.
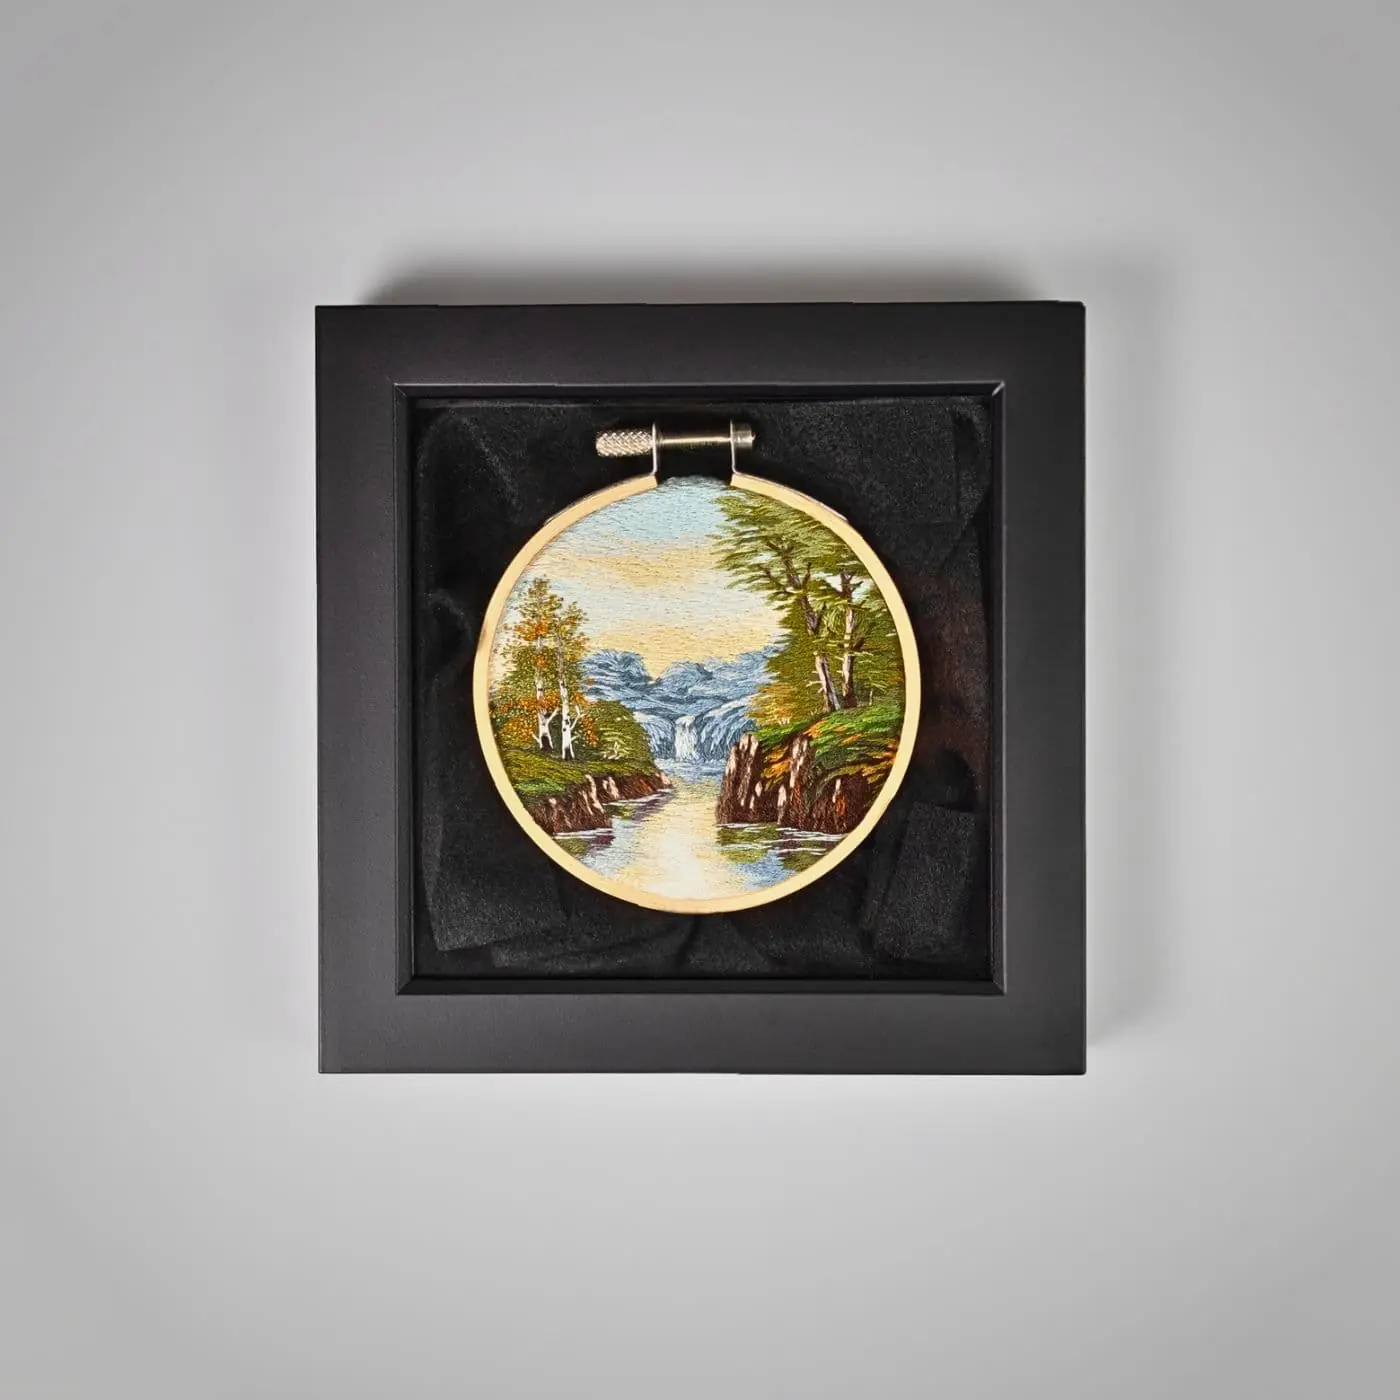
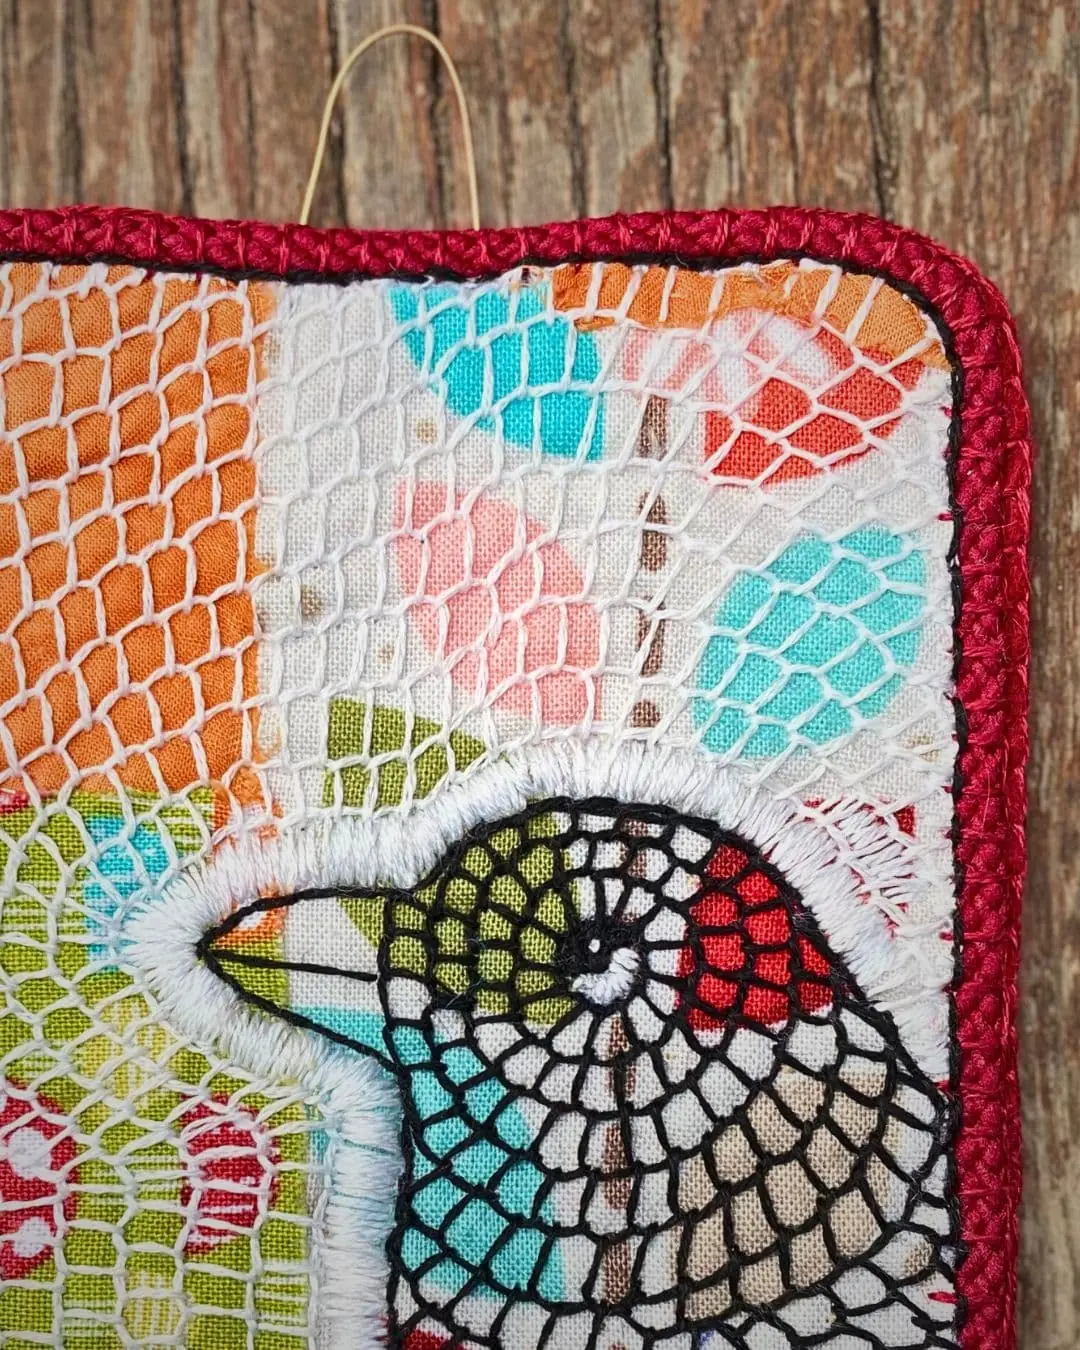
Hoop in a shadow box
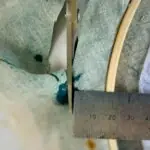
Cassandra Dias: This shadow box technique allows me to display and protect an entire embroidered hoop without having to mount, glue or sew anything into place. All that’s needed is a completed and hooped artwork, backing felt and a shadow box.
Choose a shadow box with a width that allows at least a 1.5cm (½”) space around your embroidery hoop. The inner depth of the shadow box (the space between the glass panel and the backing board) should be around 2cm (¾”), so your hoop can be sandwiched between the glass and the felt before the backing board of the frame is set in place to hold it all together.
Once you’ve selected your shadow box, wipe down the inside of the box and glass with a damp paper towel and let it dry. Place your finished embroidery face down on the centre of the glass.
Cut some strips of felt and scrunch them up to fill the spaces surrounding the embroidery. This gives the effect of having the hoop nestled into a bed of fabric. Place a square piece of matching felt over the felt strips and your hoop. Lastly, add the backing board and close the frame.
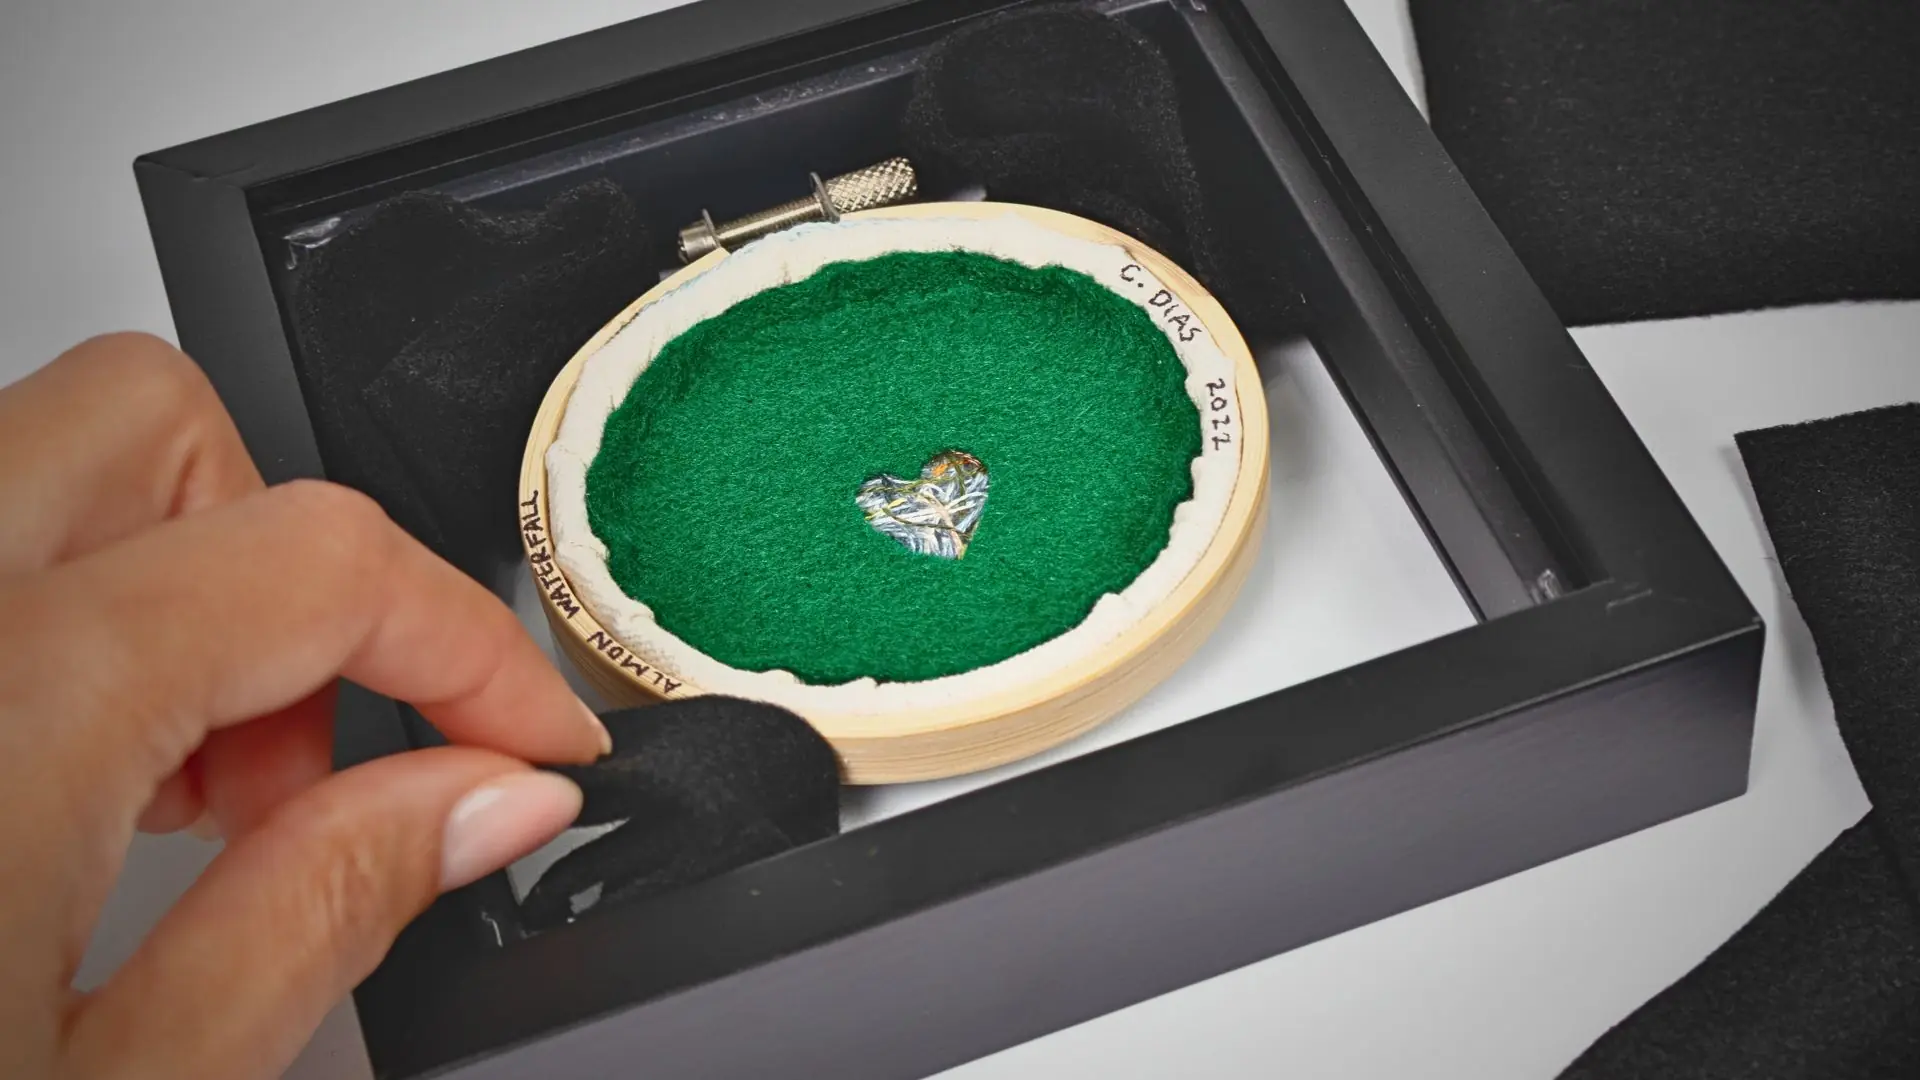
This technique works best for embroideries that have a level surface. If your work has a lot of raised stitching, the glass panel will flatten the stitches. But for flatter works, this technique is a great way to protect your art from dust and other environmental elements. You can choose to hang your work on the wall or prop it up on a flat surface.
Cassandra Dias is based in Southern California, USA. She started to embroider in 2020 as a hobby, but that quickly grew into an artistic career. Cassandra’s work has been featured in various online textile and art publications, as well as in Love Embroidery magazine (September 2021).

Hanging hoop
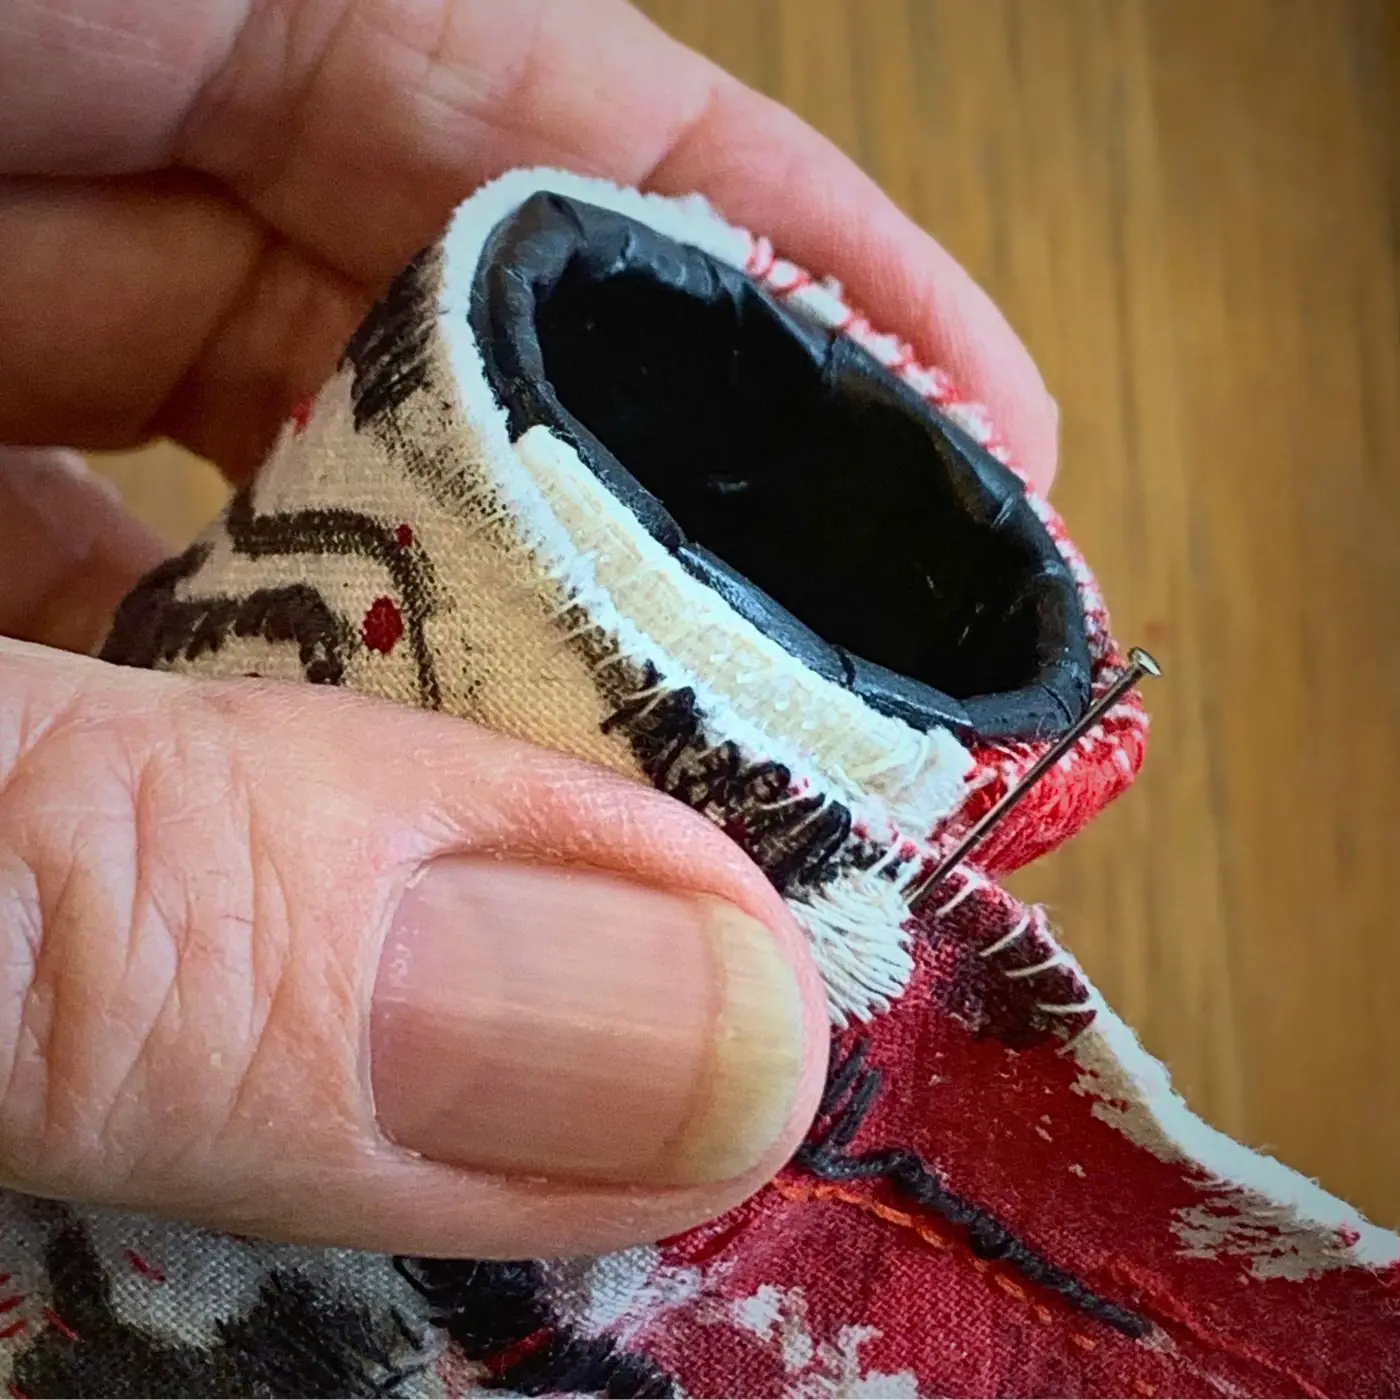
Vinny Stapley: This display technique is especially wonderful for works created with sheer translucent fabrics, as well as opaque fabrics. It gives a nice clean finish that looks lovely from both the front and back.
You’ll need your artwork, an embroidery hoop, scissors and double-sided tape that matches the depth of your hoop. A small butter knife or something with a rounded flat blunt tip is useful to tuck under any excess fabric, and you’ll need some invisible thread or fishing line to hang the hoop.
First, secure your embroidery in the hoop. Tighten the screw, so your work is taut like a drum. I locate the screw fixing at the top of the artwork to make it easy to hang. Trim the excess fabric leaving an allowance of 2cm (¾”). Position the double-sided tape around the inside frame edge, pressing it firmly to the inside hoop edge.
Peel off the paper backing of the double-sided tape, and then carefully stretch and fold the extra fabric to the inside of the hoop onto the sticky tape. Use a flat-edged knife to tuck in any extra material at the base of the inner hoop edge. Attach some invisible thread or fishing line to hang the hoop.
The key to success is making sure your work is tightly secured in the hoop. This will help prevent it from looking loose and baggy.
Vinny Stapley is based on Mersea Island in Essex, UK. She is a member of the group East Anglian Stitch Textiles, which was featured in Embroidery magazine in 2024. Her work was selected for The Broderer’s Exhibition: The Art of Embroidery, 2025.
Sleeve & slat
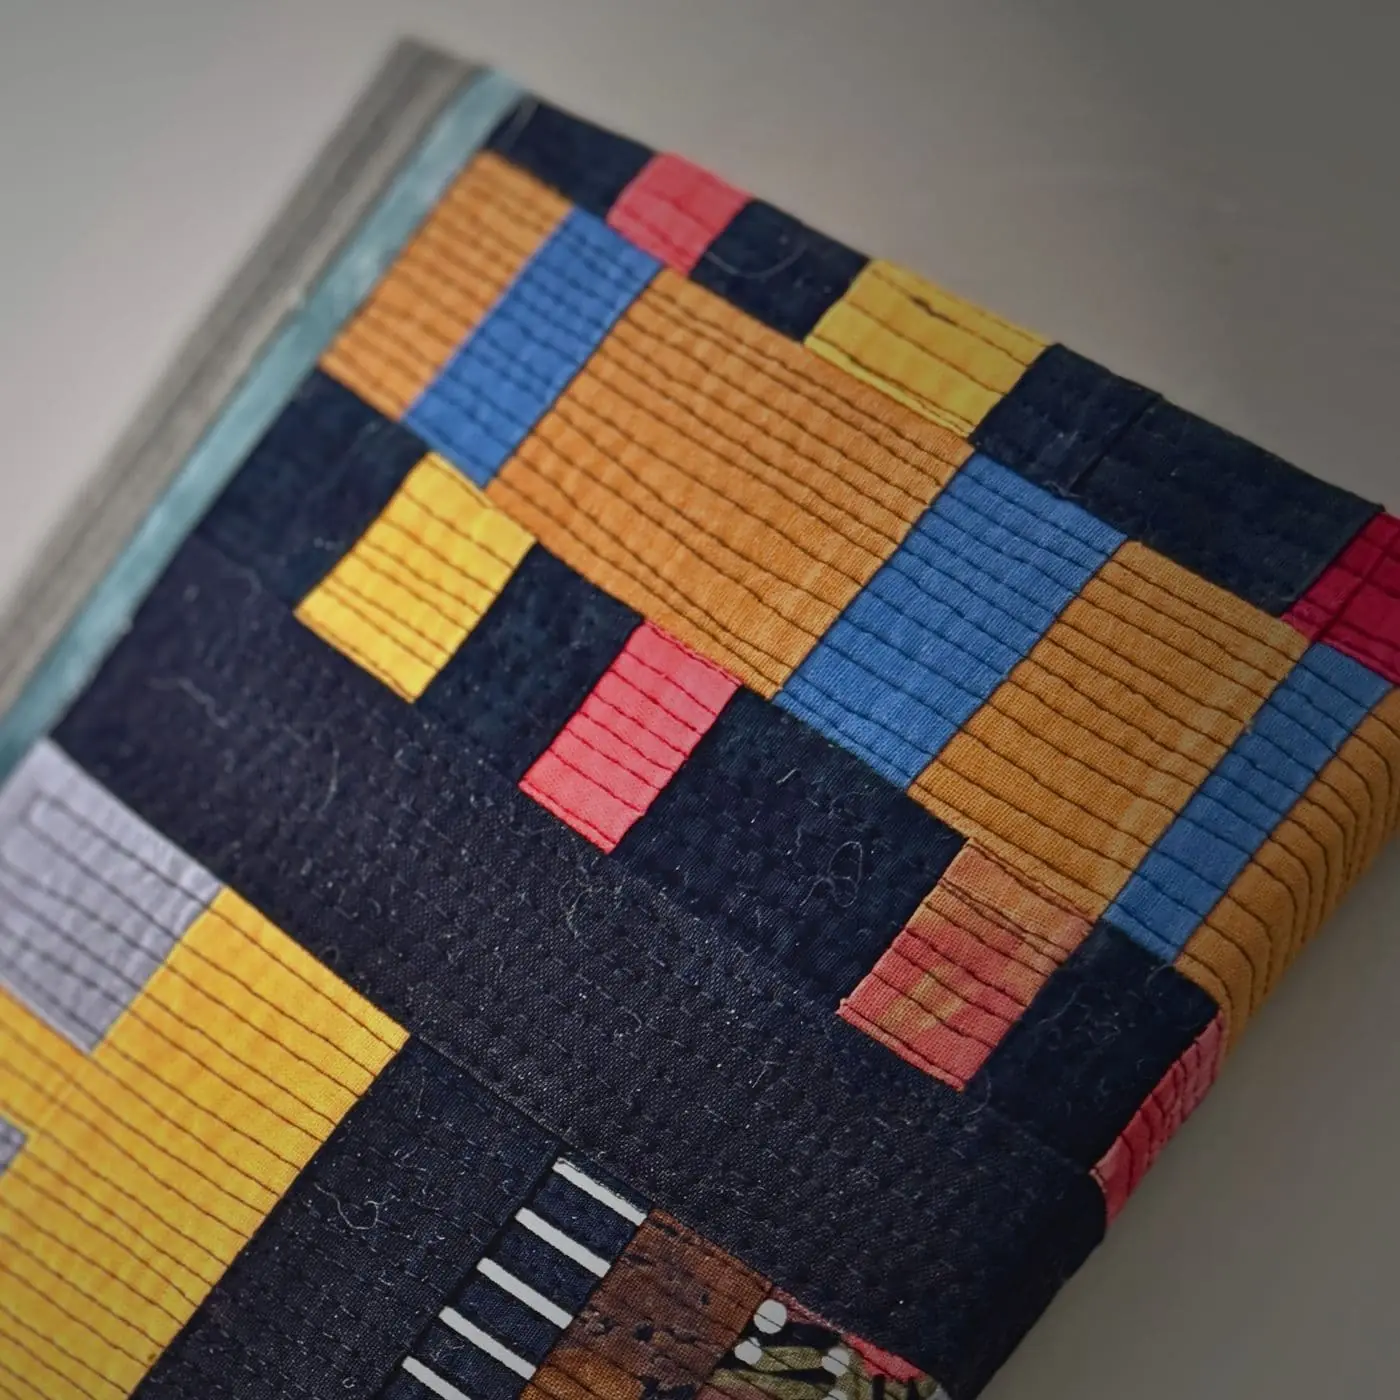
Pat Baum Bishop: The sleeve and slat system is my preferred method for larger art quilts and those that don’t match standard sizes of wrapped canvases. It works great for all sizes of textile art that has more than one layer, including those that have decorative or intentionally unfinished edges.
First, measure and cut a fabric strip that is 10-15cm (4-6″) less than the width of the quilt and about 25-30cm (10-12″) deep. For smaller quilts, you could make your sleeve about 10cm (4″) deep.
To create a sleeve, fold the fabric in half lengthwise and stitch along the long edge. Press this flat and then cut it into two equal sections. Evenly shorten each half section, enough to leave a 15cm (6″) gap in the centre of the artwork. Finish the shortened edges by turning them under by 1cm (½”) and stitching. Pin each sleeve about 1cm (½”) down from the top of the quilt and 2cm (1″) in from the outer edges, then hand stitch into place.
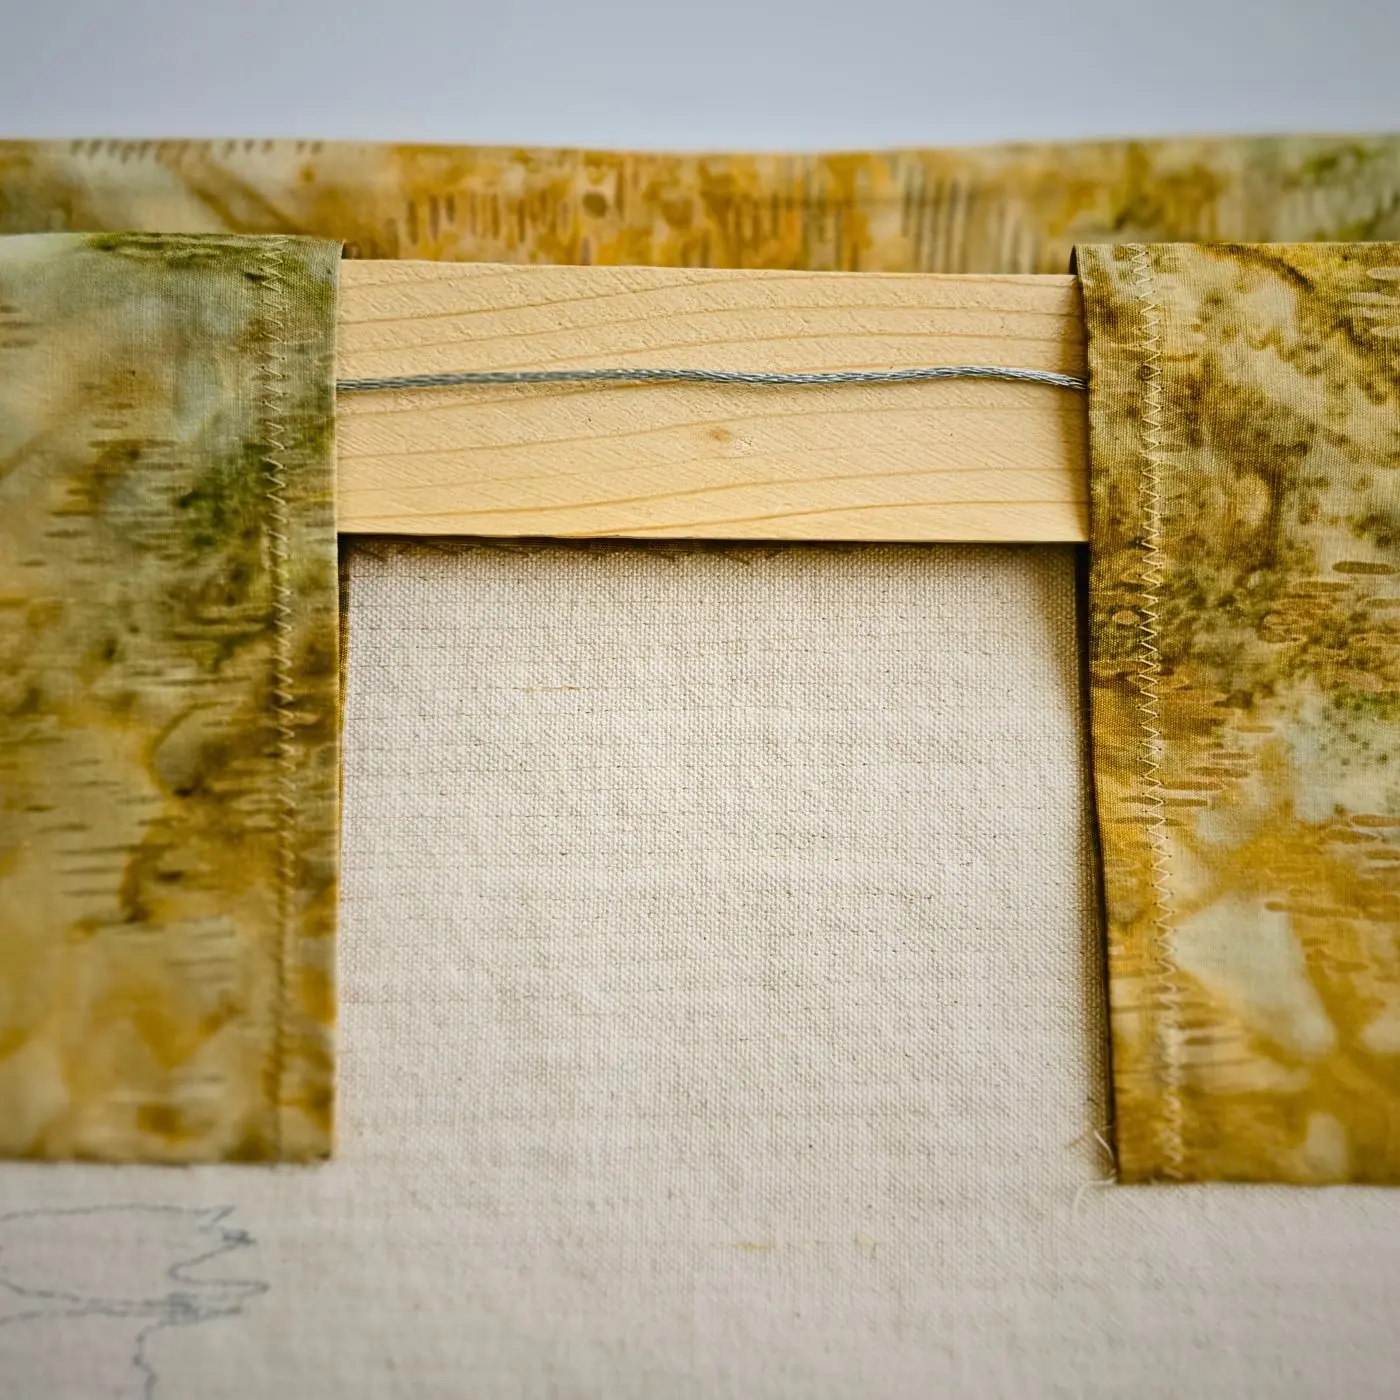
For the insert slats, I use wooden firring strips from a DIY/home improvement store that are 0.64cm x 122cm x 4cm (¼” x 48″ x 1½”). I cut the strip to 2.5cm (1″) less than the width of the finished quilt and sand down the edges.
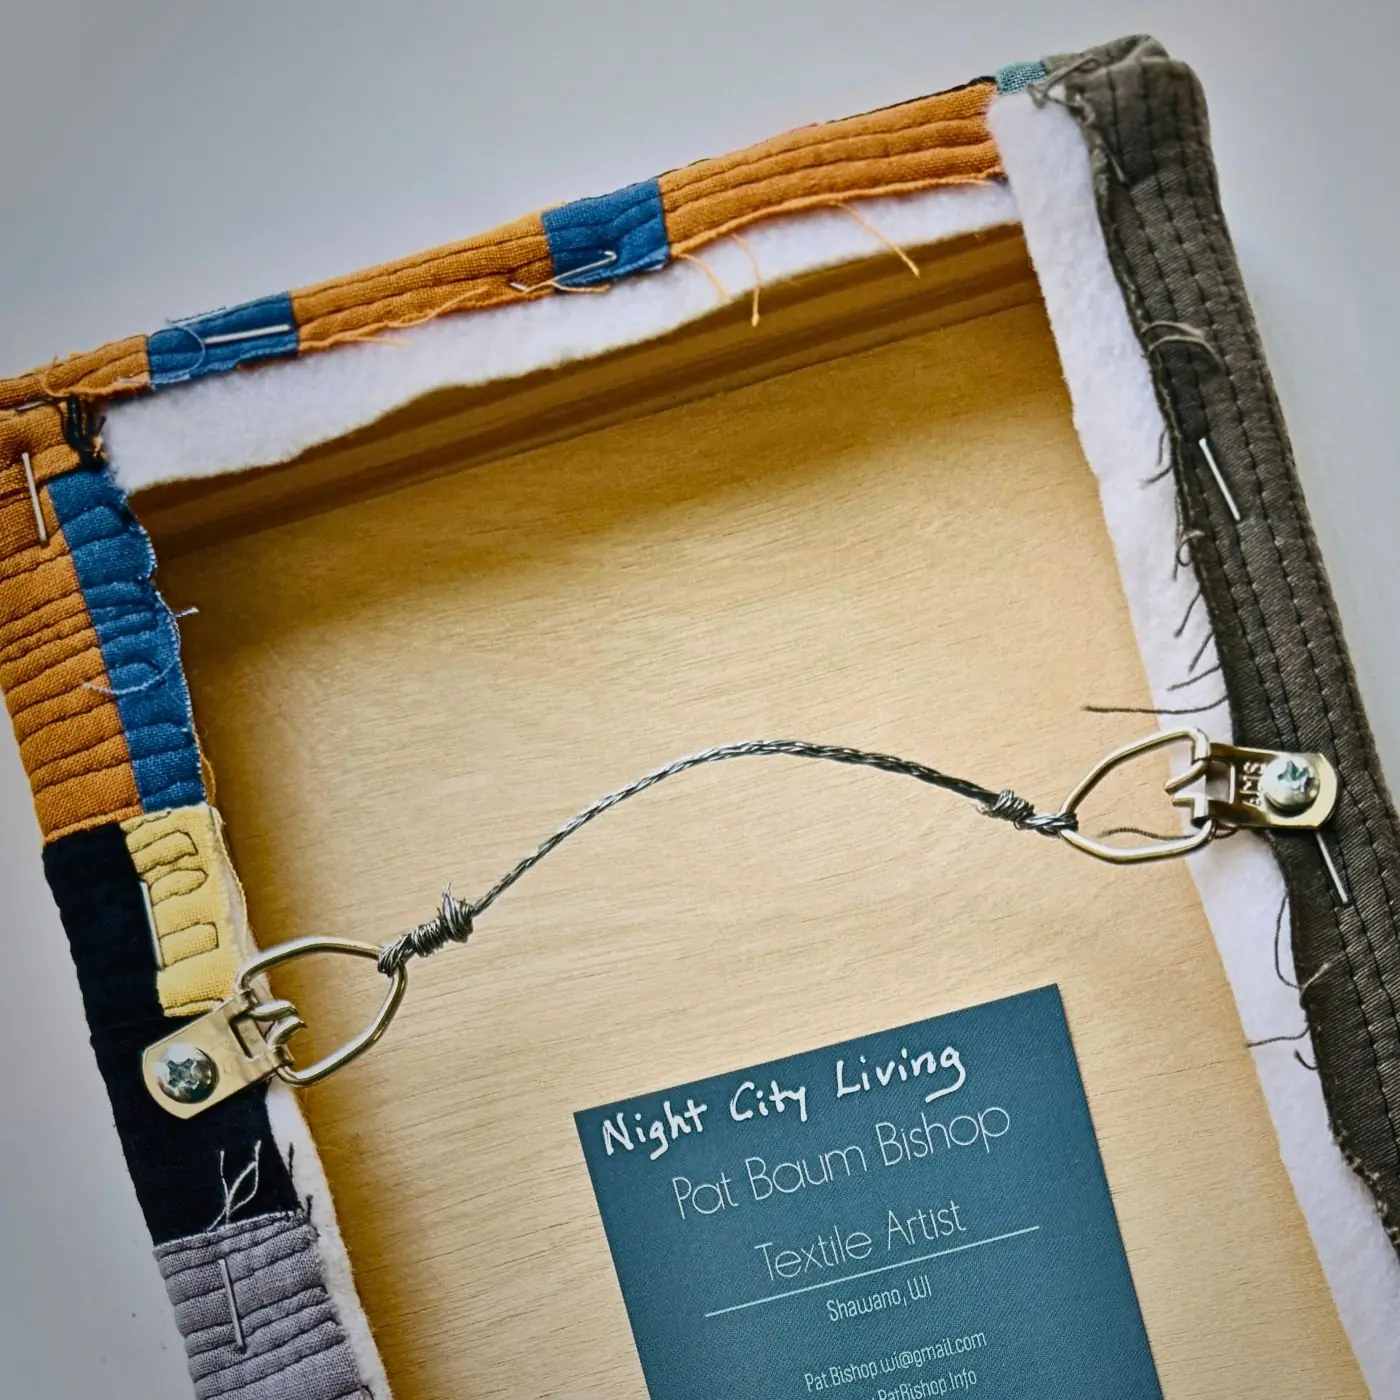
I cut about 30cm (12″) of hanging wire and make a loop at each end. With the wire centred, I staple each of the looped ends to the slat with a household stapler.
Pat Baum Bishop is an artist and teacher based in Wisconsin, USA. She has exhibited across the globe and won numerous awards in fine art venues and prestigious fiber art exhibits. She has also been on the cover of Quilting Arts Magazine and appeared on The Quilt Show in 2024.
Pat Baum Bishop’s alternative option for small textile art quilts uses machine-stitched facings.
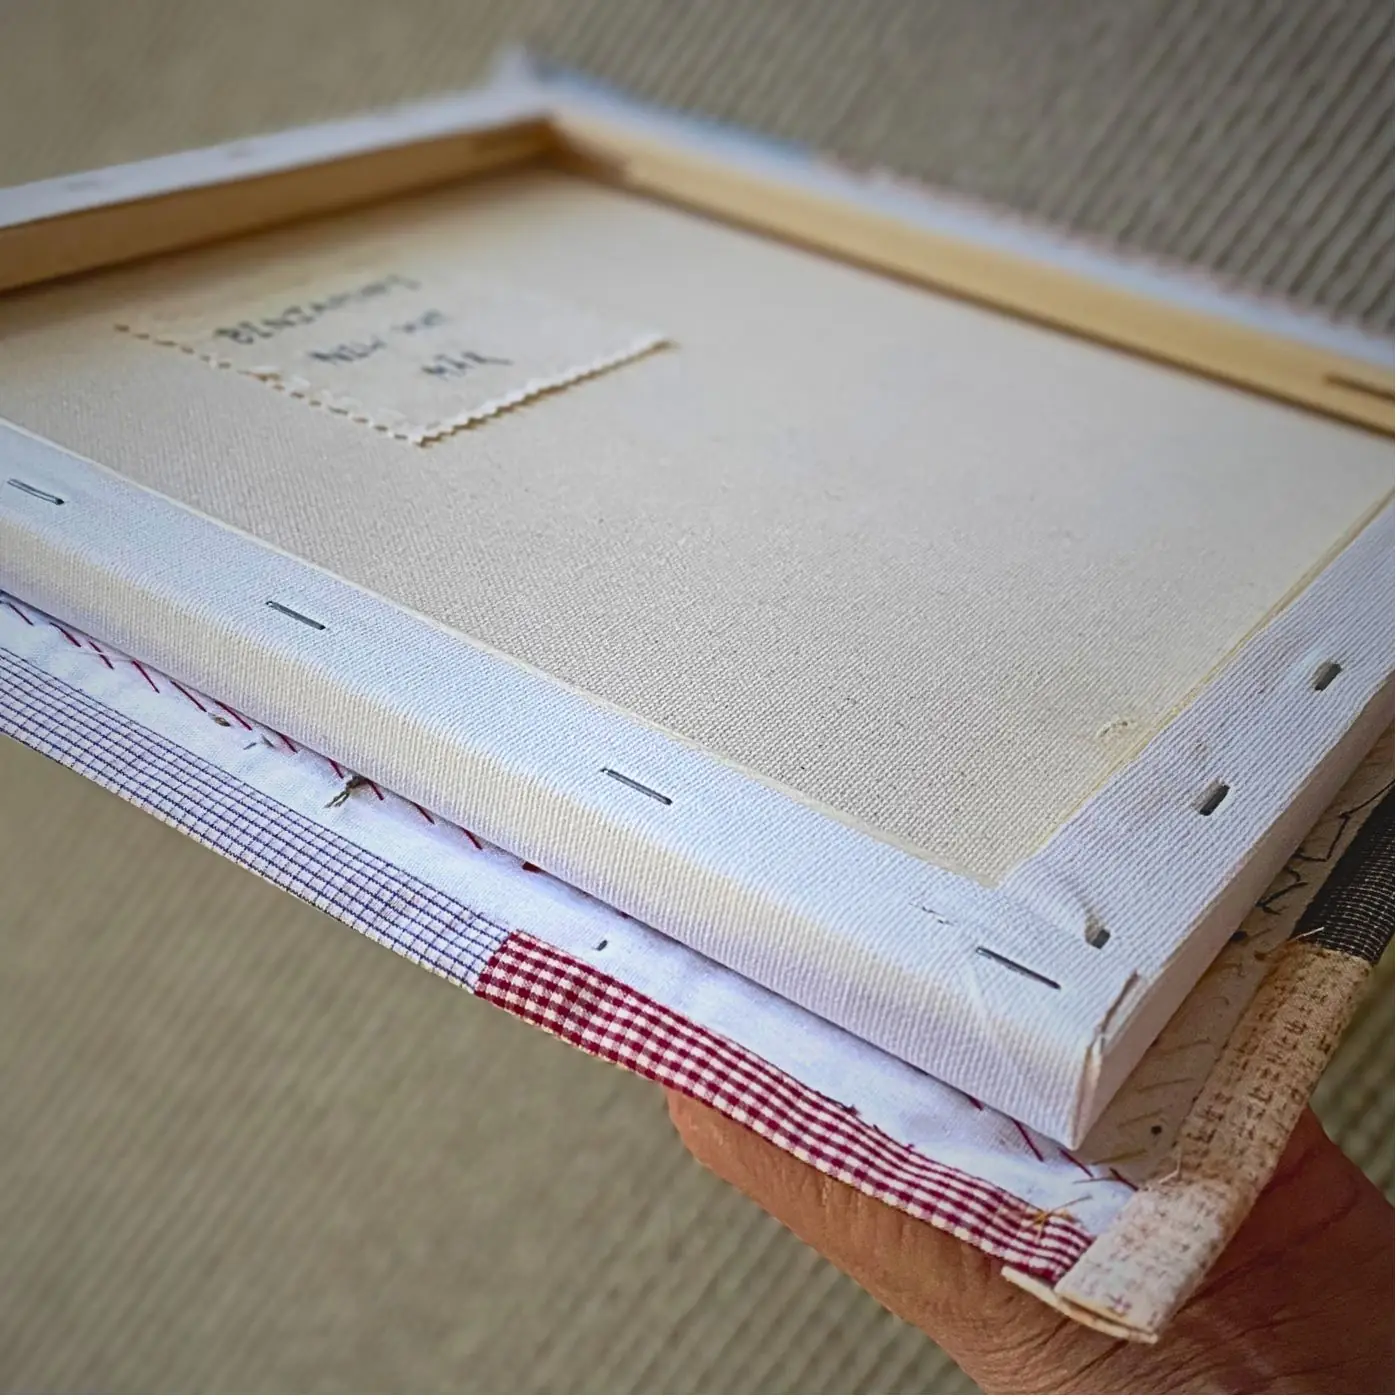
Wrapped canvas
Pat Baum Bishop: The wrapped canvas method can be used for both framed and unframed display. I think this technique gives the artwork more presence, substance and importance. It also prevents the art from sagging or hanging unevenly.
You want to first make sure your textile art overlaps your canvas by at least a 5cm (2″) on all four sides (a larger overlap may be needed for thicker frames).
Lay your quilt face down and then place the frame in the middle. Using a household stapler or staple gun, wrap and staple the art at the top and bottom centres of the back of the frame. Then wrap and staple the left and right centres of the frame. Continue to staple around the frame every 5-8cm (2-3″).
For neat corners, pull each corner of fabric up diagonally toward the centre of the canvas and staple it down. Then tuck and staple each side of the corner. If your artwork is too thick, try trimming excess material to achieve a nice look. You can also tap the corners with a hammer to encourage them to lie flatter.
To hang the work, I attach D-rings a third of the way down from the top on the left and right sides and thread through some picture frame wire.
Pat Baum Bishop, wrapping a canvas
Attached wire hanger
Jo Morphett: This technique is perfect for small to medium sized textile art that doesn’t weigh much. It uses a simple 22- or 24-gauge wire that can be found at hardware or craft stores. Depending on where you place the wire, it can be almost hidden or openly serve as a decorative element.
Start with a length of wire approximately triple the width of your project. To create a triangle, first fold the wire in half without pinching. Then bend each cut end toward each other and overlap to create a triangle shape. Twist the overlapped wire ends around each other to secure, then trim any excess wire.
The base of the triangle, the edge with the twisted ends, should be about 1cm (¼”) shorter on each side than the width of the art. Once the triangle is the size you want, pinch the top of the wire slightly to create an oblong shape at the top.
Folding a perfect wire triangle can be challenging, but don’t worry. Some wonkiness is ok. And if the wire that shows above the top of the art is centred and uniform in shape, it’ll look great.
To attach the wire to the art, centre the wire on the back of the piece, allowing it to show as above the top of the artwork. Holding the wire in place with your non-dominant hand, secure it using a whip stitch with embroidery thread (floss), making sure your stitches don’t appear on the front of the piece.
Once the wire is stitched in place, cover the back of the whole piece with fabric and use a blanket stitch to stitch it all together.
Jo Morphett is based in Northern BC, Canada on the unceded ancestral lands of the Lheidli T’enneh Peoples. She creates video tutorials and provides inspiration for starting or expanding a Slow Stitching practice. Jo also relies upon a low impact, no waste approach by using recycled or deadstock fabrics.

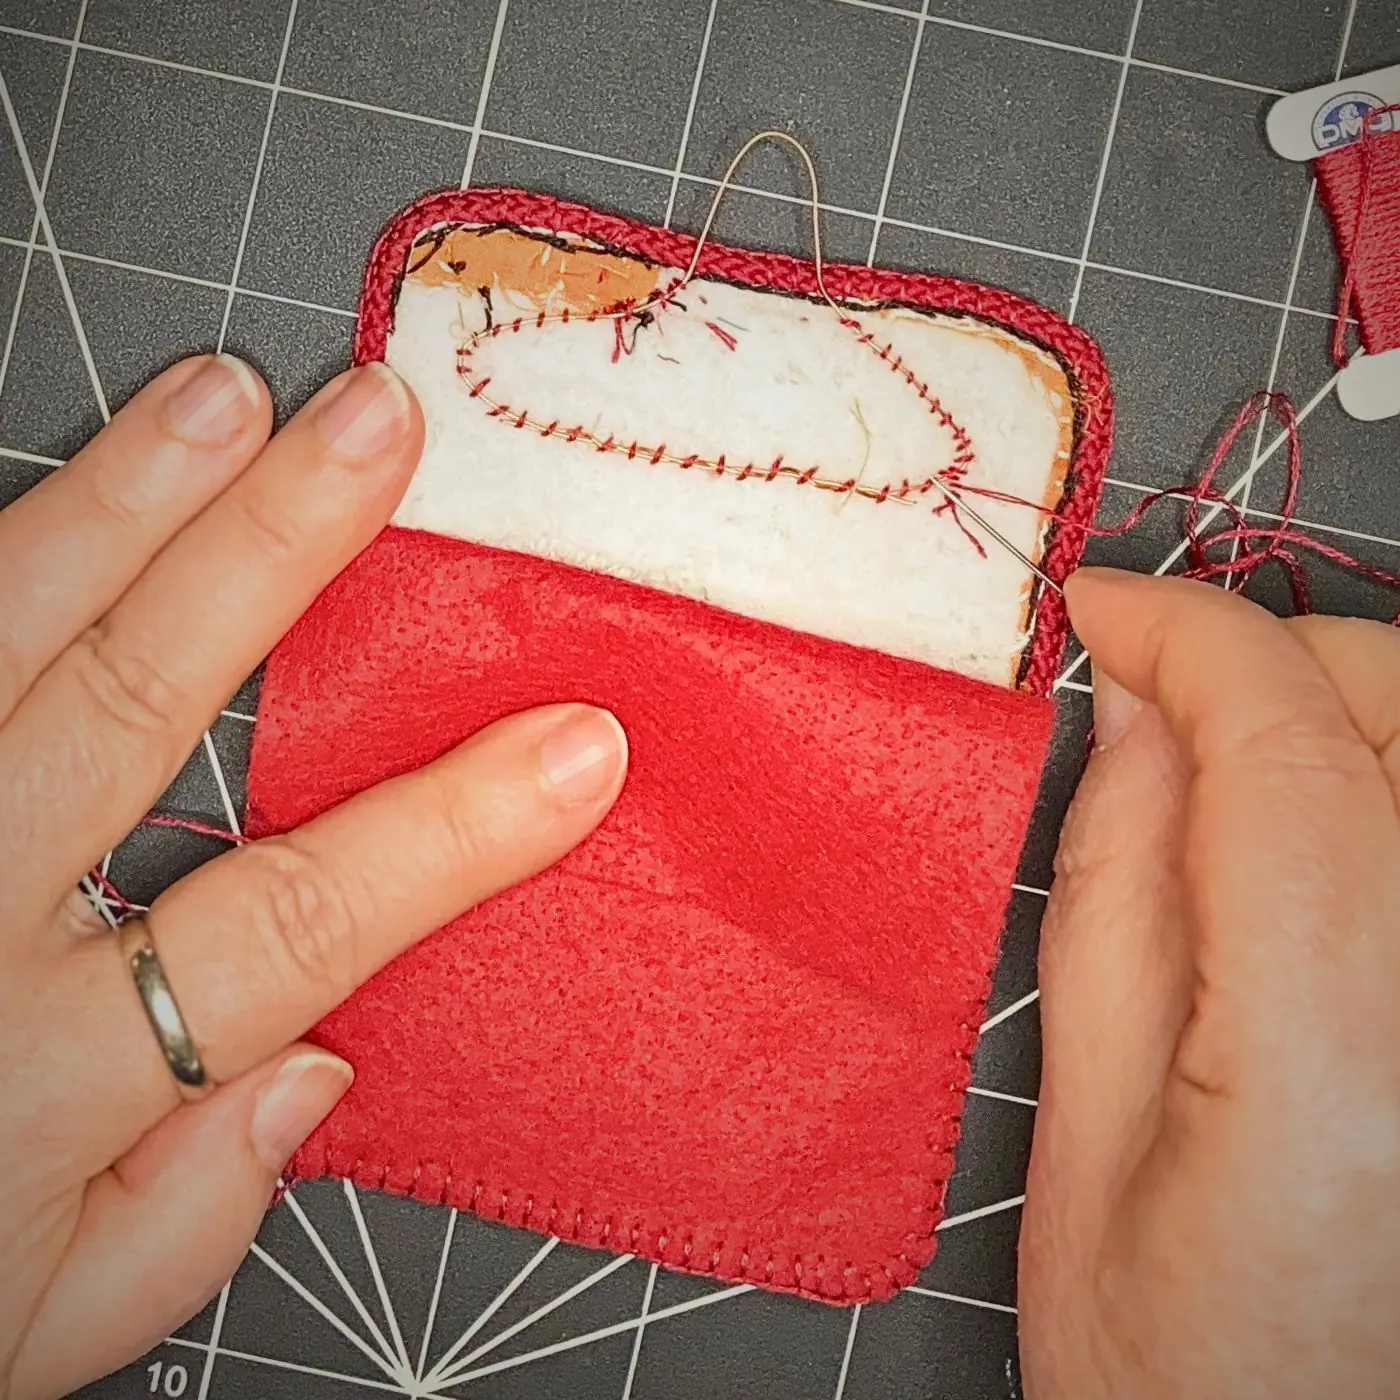
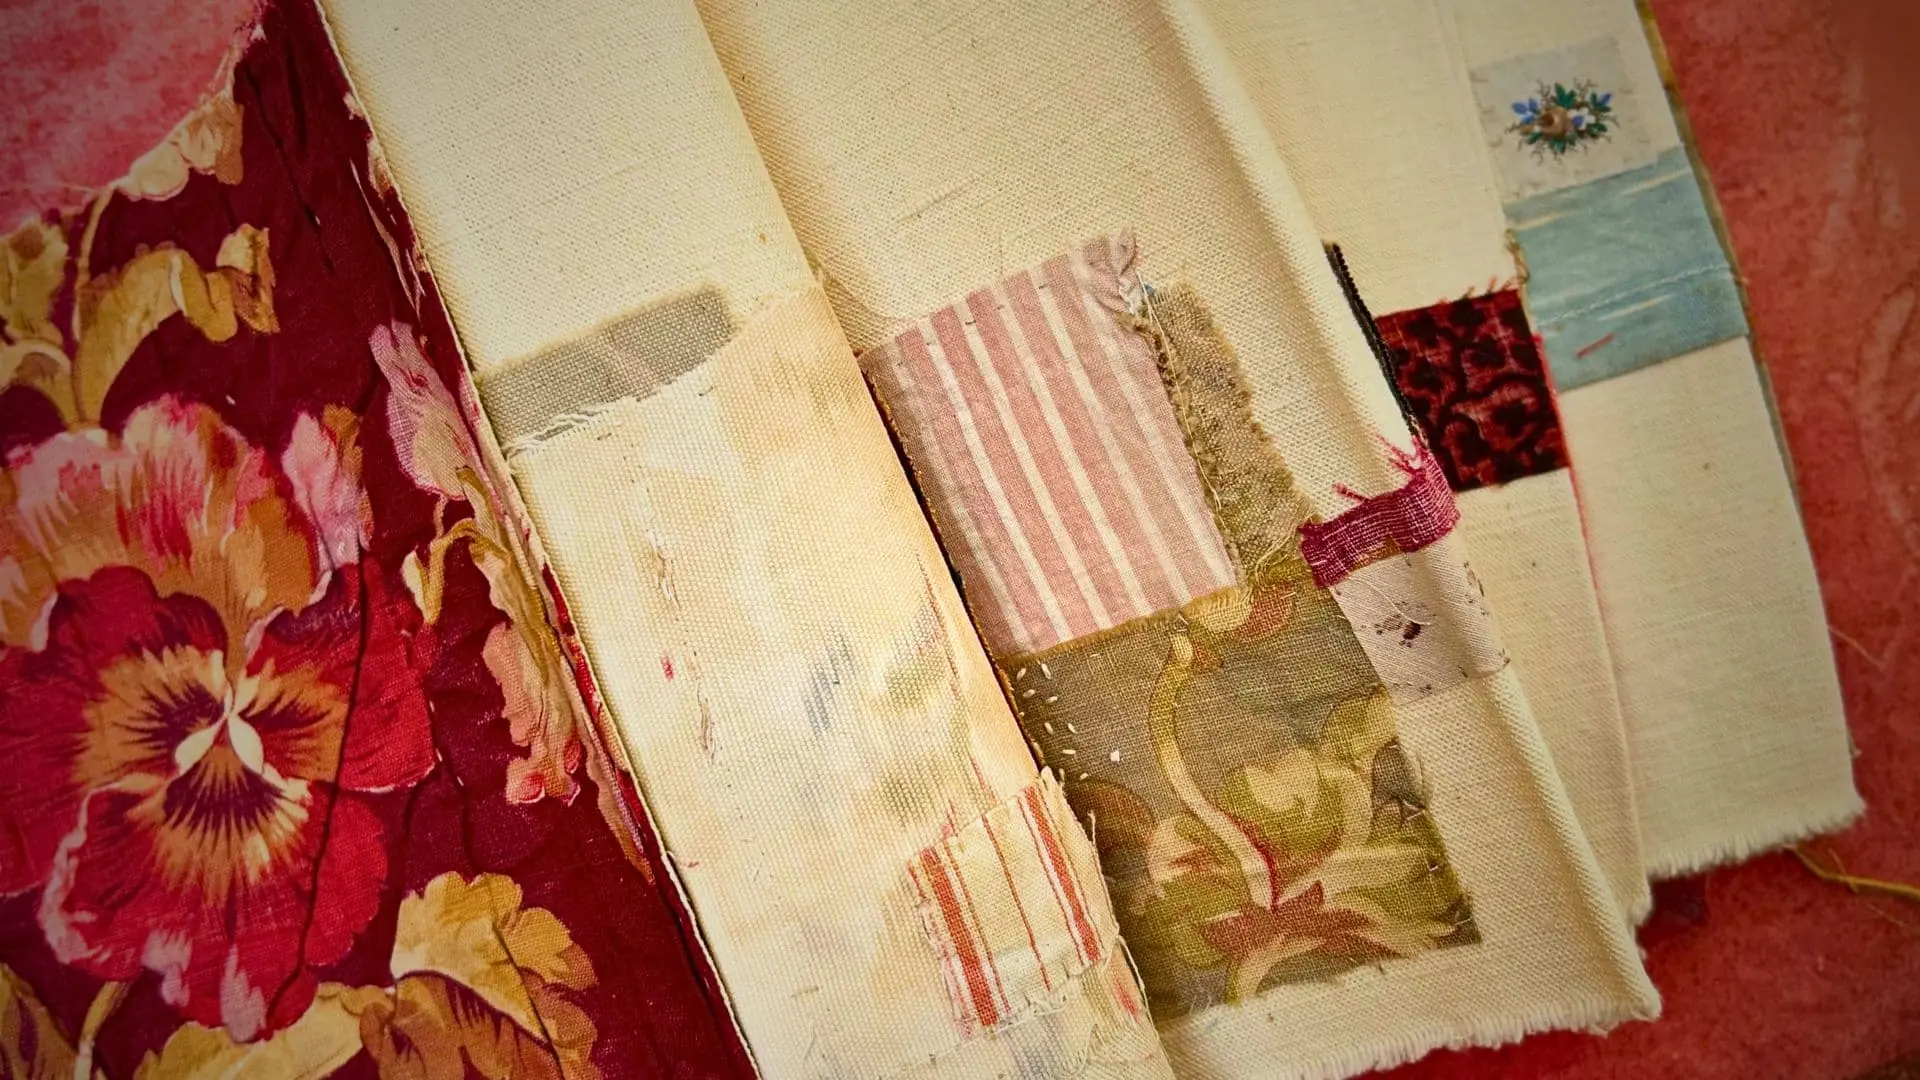
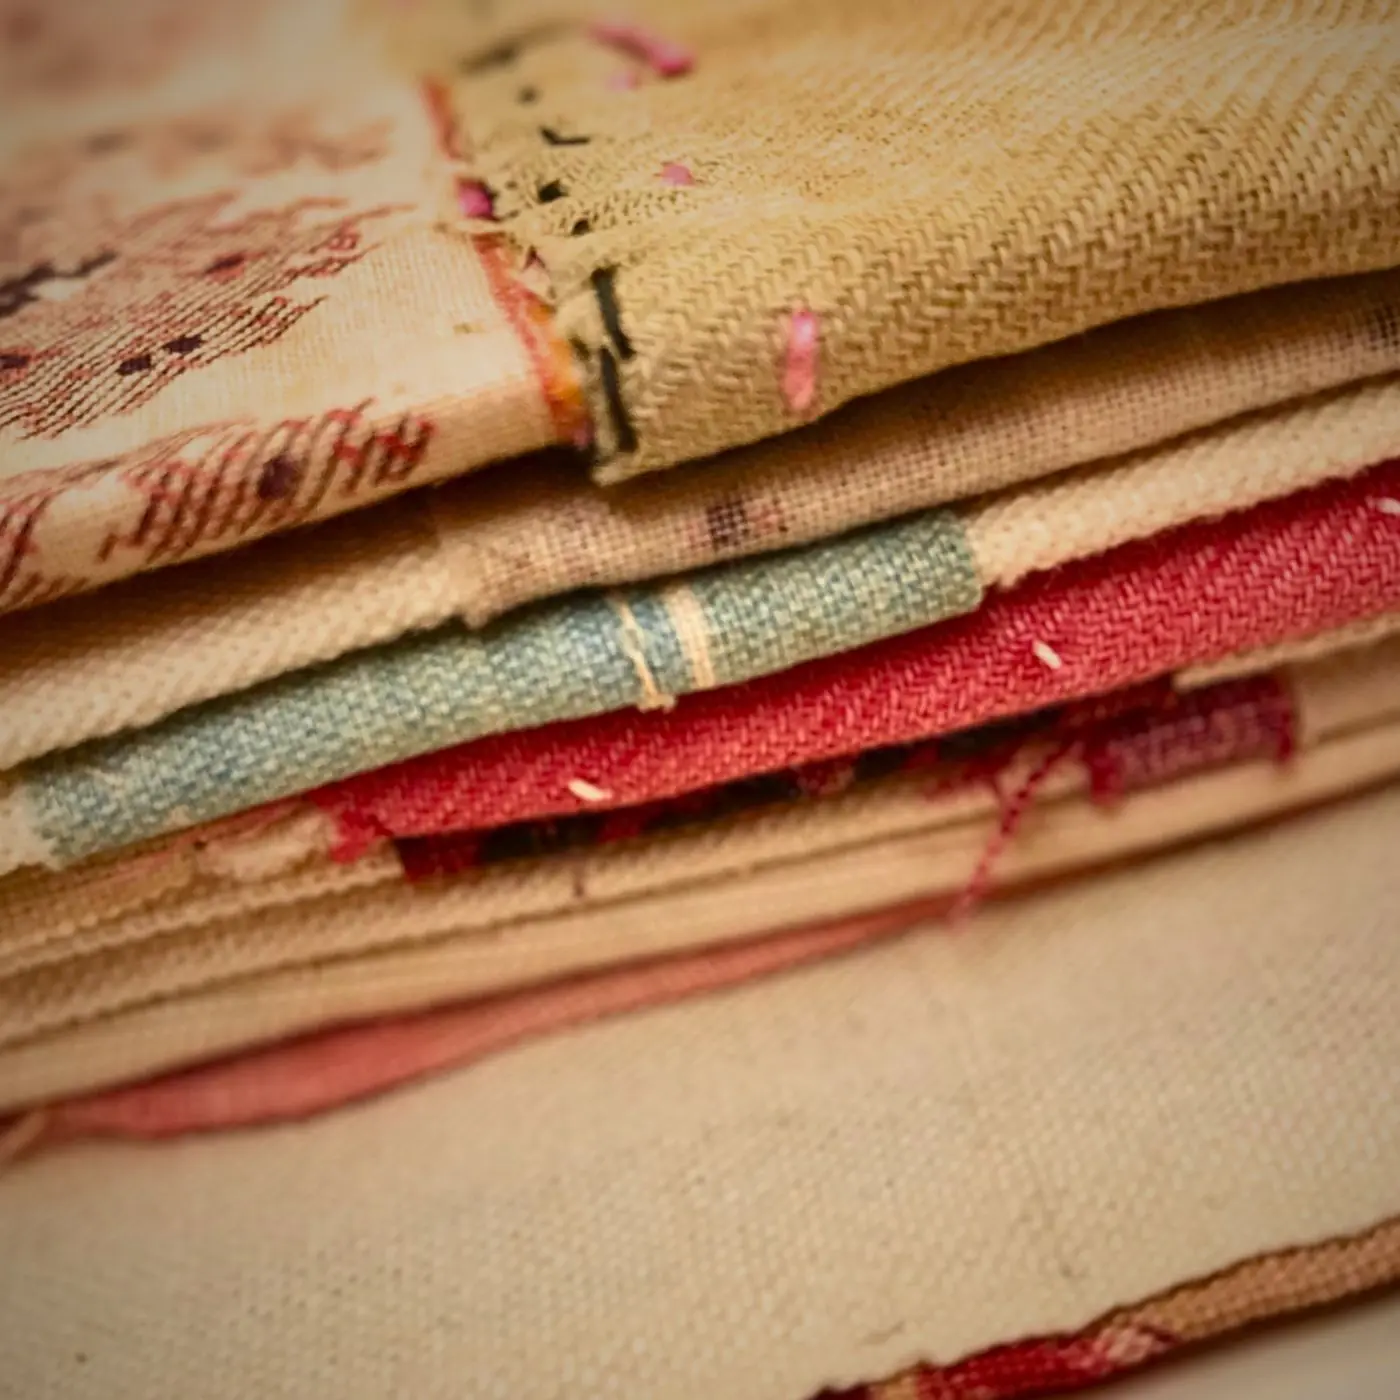
Fabric book with pages
Mandy Pattullo: I enjoy the flexibility of using fabric books. Using buttons for the side binding allows pages to be easily removed or worked on at a later stage. It’s also easy to attach a backing to the pages since they are separate.
I start by pinning all my collage elements onto a linen page and then attach a backing piece of linen using a small overstitch or stab stitch. I use matching thread and very small stitches, so they are almost invisible. It’s important the attaching stitches aren’t really seen.
I then add whatever stitch or other embellishment I want to my page, and once everything is complete, I add another same-sized linen backing piece and attach that with tiny running stitches.
To assemble the book and bind one side with a few buttons, I stack the pages together and make pencil marks on the front where each button will go. I use a strong knotted thread such as cotton perlé to stitch on the buttons.
I bring the needle up from the back of the book, through a button, and then stitch down through the button to the back. If necessary, I stitch through the button a second time.
Mandy Pattullo is based in Northumberland, UK. Her work is based on historical textiles and traditional techniques. She teaches workshops across the globe and is a member of the Textile Study Group.
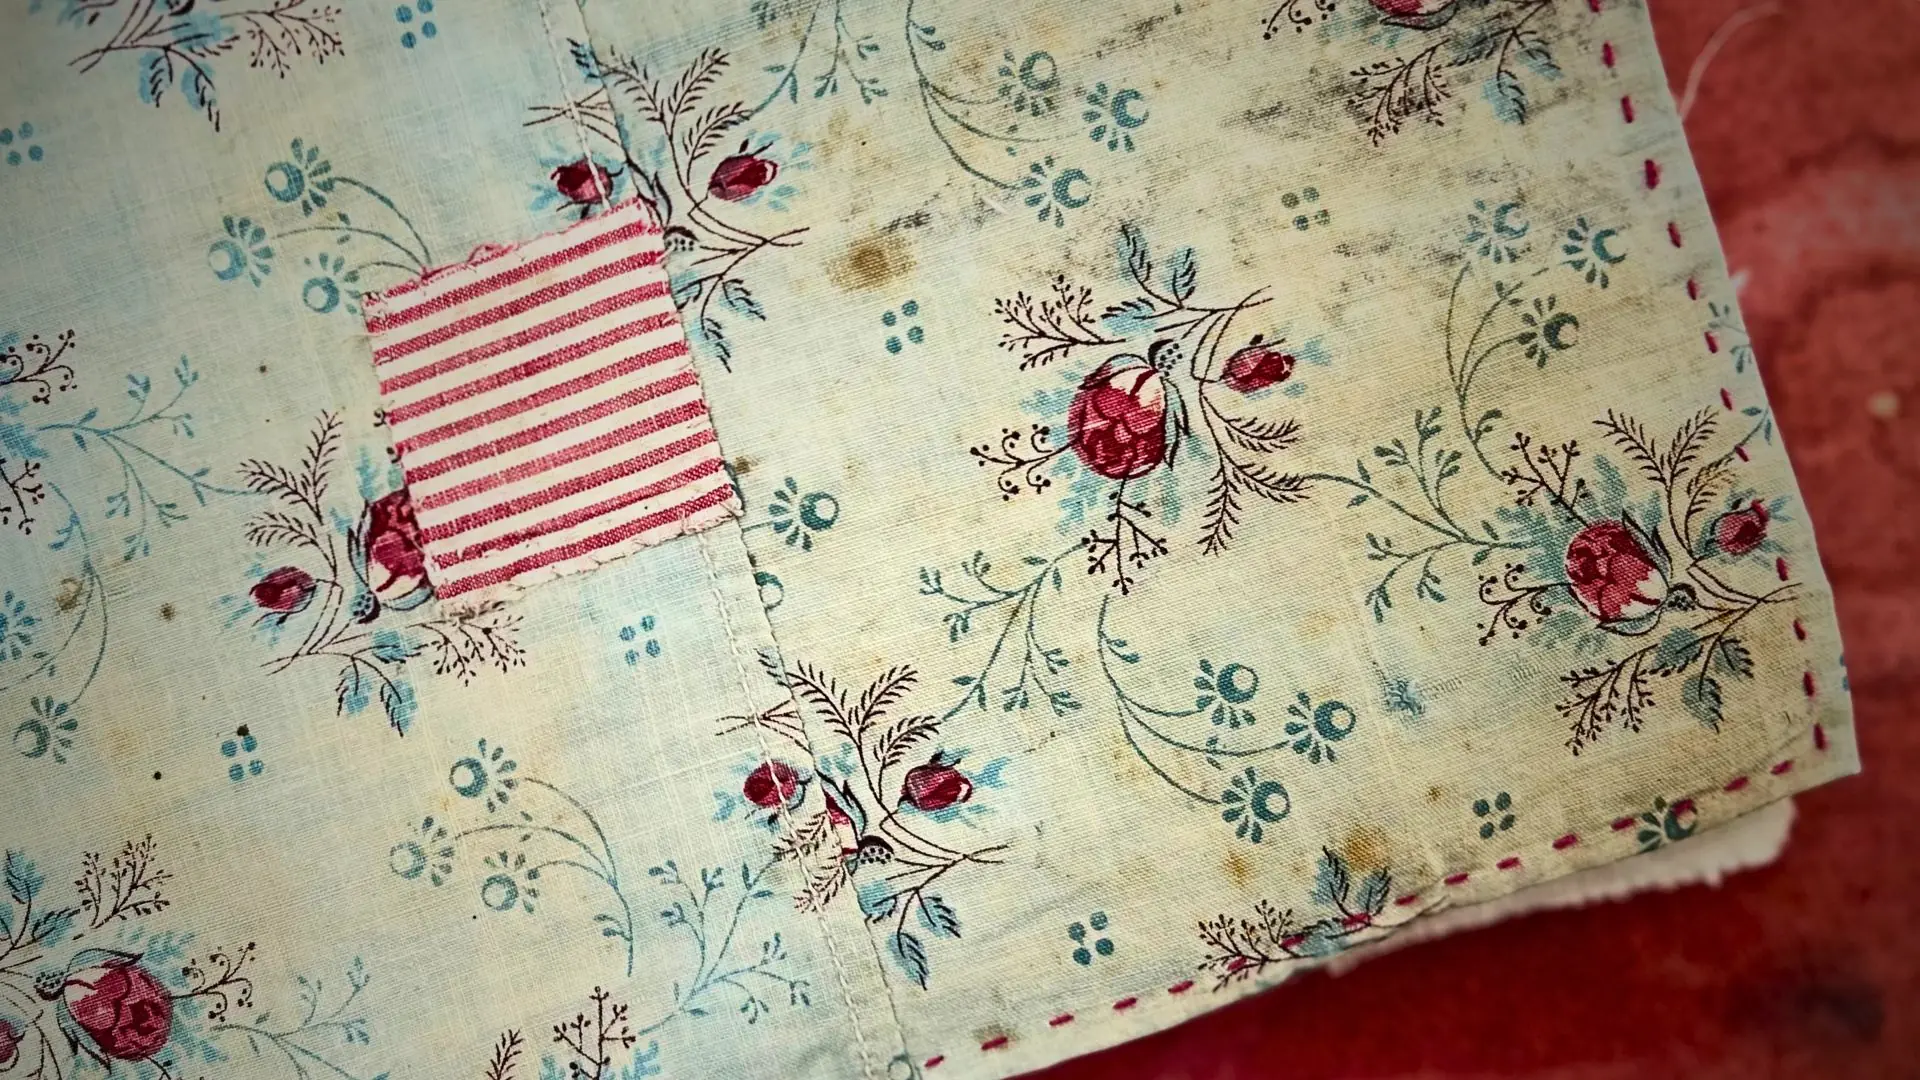
Concertina book
Mandy Pattullo: I like to use metis fabric to make concertina books. It’s a stiff mix of linen and cotton that creates a sharp concertina fold. I assemble my collage elements into colour stories and pin them onto the metis. It’s important to be careful with any elements covering the valley and mountain folds.
I’ll then stitch everything together using ordinary Gütermann sewing thread in a matching colour. I use almost invisible stitches or what some might call a whip stitch.
A challenge with this technique is that the stitches I use to attach the elements are visible on the back of the book. I’ve never found an effective way to put a second concertina on the back to hide those stitches, as doing so makes the book less pliable.
Still, I like how when the book is folded, you can ‘read’ it as double page spreads which can have their own colour story. And then when you pull the whole thing open, it gives yet another viewpoint.
This technique is also an excellent way to present very small scraps of fabric.
Stretch-mounted & framed
Heidi Ingram: I use a traditional damp-stretch method for preparing my heavily stitched work ready for mounting. By presenting my art in a glazed frame it’s protected from dust build-up.
I pin out my composition on an old cork board using lots of drawing pins (thumb tacks) and then lightly spray it with water, while trying to make sure the grain of the background fabric is straight. As I use colourfast fabrics and threads there is no risk of the dye colours bleeding into the fabric during this process. You can also use a staple gun and a piece of plywood for damp-stretching.
When the artwork is dry, I centre it over a piece of acid-free mountboard that’s several centimetres smaller than the background fabric on each side. I insert dressmaker pins into the mountboard core to temporarily fix the artwork in place.
Next, I fold over the fabric at the back, making neat folds at the corners. With long lengths of doubled-up strong thread, I lace up the back. I make long stitches, starting at the centre of each edge then moving towards the corners. I find that a small curved upholstery needle makes this job a bit easier.

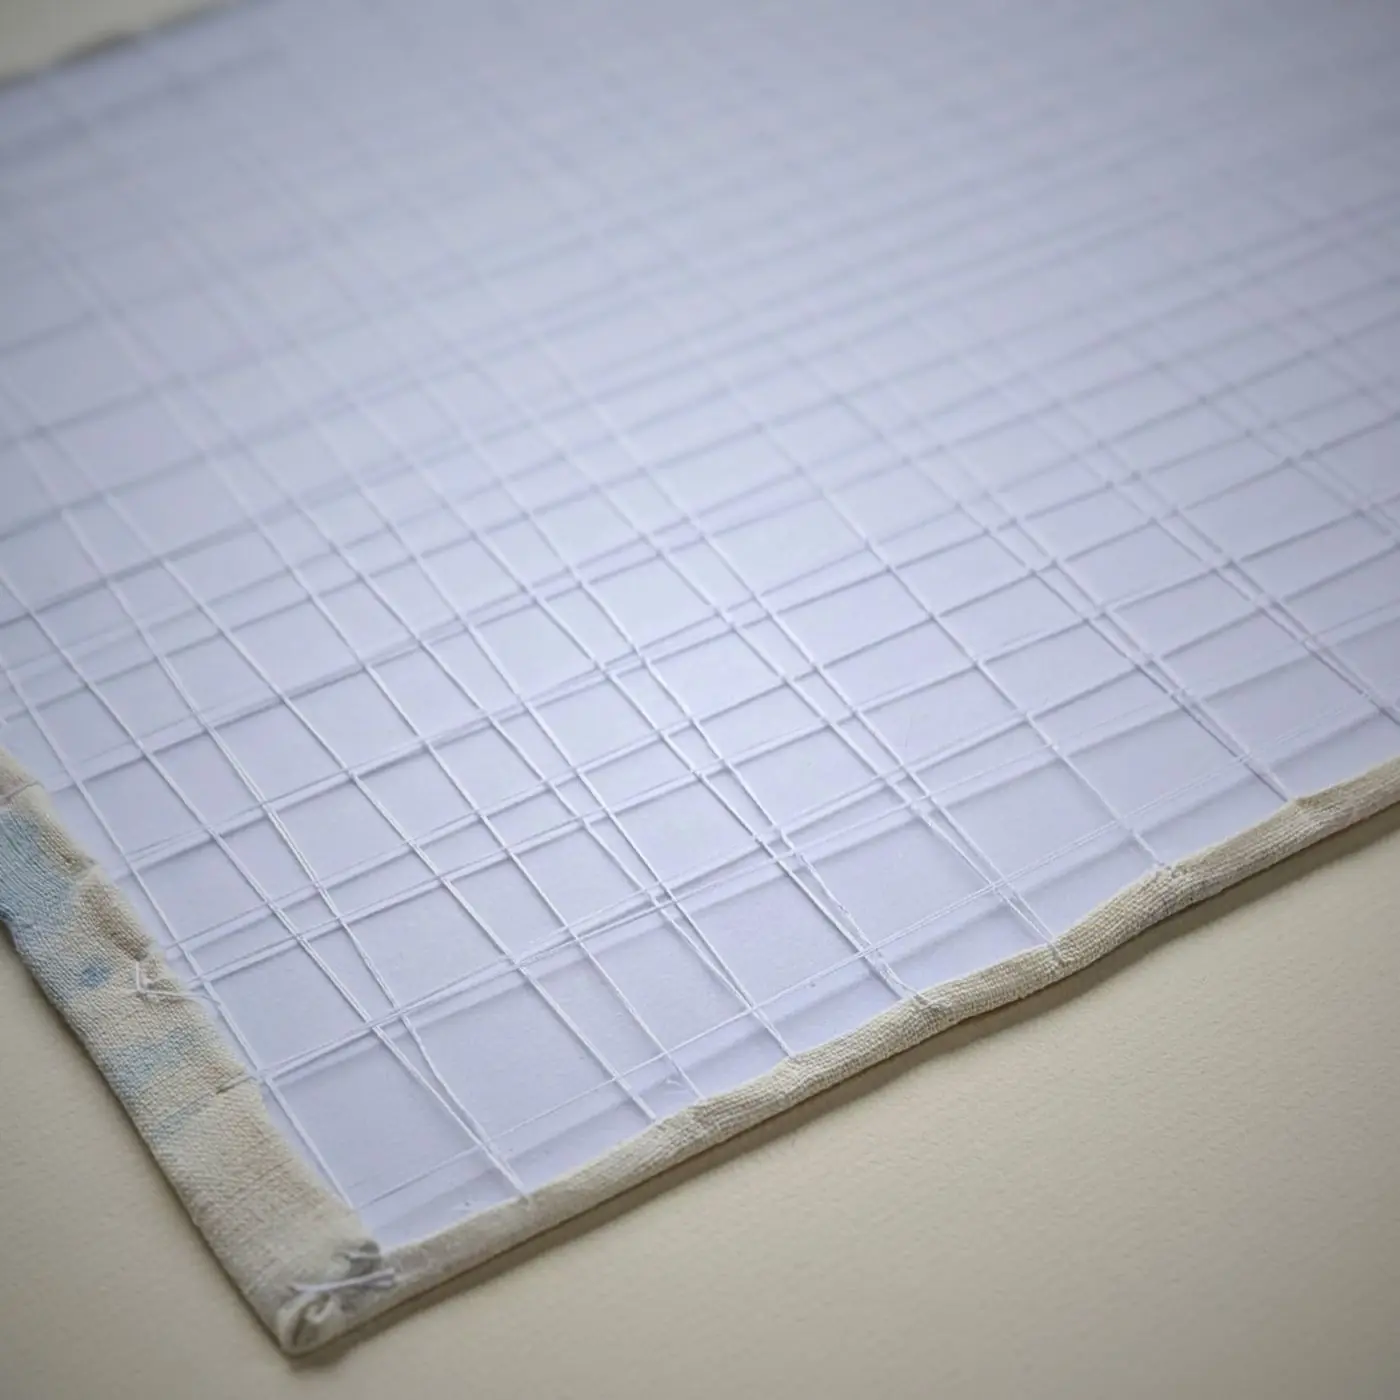
After removing the pins, I use acid-free framer’s tape to attach the work to a window mount. I tend to use a deep box frame for most of my artworks. But for flatter pieces, I can get away with using a standard frame combined with a double-layer mount to make sure the textiles aren’t touching the glass.
Framing services can be expensive so I often order bespoke frames online and then frame the work myself. This also gives me full control on how the artwork is presented. Depending on the destination of the artwork, I use either standard float glass or art glass (either TrueView UltraView or Groglass AR70), which is more expensive but is non-reflective.
Heidi Ingram is based in Scotland and makes hand stitched textile landscapes. She is a member of EDGE Textile Artists Scotland and is the learning and workshop development lead for TextileArtist’s Stitch Club.
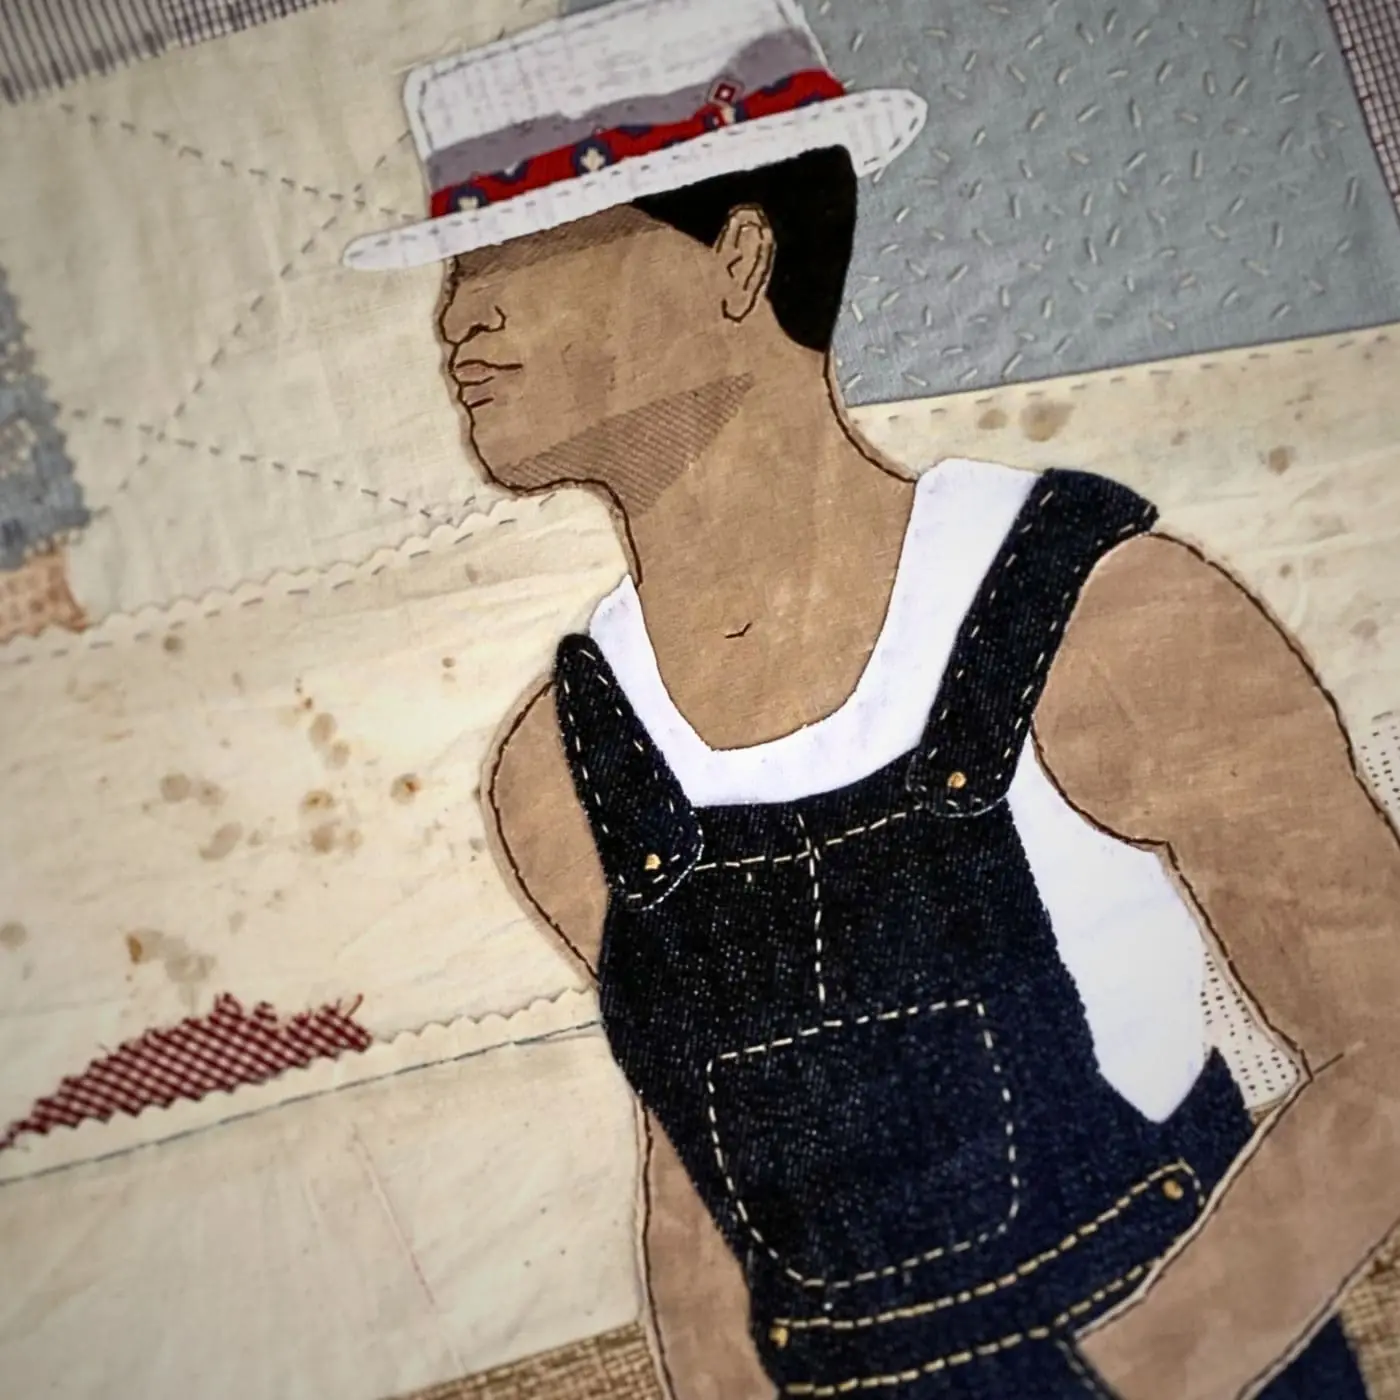
Double-sided tape float
Mary Carson: I always stretch my art because I don’t want faces and body parts puckering. I also want the manipulated fabrics to stand proud on the surface. But for Benjamin’s New Hat, I wanted to surround the work with a fabric binding so it would look like an art quilt when hung.
I didn’t add a fabric backing, so some of my stitchwork can be seen on the back. I was concerned a loose backing fabric would allow the stitched work to ripple and buckle. But seeing the threads on the reverse side doesn’t bother me, as I enjoy seeing the backs of stitched works.
I first thought about tacking the work to the canvas with thread, but I’d need too many stitches to keep it taut. So, I scoured the internet to see if there was a double-sided tape made for textiles, and discovered Stitchery Tape. It’s acid and solvent free, and it works like a charm!
I evenly distributed four full-length horizontal strips of tape across the canvas and then attached the art, working from the top down. I stretched the artwork taut as I laid it across each strip. It held remarkably well and has stayed secure to this day.
The Stitchery Tape product information suggests art can be removed or repositioned without damage. I haven’t tried that, but online reviewers said they did so with success.
In the future, I’m going to consider painting the edges of the canvas. I don’t mind the basic white finish for this piece, but a complementary colour could add to the display effect.
Mary Carson is based in Wisconsin, US. She is a storyteller at heart in both stitch and word, and she enjoys being a writer for TextileArtist.
Another way to display your art is by taking photographs, especially when you share them on social media. Check out these tips for taking professional pictures of your work with your smartphone.
24 comments
manus pricing
This article is incredibly inspiring! The diverse techniques and creative ideas for displaying textile art offer so much practical advice and inspiration for artists and hobbyists alike.
Siân Goff
Thanks for your comment, Manus! We’re so glad that you enjoyed reading the article and found it valuable.
Leigh McCalister
I use frames from charity shops as a starting point and create work where the frame is an integral part of the work
Siân Goff
This is such a great idea. I think lots of people struggle with framing, so this is very useful. Thanks for sharing!
Judy Dyer
I decorate my hand sewn shirts, skirts and dresses and just wear my embroidery art.
Nancy Ugalde
Muchas gracias por las fabulosas ideas, me serán de mucha utilidad!
Siân Goff
De nada. Nos alegra mucho que estas técnicas te resulten útiles en tu trabajo.
Mary
So inspiring! Thank you for this post and all the great information!
Siân Goff
You’re welcome, Mary. I hope you find it useful when framing your work.
Jane Axell
Love this article Mary and Textile Artist. I’m always looking for better ways of mounting my work. Very helpful, thank you.
Siân Goff
Thanks, Jane!
pamela macleod
Thank you … very informative
Siân Goff
You’re welcome, Pamela. Thanks for your comment.
Maria Khatun
Its such a great content. You should get a warm appreciation for this valuable content. Thanks
Textile Mentor
What a great article its always a difficult task to do I appreciate your hard work, keep uploading more, Thank you for sharing
Sumon
Great post! Specially images are awesome.
Tomas Desuja
Awsome inspiring post, I already applied in my life. Thanks to @textileartist.
Tomas Desuja
Excellent inspiring post, I already applied in my real life. Thanks to @textileartist.
Jools x
Brilliant idea, Thank You so much,
veronica aldous
I rip all the canvas off a frame and stretch my piece over the bare stretcher using a staple gun and canvas pliers. That’s if I want to display and sell. I really fold everything up and put it in a bag! I do find the whole ‘making it into a picture thing’ annoying.
I don’t want them to be pictures! I want them to be stroked…My brain is working on this…
Chrissie Cleary
The dilemma of wanting your artwork to be touched and yet feeling the need to confine its innate tactility behind glass in order to appeal to prospective buyers. It is indeed true that many people do not appreciate ‘unprotected’ textile art because of dust issues (which are real.) What to do?
naomi
Great idea!
Janne Koerner
Very helpful!
Thelma
I’m involved with a gallery with a good hanging system for pictures, but it doesn’t work well for textiles. There are plastic wires attached to a rail at the top, and then the picture hangs from hooks which slide up and down the wires. The top of the frame doesn’t rest on the wall but the weight of it makes sure the bottom edge does. A textile which hangs flat to the wall at home hangs away from the wall using this system, which usually means it buckles or twists. It’s very frustrating ! As a cheap strengthener I sometimes use a channel along the bottom with a piece of scrap mountboard in it; that’s enough to stop the bottom corners from drifting in and if it gets bent by accident it’s easy to replace. Recently I’ve been using canvases painted with off-white emulsion and mounting my felt pieces by putting self-adhesive Velcro on the canvas. This has the advantage of not affecting the felt at all and it can be removed and conventionally framed if desired – you do hear people muttering ‘dust-collector’ !